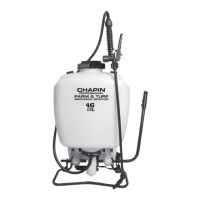
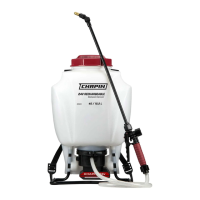
The device is a Chapin Backpack Sprayer, model 60103/60104, designed for professional farm and turf applications, as well as general household and outdoor use. It has a capacity of 4 gallons (15 liters).
Function Description:
The Chapin Backpack Sprayer is a portable, manually operated device used for applying various liquids, including plant food, herbicides, detergents, cleaning solutions, and other non-toxic household cleaning chemicals. It features a pump mechanism to pressurize the liquid within a pressure chamber, which is then dispensed through a nozzle. The sprayer is designed to be worn on the user's back, allowing for mobility and ease of application over larger areas.
Important Technical Specifications:
- Model: 60103/60104
- Capacity: 4 Gallons (15 Liters)
- Nozzle Tip Rating: 0.4 gpm (gallons per minute) at 40 psi (pounds per square inch) – this is the nominal operating pressure.
- Maximum Solution Temperature: Do not exceed 120°F (49°C) for tank solutions.
- Filtration System: 3-stage filtration system:
- Stage 1: Filter basket integrated into the tank opening.
- Stage 2: Removable filter integrated into the pressure chamber.
- Stage 3: Removable filter integrated into the shut-off assembly.
- Pump Type: Piston pump.
- Shut-off Valve: Features lock-off (no-spraying) and lock-on (continuous spraying) positions.
Usage Features:
- Ergonomic Design: Designed as a backpack sprayer for comfortable carrying during use.
- Versatile Applications:
- Plant Food: Can be used with different spray patterns for optimal foliage feeding or fungicide/pesticide application.
- Herbicides: Effective for reducing weeds and unwanted plants.
- General Household Use: Suitable for applying detergents, cleaning solutions, warm water (up to 120°F/49°C), or non-toxic household cleaning chemicals on carpets, floors, walls, glass, countertops, and ceilings. Important: Do not use a sprayer that has been used with herbicides, pesticides, or other toxic chemicals for household applications.
- General Outdoor Use: Can be used for cleaning windows or with detergent for general purpose cleaning.
- Pressure Control: The pump mechanism allows for building pressure within the chamber. Firm, rapid pump strokes are recommended to prime the pump and build pressure.
- Locking Mechanism: The shut-off valve includes a red locking mechanism with three positions:
- Lock-Off Position: Prevents spraying; achieved by pulling up on the handle and moving the red locking mechanism to the lock-off position.
- Lock-On Position: Enables continuous spraying; achieved by pushing down on the handle and moving the red locking mechanism to the lock-on position.
- Neutral Position: Standard operating position for intermittent spraying; achieved by returning the red locking mechanism to the neutral position.
- Filling: Ensure the filter basket is in place before filling. Add the appropriate amount of water and chemical agent (following chemical manufacturer's instructions) to the tank. Stir the mixture with a clean utensil. The tank can be filled with only the necessary amount for each application, not necessarily to full capacity.
- Safety Precautions:
- Always read and follow all instructions before use.
- Do not leave a pressurized sprayer in direct sunlight, as heat can cause pressure build-up and potential explosion.
- Do not store or leave solution in the tank after use.
- Always wear goggles, gloves, long-sleeve shirt, long pants, and full foot protection when spraying.
- Never use any tool to remove the pump if there is pressure in the chamber.
- Never pressurize the sprayer by any means other than the original pump.
- Do not modify the sprayer; replace parts only with manufacturer's original parts.
- Never spray flammable, caustic, acidic, chlorine, bleach, or other corrosive solutions, or heat, pressure, or gas-producing chemicals.
- Always read and follow chemical manufacturer's instructions before using with this sprayer.
Maintenance Features:
- Pre-Use Check: Before each use, check the tightness of the hose nut, hose clamp, nozzle, wand connections, large pump clamp, and the two bolts attaching the pump lever to the pump shaft.
- Cleaning:
- Always empty the sprayer and clean the tank thoroughly after each use.
- Pump the sprayer handle until all contents and air exit through the nozzle (minimum of 30 strokes).
- Fill the tank halfway with water and pump it out as described above (repeat several times as necessary).
- If spray distribution is inadequate, the nozzle may be clogged; remove and clean it.
- Soap can be added to the water to clean the tank.
- Do not use strong cleaning agents or abrasives.
- If using a chemical agent for cleaning, follow the manufacturer's recommendations for waste water disposal.
- Follow chemical manufacturers' instructions for cleanup.
- Powder-Based Chemicals: When using powder-based chemicals (mixed with liquids), ensure they are thoroughly dissolved in the liquid solution. Thoroughly clean and flush the sprayer with water to extend the life of its parts, as these chemicals can be abrasive.
- Pressure Drop Maintenance: If a rapid drop in pressure occurs, drain the sprayer completely and pump the handle with an empty tank. This will allow the pressure chamber to fill with the required volume of air to repressurize. Perform this procedure periodically as routine maintenance.
- Storage:
- Store the sprayer out of direct sunlight in a cool, dry place.
- Before freezing weather, ensure all liquid is drained from the tank, pump, pressure cylinder, hose, shut-off valve, tube, and nozzle to prevent liquid expansion and component cracking. Lock the shut-off valve in the "open" position.
- Parts Replacement: If repairs are needed, contact the nearest dealer and insist on original manufacturer replacement parts.
- Regular Inspection: Regularly inspect the hose, wand, pump, tank, and shut-off valve for signs of wear, damage, or leaks, and repair problems promptly.
Disassembly and Repair (General Steps):
The manual provides detailed instructions for disassembling and repairing various components, including:
- Nozzle Assembly: Unscrewing the nozzle cap, removing the nozzle body, and cleaning the components.
- Wand Assembly: Ensuring the o-ring is installed and tightening the retaining nut.
- Pump Handle Installation: Attaching the pump handle to the pump shaft using an R-clip and aligning holes.
- Piston Pump Disassembly and Repair:
- Remove the cotter pin and pump handle.
- Loosen the hose clamp and remove the sprayer hose.
- Remove the nut and bolt from the protective cap.
- Rotate the pump shaft to access and remove lever bolts using an allen wrench.
- Pull the piston assembly out of the piston cylinder.
- Remove the piston cylinder assembly by turning it counter-clockwise.
- Check for scratches on the piston cylinder and piston; replace if scratched.
- Replace the collar by pushing it off the crown of the piston.
- Remove and replace valve plates and o-rings on the piston cylinder using a Phillipshead screwdriver. Ensure o-rings are correctly positioned.
- Grease the o-rings on the piston cylinder (avoiding valve plate) and screw the piston assembly into the pressure cylinder base clockwise until tight and the bottom o-ring is no longer visible. Align the tab on the piston cylinder with the rib on the pressure cylinder base.
- Apply petroleum jelly to the inside of the piston cylinder wall and collar, then reinstall the piston assembly.
- Insert the piston at an angle, placing the leading edge of the collar over the slot in the piston cylinder. Bolt the piston assembly to the pump shaft.
- Replace the protective dust cap, tighten the nut and bolt, reinstall the pump handle, replace the hose, and secure the hose clamp.
- Pump Assembly Disassembly and Repair:
- Release pressure and remove all liquid.
- Remove the hose.
- Remove the two bolts attaching the pivot lever to the pump shaft and remove the piston assembly.
- Remove the large clamp holding the pressure chamber and tank.
- Rock the pressure chamber back and forth and push down to free it from the tank.
- Maneuver the entire pump assembly through the base frame.
- The pressure chamber o-ring can be replaced; do not stretch it over the bottom flange. Assemble it over the top of the chamber. Apply petroleum jelly before reinstalling the pump assembly into the tank.
- Reassemble in reverse order, noting the notch/tab combination for alignment.
- Shut-Off Valve Disassembly and Repair:
- Remove the retaining pin by pushing down on its notched end on a hard surface.
- Slide the handle off the valve.
- Remove the retaining nut (with attached o-ring), spring, and valve stem.
- Replace worn parts. Lubricate o-rings and reassemble in reverse.
- Place the handle groove in the slotted area of the valve stem and ensure the locking clip is in the neutral position.
- Insert the retaining pin. Press the handle down a few times to distribute lubricant.
- Check the filter at the end of the shut-off valve for debris; remove and flush with water to clean.
Replacement parts are available and listed with part numbers, including filter basket & cap, shut-off assembly, pump piston assembly, wand assembly, piston pump repair kit, straps, and o-ring kit.