48
GLASS FEEDING BOTTLE
STANDARD
LARGE NECK
FEEDING
BOTTLE
CAPACITY
/FILLING
ABOUT 60
ML*/2 OZ
20 ml 100 ml 100 ml 100 ml / / / /
ABOUT 150
ml/5 oz
40 ml 140 ml 210 ml 210 ml / / / /
ABOUT 250
ML/9 OZ
80 ml 160 ml 210 ml 210 ml / / / /
STANDARD
SMALL NECK
FEEDING
BOTTLE
CAPACITY
/FILLING
ABOUT 60
ML*/2 OZ
20 ml 100 ml 100 ml 100 ml / / / /
ABOUT
150 ml/5 OZ
40 ml 140 ml 150 ml 150 ml / / / /
ABOUT 250
ML/9 OZ
80 ml 160 ml 210 ml 210 ml / / / /
MILK COLLEC
TION BAG
CAPACITY
/FILLING
ABOUT 60
ML/2 OZ
/ / / 100 ml 200 ml / / /
ABOUT 150
ML/5 OZ
/ / / 100 ml 200 ml / / /
ABOUT 250
ML/9 OZ
/ / / 200 ml 200 ml / / /
BABY FOOD
JAR
ABOUT 80G
/ / / / / 150 ml 150 ml 150 ml
*60 ml of food in a 150 ml capacity feeding bottle
NOTE:
Information about the amount of water necessary for heating, provided above, refers to
the Chicco lines of feeding bottles and 80 ml jars. The same quantity of water may be used
for other brands of feeding bottles and jars of different capacities but be sure to check the
temperature
of the food at the end of the heating cycle (max 37° C).
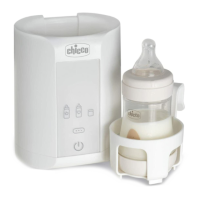
3. Slowly lower into the central body (a) the baby food jar/feeding bottle support (b) and the:
• FEEDING BOTTLE: with the ring and teat properly mounted on the bottle, without adding the
little cup.
• BABY FOOD JAR: without the lid or any labels.
WARNING
Milk collection bags and jars must be placed on the baby food jar/feeding bottle holder (b) before
they are lowered into the central body (a). This helps provide a better grip and avoids burns.
Make sure that the heating water does not spill from the top of the device and that it does not
reach the mouth of small feeding bottles or jars.
If water spills out of the central body (a) after the feeding bottle has been inserted, immediately dry
the external area and base of the bottle warmer and the power cable and plug with a dry cloth and
remove the excess water from the tank.
4. Insert the plug in the power socket: an audible signal will be heard.
5. Switch on the interface by touching the on/off touch button/icon (e): an audible signal will be
heard, the on/off button/icon (e) will turn on an blink with a blue light, the heating mode but-
tons/icons (f) and the sterilisation function button/icon (l) will turn on and blink with a whit
e
light indicating the product is ready to be programmed.
NOTE:
If the device is left unused with no cycle selected for three minutes it will emit an audible
signal and switch off automatically.
NOTE:
The product will store the most recent heating cycle selection in its memory. To quickly ac-
tivate the stored cycle, press the on/off touch button (e): an audible signal will be heard, the
interface will switch on with a fixed white light showing the icons for the given cycle, the
 Loading...