13
hazard. To avoid all risks of strangulation,
OFWFS HJWF DIJMESFO PCKFDUT XJUI DPSET PS
strings attached, or leave them within their
reach.
r1SPMPOHFEFYQPTVSFUPEJSFDUTVOMJHIUDBO
cause the colours of the fabric to fade.
After a prolonged exposure of the product
to high temperatures, wait a few minutes
prior to putting your child in it.
r"MMDPNQPOFOUTNVTUCFEVMZFOHBHFEBMTP
make sure that there are no open zippers
or buttons, as body parts or clothing of the
child make get caught (stings, necklaces,
pacier chains, etc.), causing a hazard of
strangling.
r,FFQUIFQSPEVDUPVUPGSFBDIPGDIJMESFO
when it is not in use.
COMPONENTS
A. Leg rest with wheels
")FJHIUBEKVTUNFOUCVUUPO
A2. Rocking slide
A3. Height indicator
A4. Foot rotation release button
A5. Articulated feet
A6. Wheels with brakes
A7. Slide deactivation button
A8. Cross slots
B. Upper structure
B1. Fixed structure
B2. Mobile structure
B3. Foot hook
B4. Side tilting handle
B5. Fabric attachment buttons
C. Central support structure
C1. Fastening pin
C2. Fabric lining attachment buttons
C3. Grey fastening buckles
D. Fastening straps
D1. Red fastening buckles
E. Fabric lining
E1. Strap with clip
E2. Pocket
E3. Fabric removal zipper
E4. Net windows
E5. Rigid tabs for fastening the fabric lining to the upper
structure
F. Mattress with removable lining
G. Bottom bar
H. Bag
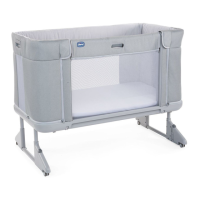
ASSEMBLY OF THE CRIB:
1. Hold foot support “A” and make the outer bar slide up until
you hear it CLICK into the rst position (g.1). Repeat this step
for the other foot support.
2. Insert the lower bar “G” in the relevant slots inside the foot
supports “A” (g.2) until you hear the metal pin lock into place.
3. Fasten the upper structure “B” to the two feet as shown in
gure 3. The CLICK of the pin means that the structure is
correctly fastened.
WARNING: Make sure the grey buckles are facing the same
side as the articulated feet (g.4).
4. Mount the upper structure “B” and t the fabric “E” on the
feet “A” making the bar of the foot slide rst inside the lateral
pocket of the fabric (g.5). Repeat the step on both sides.
WARNING: The structure must be oriented so that the
side with the handle ”B4” is facing the same direction as the
articulated feet “A5.”
5. Then fasten the upper structure to the feet by inserting the
relevant plastic support as shown in gure 6. Push down until
you hear it click into place. Repeat the step on both sides.
6. Fasten the fabric lining ”E” to the central structure “C”
fastening the 2 straps with clip “C2” on the lower part of the
lining (g.7).
7. Fasten the buttons “C2” to the buttons “B5” to fasten the fabric
to the upper structure (g.8) and complete by closing the
zippers E3 (g.8A). Repeat the step for the missing side.
8. Position il mattress “F” on the bottom of the crib (g.9).
9. Block the 4 wheels “A6” of the crib by lowering the levers that
activate the brakes (g.10).
The crib is now ready to be used.
WARNING: Make sure that all the fasteners are engaged
correctly and that the zippers are closed and locked at the end.
WARNING: Do not use the crib with the articulated feet
partially or completely turned or released (g. 11). The position
of correct use is illustrated in gure 12. In the case of accidental
knocking against the articulated feet, put them back in the
correct position by lifting the crib slightly.
WARNING: If the crib has been used previously in “Co-Sleeping
conguration (fastened to the bed),” make sure that the side is
in locked position and check that it is engaged correctly.
ADJUSTING THE CRIB HEIGHT
5IF DSJC DBO CF BEKVTUFE BU EJíFSFOU IFJHIUT 5P BEKVTU UIF
height, the setting button “A1” up and lift the crib to the desired
position (g.13). Repeat the step on the opposite side.
5IFCBTFPGUIFDSJCDBOCFTMJHIUMZJODMJOFECZBEKVTUJOHUIF
feet at dierent heights (g.14).
WARNING: The crib can be inclined by a maximum of 4
positions between one foot and the other (e.g., right foot in
position 5 and left foot in position 1, see g. 15).
WARNING: The child’s head must always be positioned near
the raised end (g.16).
WARNING: It is not possible to select dierent heights on the
two sides of the crib when in rocking conguration.
CO-SLEEPING CONFIGURATION (FASTENED TO THE BED)
It is possible to fasten the crib to the parents’ bed (co-sleeping
conguration).
CAUTION - IMPORTANT FOR YOUR CHILD’S SAFETY: This
conguration is allowed only with beds that allow complying
with all the conditions described in this paragraph.
In particular, the side of the crib must always be positioned
against the mattress of the parents’ bed and the parents’
mattress must be aligned with (or at most higher than) the
height of the crib’s side (g.17). Moreover, the crib must be
fastened to the frame of the parents’ bed or to the mattress
support (mesh or slat sprung base).
WARNING: Check that the structure of the crib in co-sleeping
conguration does not interfere with the parents’ bed.
WARNING: During use, make sure that the bedsheets, blankets,
etc. do not interfere with the crib’s space.
1. Lower the side of the crib “B2” by gripping the relevant
interface “B4” and rotating it upward to release the side
lowering mechanism (g.18).
WARNING: Use the crib with the bar lowered only in co-
sleeping conguration.
2. Put the crib against the parents’ bed and check the height of
the crib compared to the parents’ mattress.
WARNING: The height of the parents’ mattress must be higher
than or the same as that of the side of the crib. If this is not the
DBTFVTFUIFBEKVTUNFOUTZTUFNUPBDIJFWFUIJTDPOEJUJPOPO
both sides.
WARNING: In co-sleeping conguration, the 2 feet of the crib
must be set at the same height.
3. To fasten the crib to the parents’ bed (co-sleeping
conguration), use the pair of supplied straps “D”. The straps
are found in the lower pocket “E2” of the fabric lining (g.19).
4. Fasten the grey buckles “C3” under the fabric lining on both
sides. Make sure the red buckle “D1” is positioned above the
strap as illustrated in gure 20.
5. Then run the strap around the structure of the parents’
bed from the bottom up (g.21) and fasten the red buckle
forming a noose (g.22). Repeat this operation on the other
side. To make installation easy, when fastening the buckles,
always keep the crib slightly away from the parents’ bed.
6. At this point put the crib against the parents’ bed and tighten
the noose pulling the straps (g.23). Carry out this step rst
POPOFTJEFBOEUIFOPOUIFPUIFSBEKVTUJOHUIFTUSBQTVOUJM
the crib is in contact with the parents’ mattress.
WARNING: Before use, always make sure that there is no space
CFUXFFOUIFQBSFOUTNBUUSFTTBOEDSJCTTJEF0UIFSXJTFBEKVTU
the straps pulling them until the required condition is restored.
Make sure that the side is always free to be lowered and raised
completely.
7. Fit the length of the straps in excess inside the pocket on the
bottom of the fabric lining.
8. Lock the crib’s wheels.
If when fastening the crib to the parents’ bed it is not possible to
t the crib’s feet under the parents’ bed, the bed can be fastened
anyway by the following the instructions above and rotating the
articulated feet when putting the crib against the bed.
To turn the feet, pull the rotation release button “A4” and turn
the feet “A5” of the crib inward by hand (g.24).
5PDMPTFUIFTJEFUIBUDBOCFMPXFSFEKVTUQVMMVQCZIPMEJOH
it by the upper mobile structure “B2” (g.25). Always make
sure that it is engaged correctly.
WARNING: Whenever the side is lowered, make sure that the
position compared to the parents’ mattress has not changed
from that illustrated in the paragraphs above.
WARNING: Never use the rocking function when the crib is in
“Co-Sleeping conguration (fastened to the bed).”
WARNING: Use the product with beds and/or mattresses with
straight sides only. Do not use the product with round beds
and/or mattresses or water mattresses.
WARNING: When the product is used in “Co-Sleeping
conguration (fastened to the bed),” it must always be mounted
on the long side of the bed. DO NOT install the product at the
head or feet of the bed.
CARE AND MAINTENANCE
The crib and mattress have a resistant fabric lining that can be
removed completely and washed.
To remove the fabric, follow the instructions in the paragraph
“HOW TO REMOVE THE FABRIC COVER.”
WARNING: Covering or removing the fabric may take a few
minutes and must be carried out by an adult.
Regularly inspect the toy for signs of wear and any damage.
In the case of damage do not use and keep out of reach of
children.
When washing the fabrics pay close attention to the
instructions on the label.
Do not use solvents, abrasive or overly aggressive products.
Wash by hand in cold water
 Loading...