11
chickenguard.com
2. Placez le support de piles dans le boîtier.
3. Visser le couvercle boîtier de commande au panneau arrière.
(NE PAS UTILISER DE PERCEUSE ÉLECTRIQUE)
CONFIGURATION INITIALE
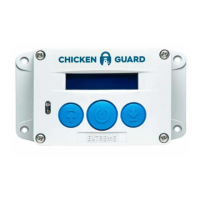
1. Appuyez deux fois sur le bouton MENU pour allumer (une seule
fois s’il est déjà allumé) - l’écran affichera :
« CHICKENGUARD.COM » et l’heure.
2. Appuyez à nouveau sur MENU pour accéder au MENU principal
- l’écran affichera : ASSISTANT DE CONFIGURATION
« SETUP WIZARD »
3. Appuyez à nouveau sur MENU pour lancer L’ASSISTANT DE
CONFIGURATION « SETUP WIZARD ».
ASSISTANT DE CONFIGURATION AUTOMATIQUE
CHOISIR LA LANGUE
1. Appuyez sur HAUT « UP » ou BAS « DOWN » pour choisir
votre langue « FRENCH »
2. Appuyez sur MENU pour sauvegarder.
SÉLECTIONNER LE FORMAT DE L’HEURE
Appuyez sur HAUT « UP » pour 12 heures ou BAS « DOWN » pour 24
heures.
RÉGLAGE DE L’HEURE
1. Appuyez sur HAUT « UP » ou BAS « DOWN » pour régler l’heure.
2. Appuyez sur MENU pour sauvegarder.
3. Appuyez sur HAUT « UP » ou BAS « DOWN » pour régler
les minutes.
4. Appuyez sur MENU pour sauvegarder.
CONTINUER
Sélectionnez « OUI » en appuyant sur le bouton HAUT « UP » pour
continuer.
CALIBRAGE DE LA PORTE
1. Appuyez sur la touche HAUT « UP » et maintenez-la enfoncée
jusqu’à ce que la porte soit complètement ouverte.
2. Lorsque la porte est complètement ouverte, relâchez le bouton
HAUT « UP ».
3. Appuyez sur MENU pour enregistrer (la position d’ouverture
complète).
4. Appuyez et maintenez enfoncée la touche BAS « DOWN » jusqu’à
ce que la porte soit complètement fermée.
UP MENU DOWN
 Loading...