01
Product Overview
SD Card Installation
Body
Accessories
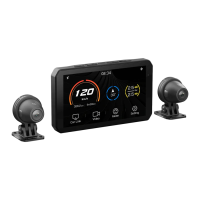
Host X1 CameraX2
Components Details
External
GPSx1
Mounting
Bracket x1
Ball Head
Component x1
Power
Cablex1
Step
Rings x3
Splicing
Bucklesx2
Magic
Tie x2
Nylon
Tie x5
Disassembly
Toolx3
Stickers x2
GPS 10Hz
AIO-5 Lite
Motorcycle Smart Riding System Manual
Introduction
Enjoy a safe ride with intelligent escort: CHIGEE AIO-5 Lite
Motorcycle Smart Car, equipped with front and rear 1080P dual
cameras, high-quality imaging capability, record riding road
conditions videos at any time, relying on powerful main control
computing power to develop intelligent functions such as mobile
wireless projection, online navigation, BSD blind zone monitoring,
etc. to make your ride safer and more convenient. 5-inch
high-brightness display, dual Bluetooth module to meet the
motorcycle audio interactive scene and 10hz high-precision
satellite positioning function, to provide you with a cutting-edge
riding experience. AIO-5 Lite host supports IP67 dust and water
resistance to easily cope with harsh environments. At the same
time, it can be matched with a variety of optional accessories to
customize a personalized riding experience, so that you can travel
safely and enjoy a unique motorcycle intelligent journey.
Home Key
Switch Key
Record Key
Lock Key
Record Indicator Light
Light Sensor
①
②
③
④
⑤
⑥
① ②
③
④
⑤
⑥
Speaker
Connecting
Cable
Suspension
Shock Absorption
Microphone
Micro SD
Card Slot
RESET
Type-C
17mm Ball Head
02
Installation Guide
Please use a microSD card with a U3 rating for transmission
speed to ensure stable video recording, otherwise there may
be risks of video stuttering and loss.
(SD card needs to be purchased separately)
The AIO-5 lite comes with an internal 32GB storage space (approximately
29GB available) that can store photos and videos directly. When a microSD
card is inserted, photos and videos will be stored on the microSD card.
Collision Lock Files will not be overwritten in a loop. Please follow the host's
prompts to delete the lock files, or format the storage space.
Image Storage Logic
After installing the microSD card, please
press the waterproof plug flush with the
body, otherwise it will affect the
waterproof performance.
Regularly format the SD card to keep
it in good condition.
This will erase all media files.
① Enter Settings
② Click "Storage" > "Format"
Suggestion
Choose the appropriate size reducer ring according to the diameter of
the handlebar, and use PVC gasket to avoid scratching the handlebar
when the handlebar diameter is 32MM.
Device Mounting
T25 Daisy-Hole
Stainless Steel Wrench
M5X10 Phillips
Round Head Screws
M5X18 Phillips
Round Head Screws
M5X20 Phillips Pan Head Screws
M3X8 Phillips Pan
Head Countersunk Screws
M3X16 Phillips Pan
Head Countersunk Screws
Φ
22-32 Round Tube
⑤
Variable Sleeve
28mm
Variable Sleeve
25mm
Variable Sleeve
22mm
③
④
①
T10 Phillips Slot Head
Stainless Steel Wrench
Camera Installation
Clamp
Orientation Marker
Camera Rotates Left
and Right Adjust the
Orientation Marker Upward
M4 Hex Nut
M4x20 Butterfly Tightening
Screw Adjust the Front Pitch
Angle of the Camera
3M VHB Double-Sided Tape
100°
1. By loosening the screws, the camera can be rotated 360°.
Please adjust the camera label to face straight up.
2. Use 3M VHB double-sided adhesive tape to stick to the desired
position. Please wipe the surface of the object being stuck. When
sticking, press with full force for more than ten seconds and wait
for 30 minutes to ensure the best sticking effect.
Installation Prompts
Wiring Diagram
ACC
ACC Power Definition:
When the motorcycle ignition is in the OFF position,
the voltage is 0V, and when in the ON position, the
voltage of 11-14.4V can be recognized as the ACC
state power supply.
Cam F
Cam B
Cam F
Cam B
Fuse
① Connect the GPS module
② Distinguish between the front
and rear cameras according
to the label
③ When wiring, match the
connectors with the same
color to the arrow label Insert
and tighten the nut
④ Fuse box (3A)
⑤ Red line connected to the
positive pole of the vehicle
battery
⑥ Black line connected to the
negative pole of the vehicle
battery
Arrow label
⑦ Yellow line connected to the
vehicle ACC
⑥
⑤
①
③
④
②
⑦
Cam B
Cam F
Front Camera
Rear Camera
take note of
① Cannot be mounted under carbon fiber.
② Cannot be blocked by metal.
③ Keep away from the camera and camera
cable and the main unit as far as possible.
④ TOP faces the sky.
Recommended to install in the shell reverse sticker (3m ad-
hesive sticker on top side of the sky air adhesive)
GPS installation location and requirements
Module
GPS
BSD Camera Installation Location
1.The recommended mounting height of the rear camera should be
within 60-90CM from the ground.
2.Enter the BSD settings to turn on the calibration line and adjust the
camera tilt angle so that the red marking line is at a distance of 8
meters from the rear of the motorcycle.
Audible alert
Calibration line