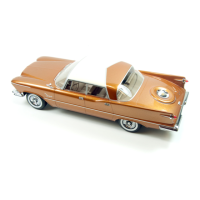
DISCHARGE FLANGE
VALVE
Fig. 1 _ Compressor
(h
t
er
i
or
View)
COMPRESSOR
Service to
the
comp
re
ssor is limited to the
following
compon!!nts which
are
available in
package
form:
Seal assembly. valve
plate
as-
sembly,
discharge
flange, suction service
(Shut-
off) valve, suction
st
r
ainer
screen, gnsket re-
placement
assortment
and
cylinder heads.
Refer
to
Figure
2
for
proper location of
parts
when
removing
or
replacing any of these components.
COMPRESSOR SEAL ASSEMBLY
The
seal assembly consists of
the
seal cover
plate
and
gasket, a carbon nose,
rubber
retainer
spring
and
spring
collar.
This
assembly is held
93
in place in
the
bearing
housing in
the
front
of
the
co
mpressor by
six
bolts (Fig.
2).
Removal
Start
the
engine and
operate
at
a
fast
idle with
the
air
conditioning system
turned
on
for
five
to
ten
minutes to
warm
up the compressor.
This
will vaporize
any
liquid
refrigerant
that
may
be
present
in the compressor.
Stop
the
engine
and
valve
off
the
compressor
by
rotating
both service valves clockwise until
they
are
fully seitted
against
their
seats. Then,
loosen the valve
port
caps to gradually release
the
pressure
in
the
compressor.
NOTE:
The discha1'ge service valve is
at
the
condense1
',
and the suction service valve is on
the
comp1'eSS01'.
Remove belts
and
clutch pulley assembly. Re-
move
the
six bolts
attaching
the
seal plate to
the
compressor
Hnd
removc seal plate and seal
assembly. Be
sure
to
remove
spring
collar
from
between
the
spring
and
the
crankshaft
shoulder.
Installation
After
the seal is removed, clean
the
crankshaft
carefully
making
su
re
that
there
are
no
burrs
or
scratches.
If
there
is
any
rust
or
corrosion,
polish the
shaft
with fine crocus cloth to a
bright
smooth finish, then wash with clean sol-
vent;
oil with
refrigerant
oil.
Dip
the
new senl
parts
in
clear
refrigerant
oil
and
install
the
seal collar
and
spring.
Remove
the
carbon seal nose from
the
new
retalller
and slide
the
rubber
re
tainer
over the
shaft
without
the
carbon seal nose. Use
the
OLD OIL
SEAL
PLATE
to force the
rubber
retainer
into place by pulling
it
in evenly With
the
bolts.
Remove
the
old seal plate.
Install
the
car-
bon seal nose, new
gasket
and
new seal plate.
Tighten
the
bolts evenly. This
must
be done
carefully to avoid breaklllg the carbon
seal nosc.
Replace pulley
and
clutch assembly
and
belt.
Adjust
the
belts
to
a
~
inch deflection with
a 9 to
12
pound pull applied
at
the
center of
the
longest span between pulleys.
Open service valve stems counter-clockwise
until
the
valves
are
fully back-seated.
Test
for
leaks
and
for
proper
amount
of rc-
frigerant.
Check compressor oil level.
 Loading...