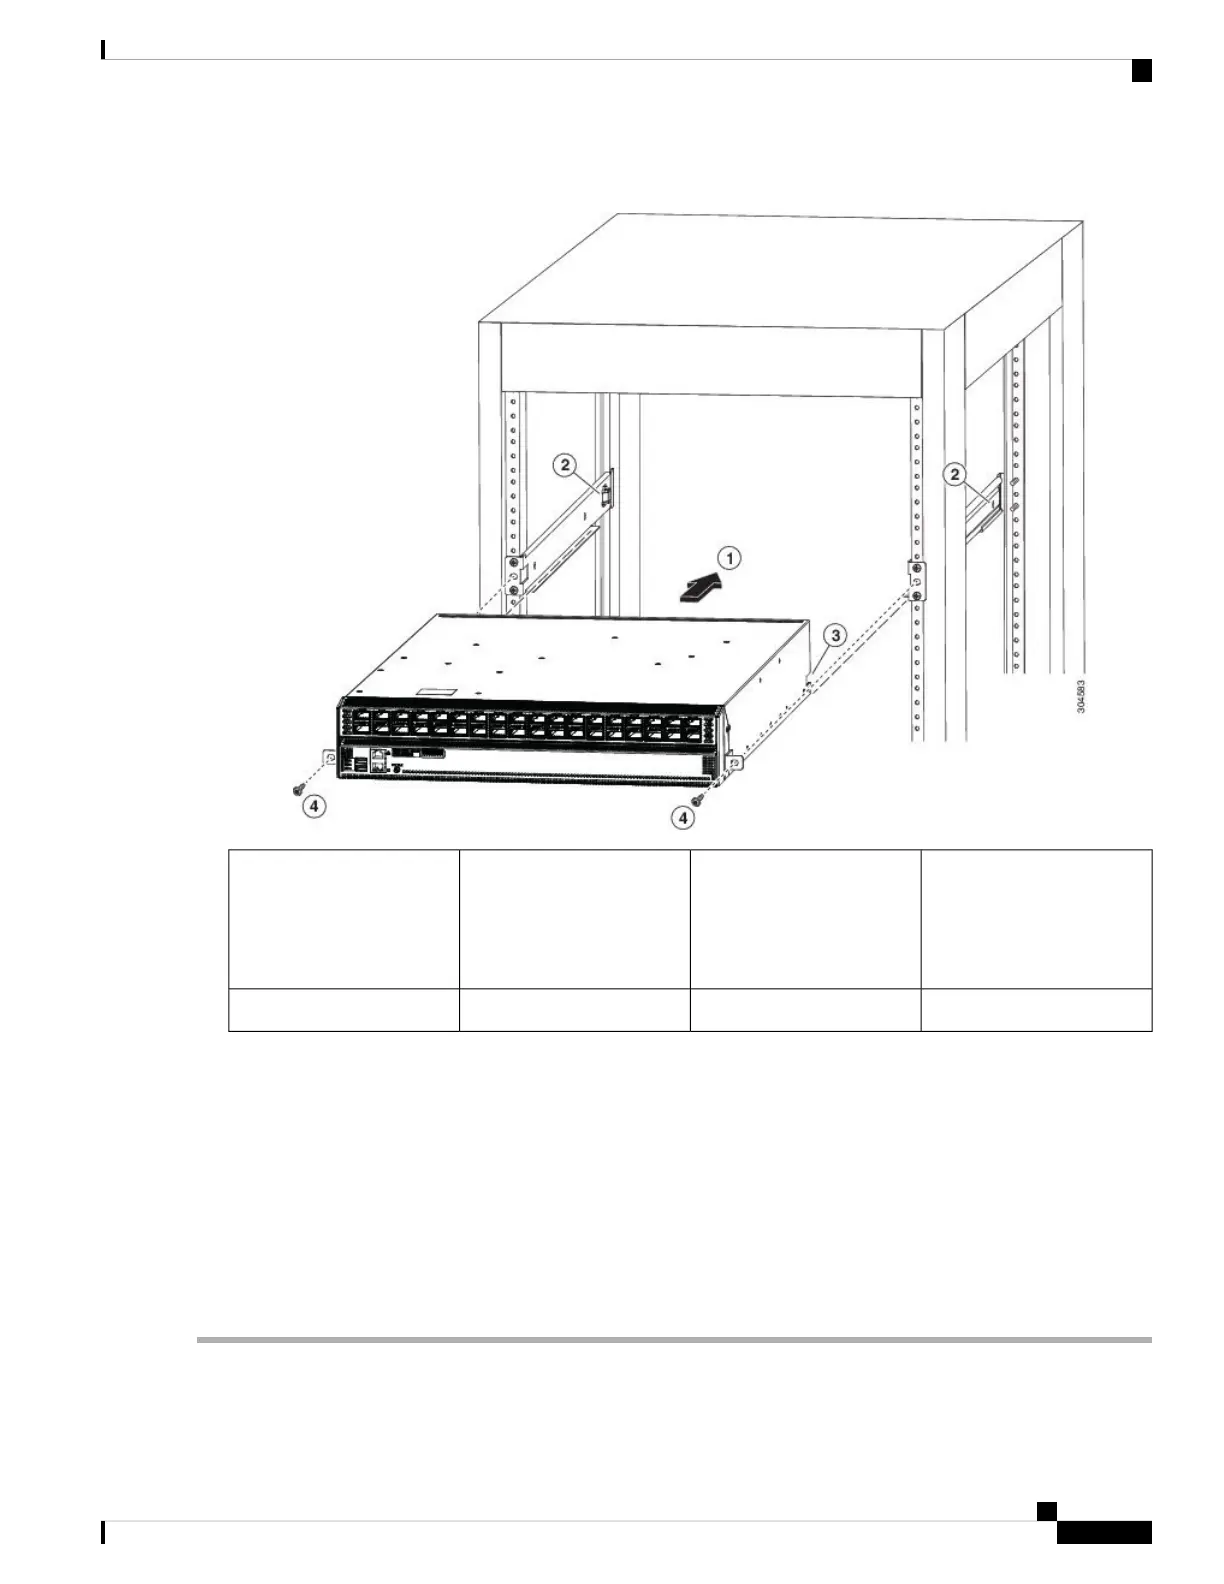
Figure 26: Sliding the Chassis onto the Bottom-Support Rails
Receiving notches on each
side of the chassis for the
chassis stops on the
bottom-support rails.
3Slide the power-supply end
of the chassis onto the
bottom-support rails so that
the chassis stops insert into
the chassis notches.
1
Rack-mount screw4Chassis stops2
b) Use two screws that are appropriate for the rack to attach the front-mount brackets to the rack (one screw for each
mounting bracket).
Typically, you use one of the following types of screws and the associated torque settings when tightening them:
• M4 screws—use 12 in-lb (1.36 N·m) of torque
• M6 screws—use 40 in-lb (4.5 N·m) of torque
• 10-32 screws— use 20 in-lb (2.26 N·m) of torque
If the rack requires another type of screw, use the appropriate torque setting for that type of screw.
Cisco Nexus 3000 Series Hardware Installation Guide
45
Installing the Chassis
Installing a 2 (RU) Chassis in a Four-Post Rack
 Loading...