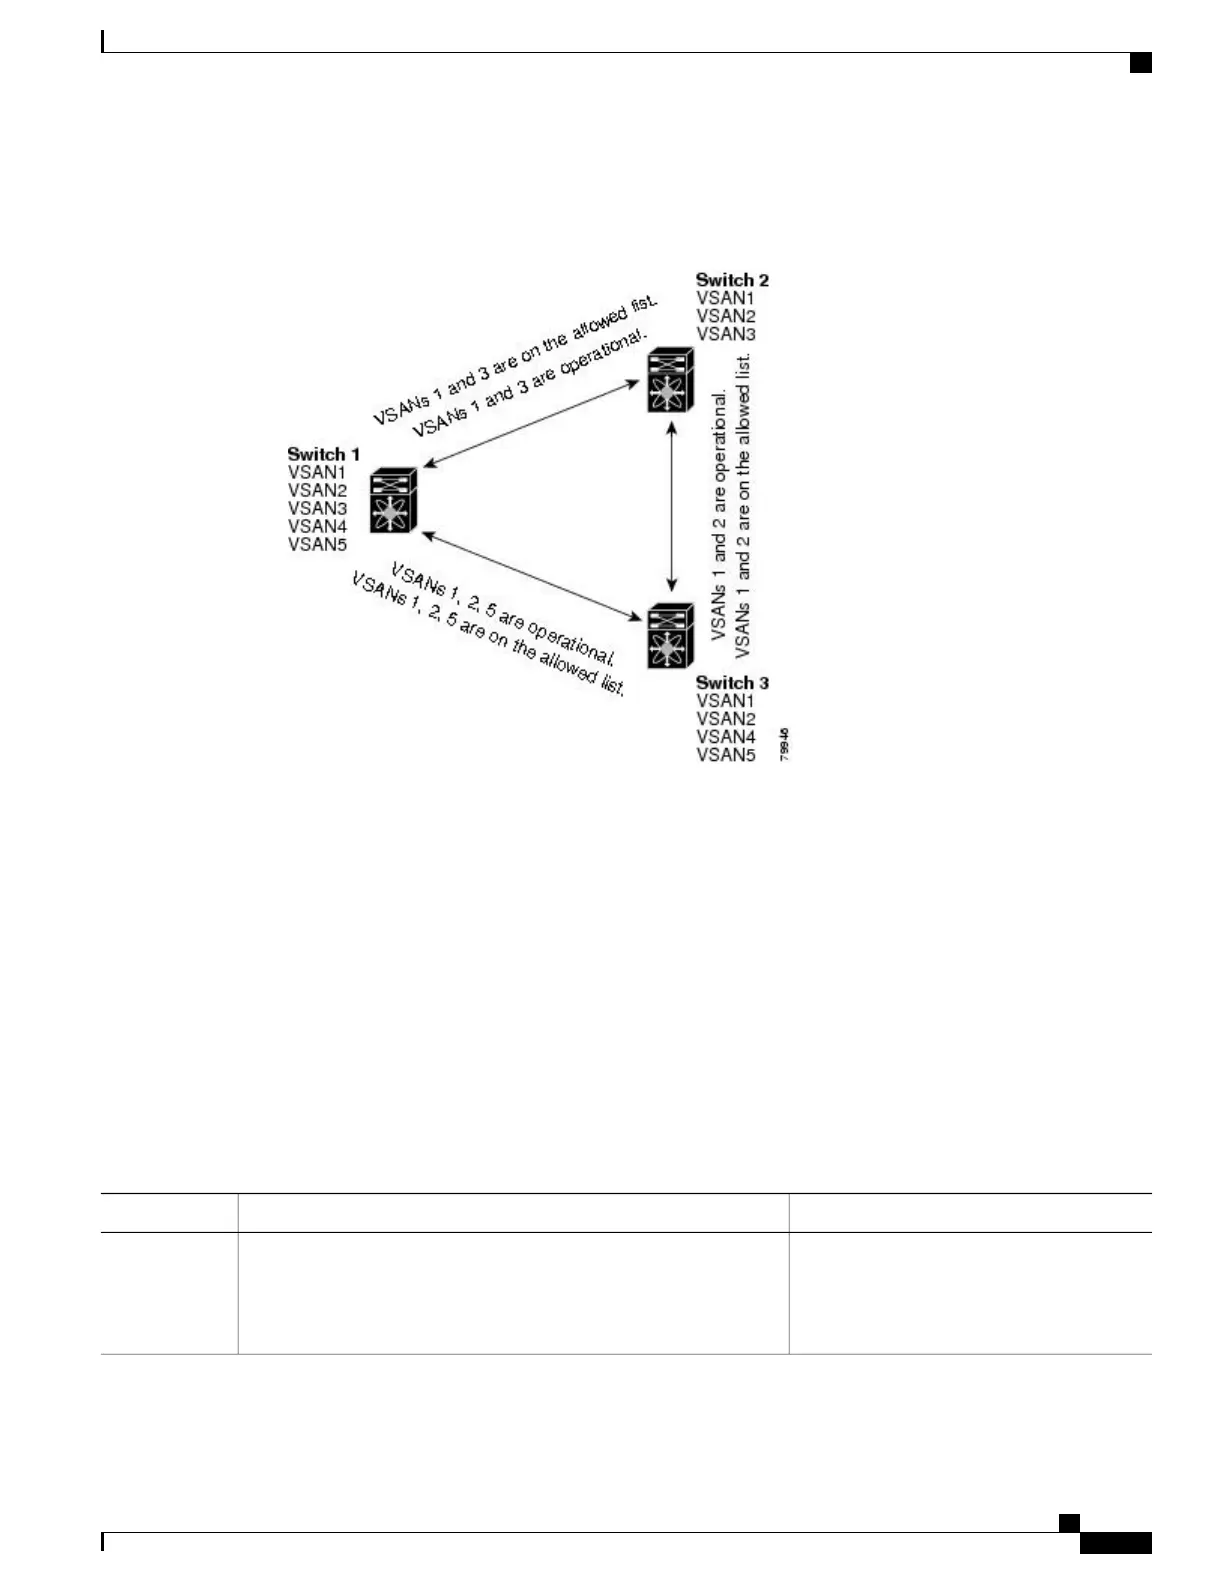
VSAN 2 can only be routed from switch 1 through switch 3 to switch 2.
Figure 19: Operational and Allowed VSAN Configuration
Configuring an Allowed-Active List of VSANs
You can configure an allowed-active list of VSANs for an interface.
SUMMARY STEPS
1.
configure terminal
2.
switchport trunk allowed vsan vsan-id - vsan-id
3.
switchport trunk allowed vsan add vsan-id
4.
no switchport trunk allowed vsan vsan-id - vsan-id
5.
no switchport trunk allowed vsan add vsan-id
DETAILED STEPS
PurposeCommand or Action
Enters global configuration mode.configure terminal
Example:
switch# configure terminal
switch(config)#
Step 1
Cisco Nexus 5000 Series NX-OS SAN Switching Configuration Guide, Release 5.2(1)N1(1)
OL-27583-01 91
Configuring VSAN Trunking
Configuring VSAN Trunking

 Loading...