—49—
Printing memory switch settings
1. While paper is loaded, press and hold button 1 while turning the power on.
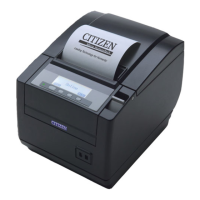
The function test mode starts and “Self test” appears on the LCD.
2. Press button 3 ( ).
“Printing MSW” appears on the LCD.
3. Press button 4 ( ).
A list of the current memory switch settings starts printing.
The function test mode has the following sub modes.
*1: The memory switches are automatically set to their optimum settings by selecting the
manufacturer and model of the printer being replaced.
*2: Label-printing models and black mark models.
Function Description
Self test Runs self test.
Printing MSW Prints memory switch settings.
Quick Setting
*1 Sets the memory switches to be compatible with
specific models.
Paper select
*2 Selects the paper type.
Calibrate BM
*2 Used to calibrate the black mark sensor.
Calibrate Label
*2 Used to calibrate the label sensor.
Selected item
Automatic memory switch settings
Manufacturer Model
Paper
width
Character
space
MSW2-4
Full Col
Print
MSW3-7
CBM1000
Mode
MSW8-1
Print
Width
MSW6-2
Character
Space
CITIZEN CBM1000 58 mm — Auto
linefeed
Valid 432dots —
80 mm — Auto
linefeed
Valid 576dots —
CT-S300 58 mm — WaitData Invalid 384dots —
80 mm — WaitData Invalid 576dots —
CT-S2000 58 mm — Auto
linefeed
Valid 432dots —
60 mm — Auto
linefeed
Valid 436dots —
80 mm — Auto
linefeed
Valid 576dots —
83 mm — Auto
linefeed
Valid 640dots —
EPSON T88 58 mm 0dot WaitData Invalid 360dots 0dot
1dot WaitData Invalid 390dots 1dot
80 mm 0dot WaitData Invalid 512dots 0dot
1dot WaitData Invalid 546dots 1dot
203dpi 58 mm — WaitData Invalid 420dots —
60 mm — WaitData Invalid 436dots —
80 mm — WaitData Invalid 576dots —
 Loading...
