1
2
50mm x 2
50mm x 2
50mm x 2
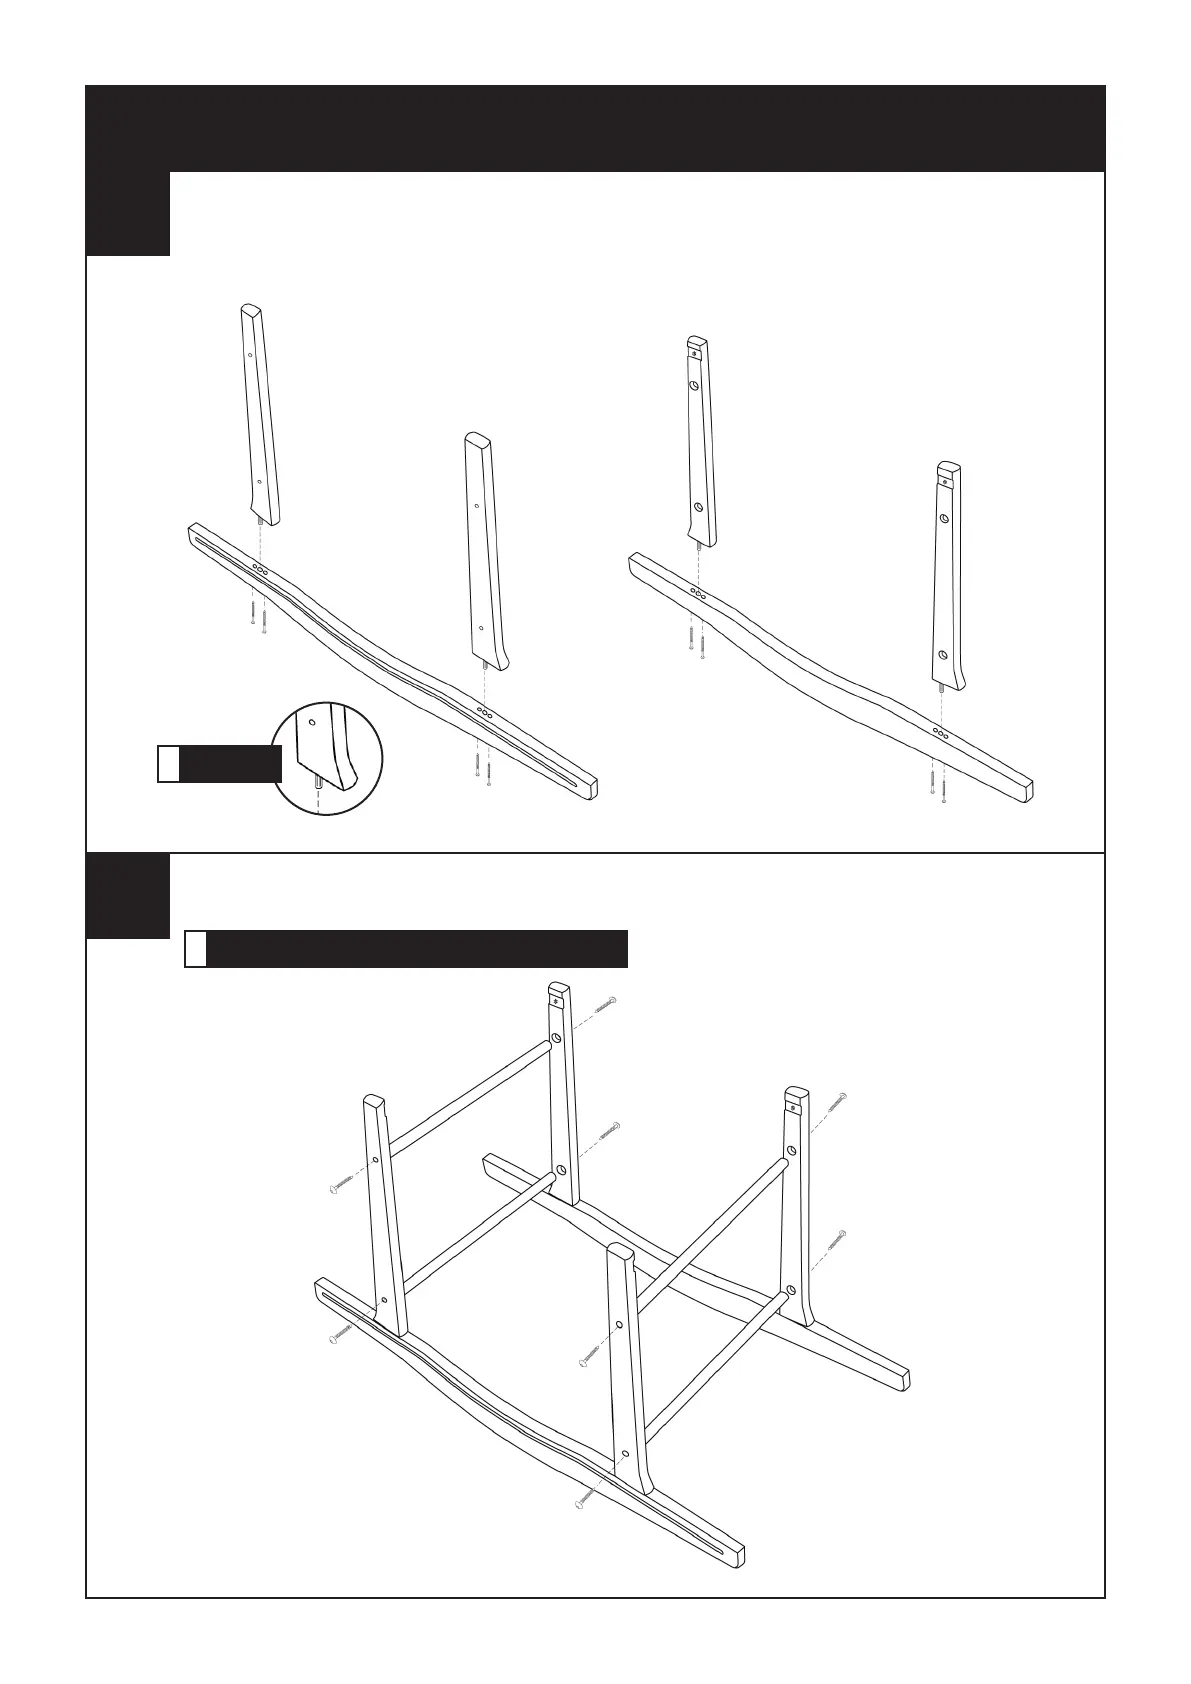
IIMMPPOORRTTAANNTT:: PPlleeaassee mmaakkee ssuurree wwhheenn aasssseemmbblliinngg tthhee ssttaanndd tthhaatt tthhee pprree--ddrriilllleedd gguuiiddee hhoolleess iinn eeaacchh ccoommppoonneenntt aarree
l
l
i
i
n
n
e
e
d
d
u
u
p
p
a
a
n
n
d
d
t
t
h
h
a
a
t
t
t
t
h
h
e
e
s
s
c
c
r
r
e
e
w
w
s
s
a
a
r
r
e
e
l
l
o
o
c
c
a
a
t
t
e
e
d
d
c
c
a
a
r
r
e
e
f
f
u
u
l
l
l
l
y
y
i
i
n
n
t
t
o
o
t
t
h
h
e
e
h
h
o
o
l
l
e
e
s
s
b
b
e
e
f
f
o
o
r
r
e
e
t
t
i
i
g
g
h
h
t
t
e
e
n
n
i
i
n
n
g
g
t
t
h
h
e
e
m
m
u
u
p
p
.
.
Ensure that the decorative side of base C faces outwards, the opposite way to the dowel
recesses in uprights, which should be facing inwards.
1. Using 4 x 50mm screws, fasten A and B uprights to decorative base rocker C through the holes in the base.
2. Repeat with the second set of parts A, B and C.
50mm x 2
B
B
A
A
C
C
!
Feet pointing
outwards
40mm
40mm
40mm
40mm
40mm
40mm
40mm
40mm
D
D
D
D
!
Important: Make sure dowels are pushed fully into dowel recesses.
1. Align the two sides of rocking stand so that the recesses for dowels D in the uprights face each other.
2. Locate the 4 cross dowels D into the recesses in uprights A/B, secure using 8 x 40mm screws.
B
B
A
A