WICKER BASKET - HOOD ASSEMBLY INSTRUCTIONS
Your components and ttings
x 2 Screws
x 4 Washers
x 2 Wing Nuts
x 2 Nyloc Nuts
x 2 Hood Runners with
attached hood
x 1 Flat head screwdriver
PLEASE CHECK YOU HAVE THE FITTINGS SHOWN BELOW.
Please note: The quantities below are the correct
amount to complete the assembly.
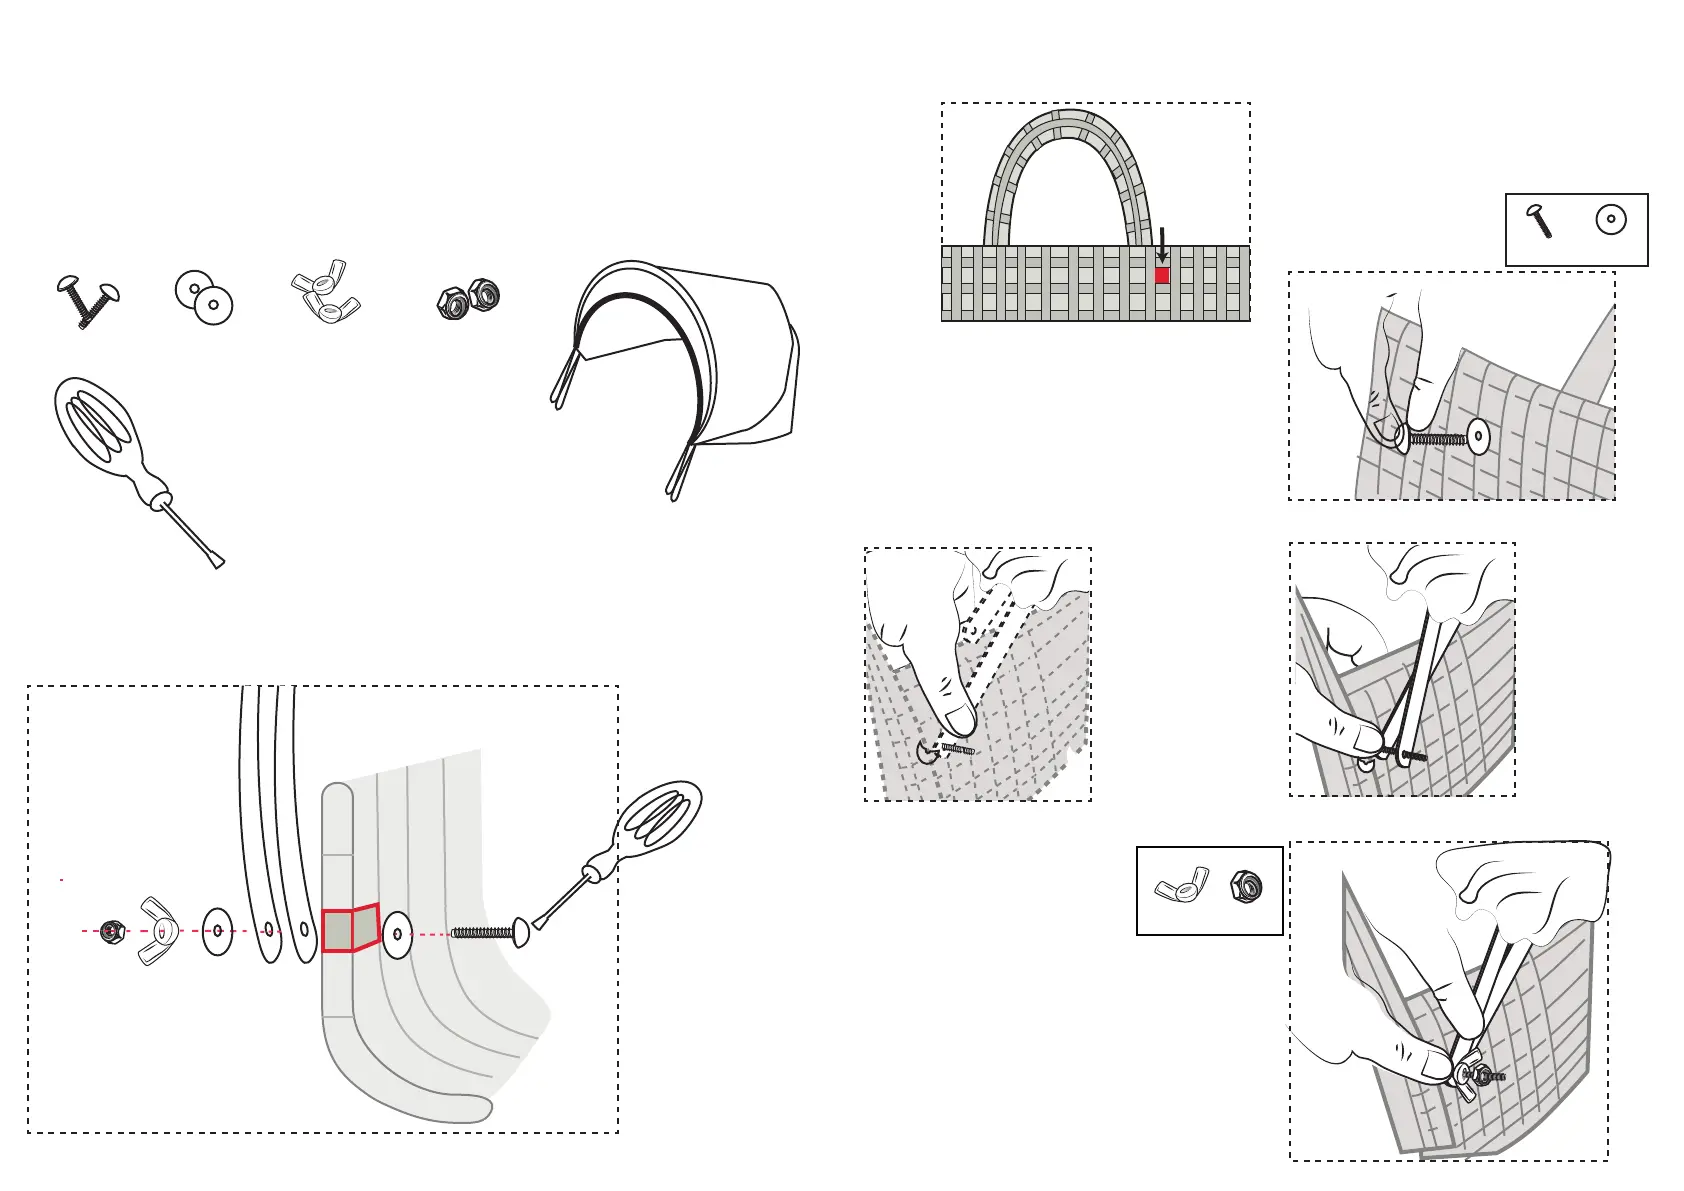
Position of Components
Inside of the
basket
Outside of
the basket
A
B
C D
E
A
B
B
C
D
E
Find the existing hole in your wicker
basket and insert a screw and washer
through from the inside of the basket.
FRONT
BACK
FRONT
BACK
Step 1 - Inserting screw and washer
1 X (A) & 1 X (B)
Step 2 - Inserting the runners
Then attaching the
FRONT runner on
top of the BACK
runner. It is essential
that BACK runner is
attached rst,
followed by the
FRONT
Having located the
screw with the washer
attached from the
inside of the basket,
now attach the BACK
runner E outside of the
basket.
The locking Nyloc nut should be tightened with
a pair of plyers so that it locks and cannot be
undone using nger pressure.
Please note: if the hood of the moses basket
does not stay up,tighten the wing nut slightly.
The Nyloc nut is used for extra security to keep
the wing nut in place.
1 X (C) & 1 X (D)
Attach the Wing nut and the
locking Nyloc nut
1
2
Repeat process, 1, 2 & 3 to attach hood to the
otherside of the wicker basket.
Step 3 - Attaching Wing nut & Nyloc Nut
Please note: For safe keeping the hood ttings and xtures are stored in the back of the mattress.