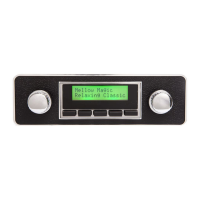
Do you have a question about the Classic Car Stereo CR017 Classic 200 and is the answer not in the manual?
| Brand | Classic Car Stereo |
|---|---|
| Model | CR017 Classic 200 |
| Category | Car Stereo System |
| Language | English |
Instructions for turning the unit on/off and adjusting the volume level.
How to adjust bass, treble, balance, fader, subwoofer, loudness, and equaliser.
Settings for clock display (12/24 hour) and audible beep feedback.
Selecting DAB mode and performing full station scans or manual tuning.
Selecting specific stations, setting up presets, and overwriting them.
Using Dynamic Range Compression (DRC) and the Prune function.
Performing a factory reset and checking the software version.
Scanning for stations, setting presets, and manual tuning for FM.
Adjusting audio output for weak FM signals to reduce noise.
Steps to pair a mobile device and establish an automatic Bluetooth connection.
Managing music playback: track selection, pause, and resume.
Answering, ending, and switching between hands-free and handset modes.
Dialing the last number and adjusting hands-free call volume.
Playing music from USB, track selection, fast forward/rewind, and pause/play.
Using intro scan, repeat, random playback, and pause/play.
Selecting tracks, folders, and recommendations for playlist setup.
Ensuring fitment, checking vehicle earth system, and potential adaptor needs.
Procedure for adjusting spindle spacing for dashboard mounting.
Mounting instructions for the DAB antenna on the windscreen.
Details for connecting power, earth, and DAB antenna via ISO Connector A.
Connecting front and rear speakers using ISO Connector B pinout.
Connecting a subwoofer and mounting the hands-free microphone.
Connecting the microphone and understanding amplifier line output.
Detailed steps for physically fitting the radio into the dashboard aperture.
Checks for power supply, earth connection, and battery status when unit won't power up.
Diagnosing issues like speaker short circuits, wiring, or fader settings.
Checks for antenna extension, cable damage, and environmental interference.
Verifying reception area, antenna connection, and cable integrity.
Factors affecting reception and USB memory stick read errors.
Troubleshooting no sound or low volume in auxiliary mode.
Important notes on negative/positive earth systems and general connector use.
Detailed breakdown of pin assignments for ISO Connector A.
Detailed breakdown of pin assignments for ISO Connector B.