9
EN
Technical Data
type volt hz watt
752 220-240 50/60 140-150
Before the first use
• Read these operating instructions carefully before
using the appliance for the first time.
• Remove all packing parts and possibly stickers, but
not the type plate nor the serial number.
• Clean the device with a moist cloth.
• Place the coffee grinder on a dry, slip-resistant and
level surface.
EC Label / Safety information
The appliance meets the requirements
of the applicable EC directives.
The appliance is designed
for indoor domestic use only.
ATTENTION! Always unplug
the appliance when not in use
and before cleaning.
Assembly
• To begin with, make sure that the appliance is not
connected to the mains and that the standby switch
8
is set to the OFF “O” position.
• Prior to assembly, ensure that the grinder is free of
any old coffee beans.
• Fit the grinding ring
1
incl. seal on the grinding
cone (below the coffee bean receptacle
5
. The three
teeth of the grinding ring will fit exactly into the three
notches in of the device. Beware! Sharp edges
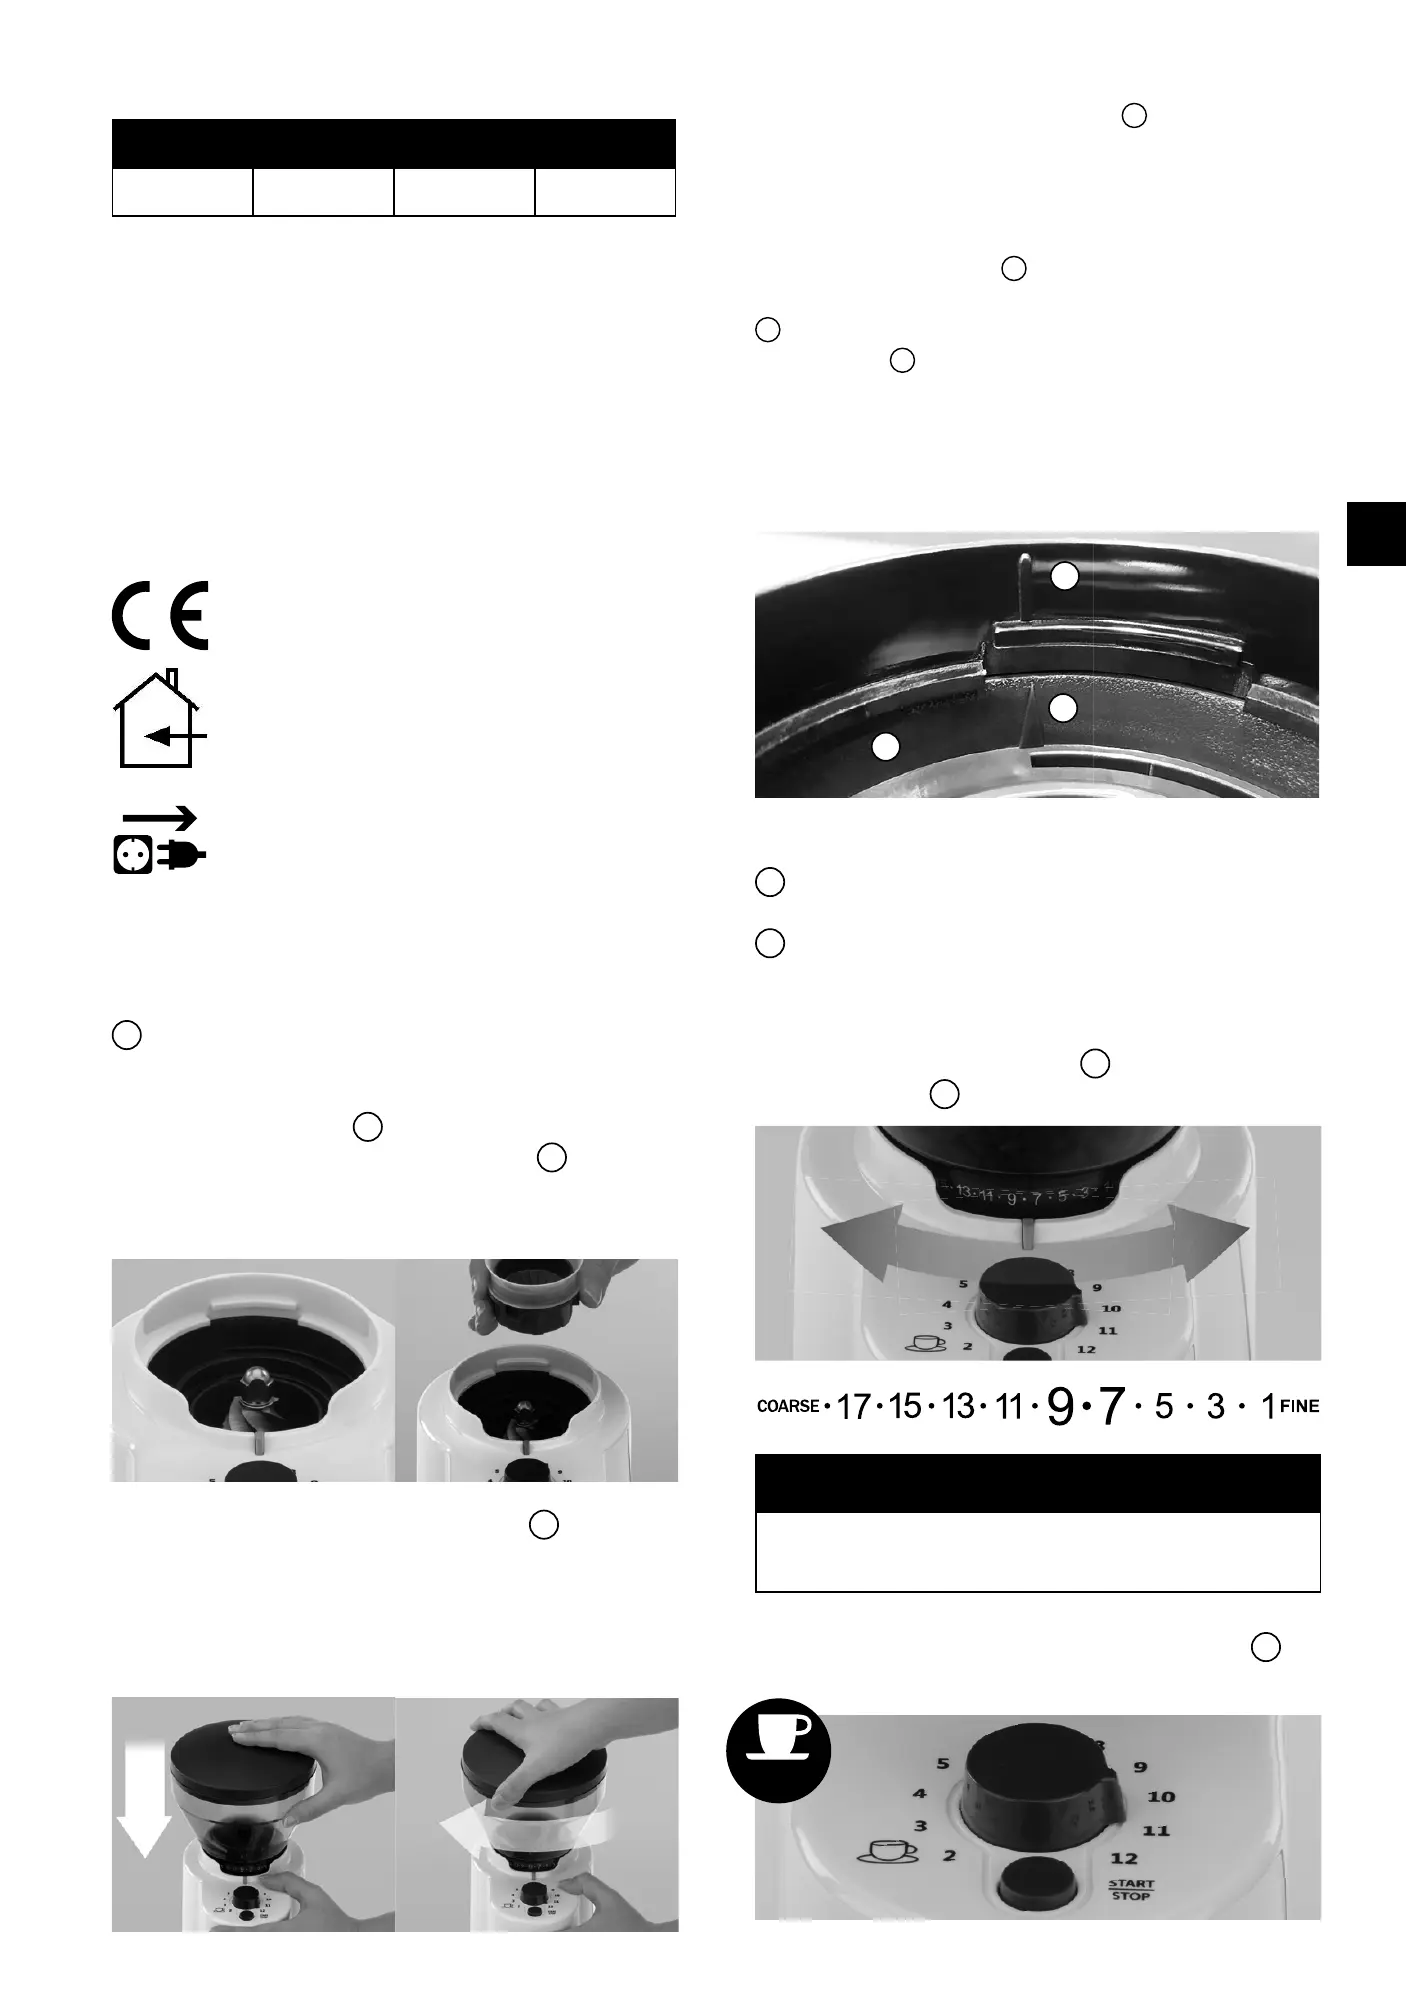
• Attach the empty coffee bean holder
5
to the de-
vice. Do this by aligning the triangle on the coffee
bean holder with the grey mark on the appliance.
Now press the coffee bean holder down and turn it
clockwise towards the grinding coarseness setting.
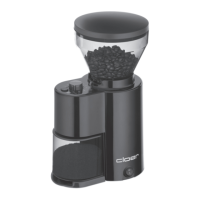
• Attention! If the coffee bean container cannot be
inserted correctly, the plastic ring
a
underneath the
bean container is probably not in the correct posi-
tion. Proceed as follows:
- Remove the coffee bean container and the grinding
ring incl. seal.
- Turn the plastic ring
a
with your hands or with a
screwdriver to the left as far as it will go. The arrow
b
on the plastic ring must point to the marking on
the housing
c
.
- Reinsert the grinding ring incl. seal and bean contai-
ner. The bean container must point with the triangle
to the grey marking on the machine. Press the contai-
ner down and turn it clockwise to the desired grind.
.
 Loading...