To
Extinguish
1,
Open
c
opy
cover
—and
place
squffer
firmly
over
heater
head.
2.
Close
canopy.
NOTE:-
Do
not
pack
heater
until
it
has
cooled
20-30
minutes.
To
Transport
Before
truel secure
heater
in
upright posi-
tion
to
avoid
possible
fuel
spillage
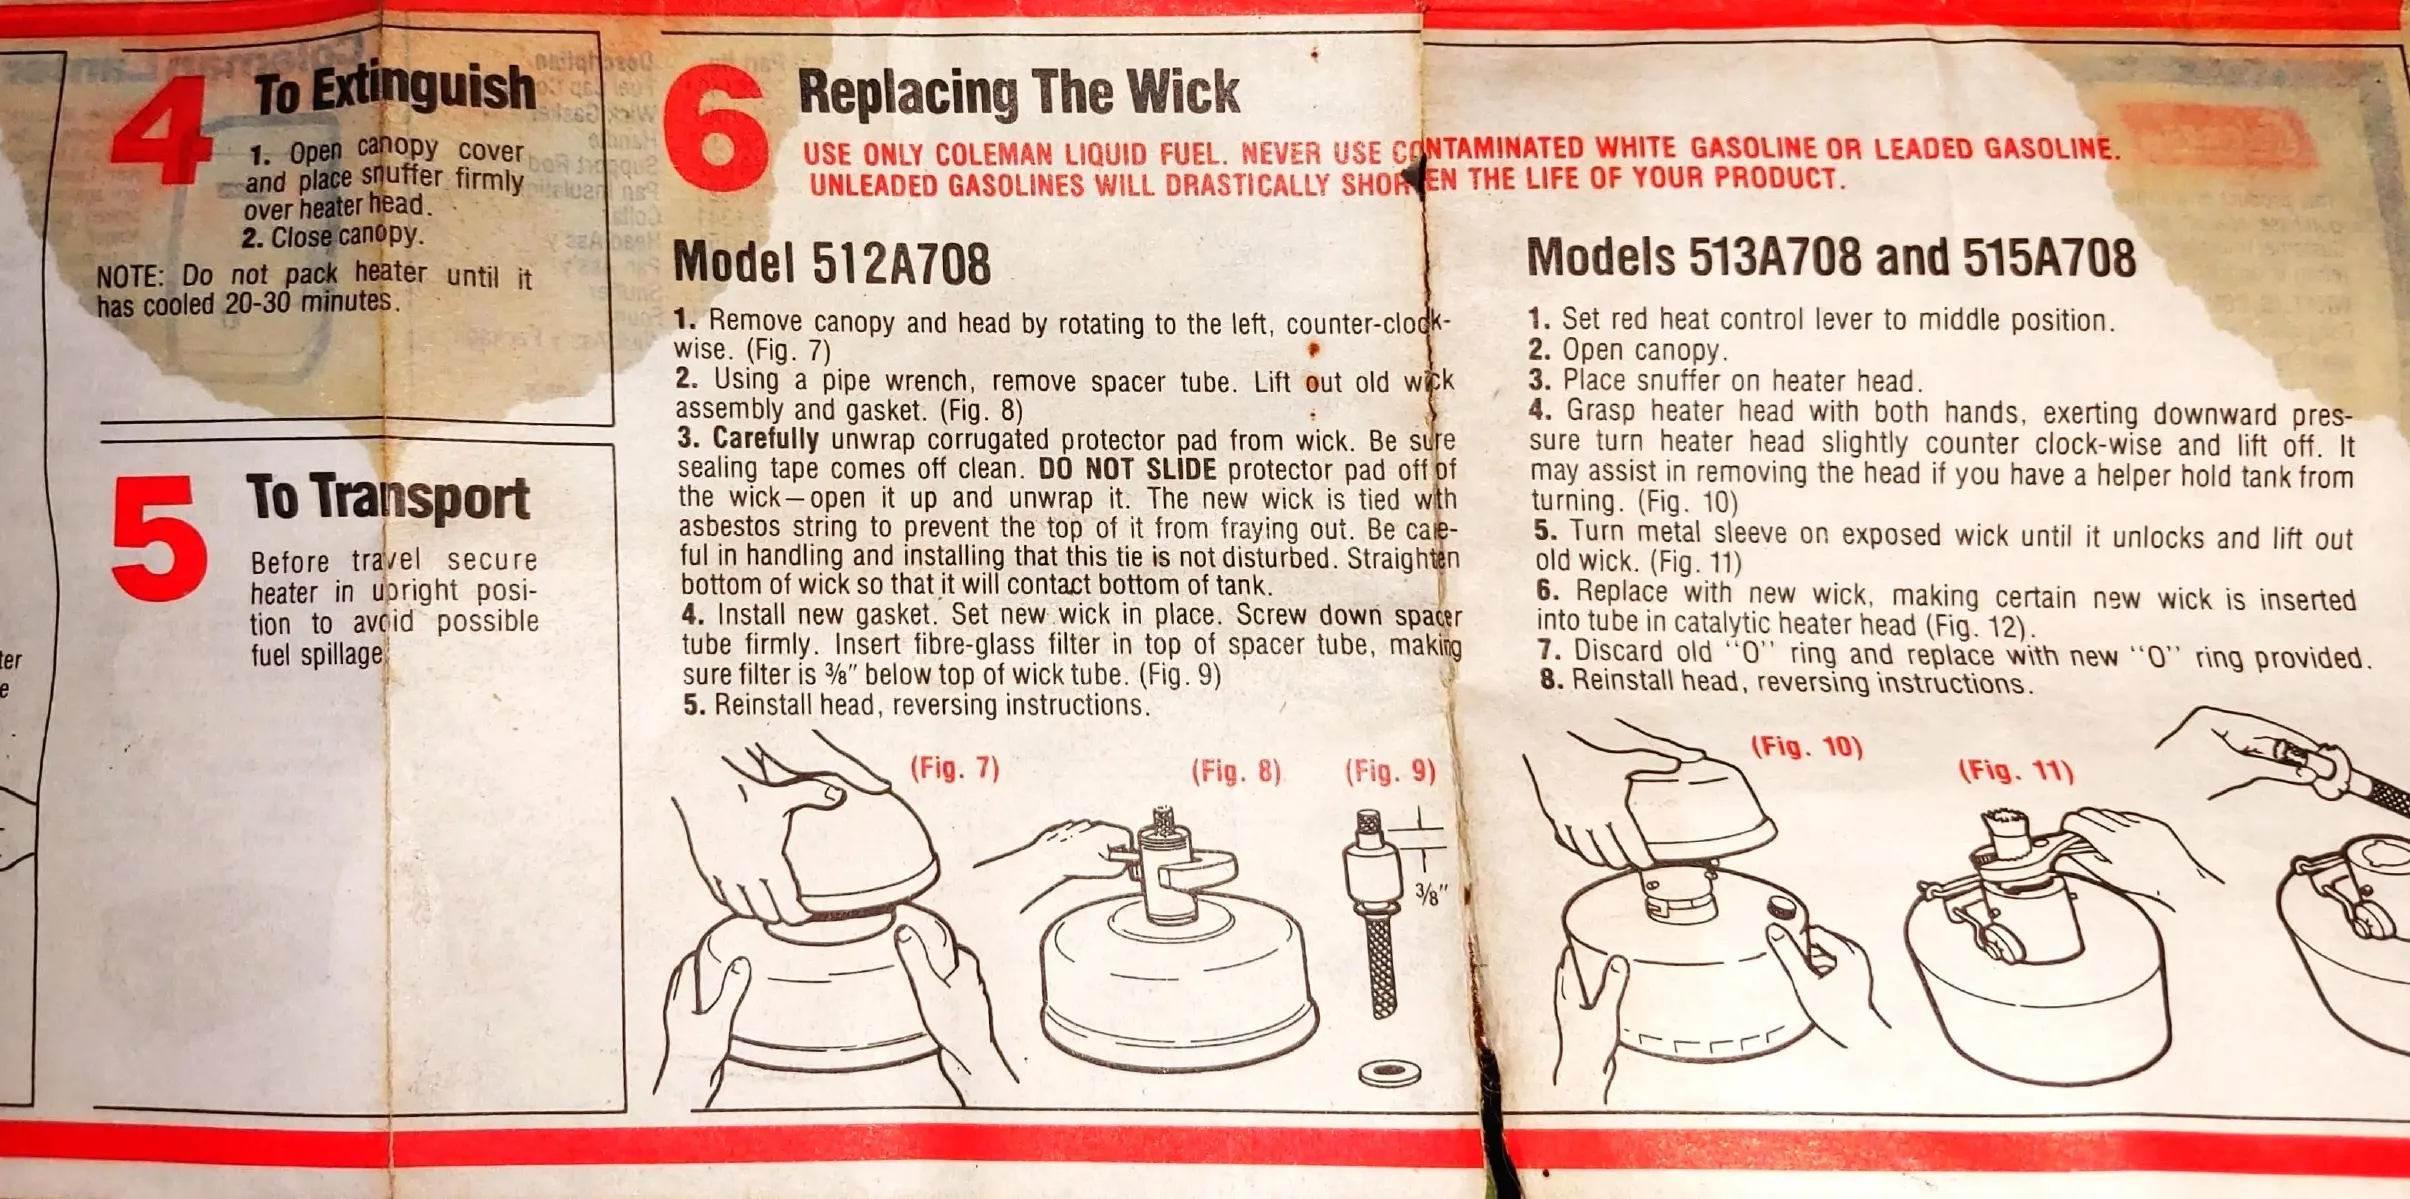
Replacing The Wick
o
USE ONLY COLEMAN LIQUID
FUEL.
NEVER
USE
C
NTAMINATED WHITE GASOLINE OR LEADED
GASOLINE.
UNLEADED
GASOLINES WILL DRASTICALLY
SHO
EN
THE
LIFE
OF
YOUR
PRODUCT.
Model
512A708
1.
Remove
canopy
and
head
by rotating to the left, counter-clo
k-
wise.
(Fig.
7)
2.
Using
a
pipe
wrench,
remove spacer
tube. Lift out old w
k
assembly
and gasket. (Fig.
8)
3.
Carefully
unwrap corrugated protector
pad
from wick. Be s e
sealing
tape
comes off
clean. DO NOT
SLIDE protector
pad off f
the
wick—open
it up and unwrap
it. The
new wick is tied w h
asbestos
string to prevent
the top
of it from
fraying out.
Be ca
-
ful in handling and installing
that this
tie is not
disturbed.
Straigh n
bottom of wick so
that it will
contact bottom
of tank.
4. Install new gasket. Set new wick in place. Screw
down
spacer
tube firmly. Insert fibre-glass filter in top of spacer tube,
making
sure filter is %" below top of wick tube. (Fig. 9)
5. Reinstall head, reversing instructions.
Models
513A708
and 515A708
1. Set red heat
control lever to middle
position.
2. Open canopy.
3. Place
snuffer on heater
head.
4.
Grasp
heater
head
with both hands,
exerting
downward
pres-
sure
turn
heater
head
slightly
counter
clock-wise
and
lift off.
It
may
assist
in
removing
the
head if
you
have
a
helper
hold tank
from
turning.
(Fig.
10)
5.
Turn
metal
sleeve
on
exposed
wick
until
it
unlocks
and
lift
out
old
wick.
(Fig.
11)
6.
Replace
with
new
wick,
making
certain
new
wick
is
inserted
into
tube
in
catalytic
heater
head
(Fig.
12).
7.
Discard
old
"0"
ring
and
replace
new
"O"
ring
provided.
8.
Reinstall
head,
reversing
instructions.
(Fig.
7)
(Fig.
8)
(Fig. 9)