IMPORTANT SAFETY INSTRUCTIONS
WARNING: When using electric appliances, basic precautions should always be followed, including the following:
Follow the following instructions if your product also includes batteries:
1. Do not install the batteries backwards, follow the + and - symbols as shown in the instructions. Do not charge or put in a fire. Do not mix alkaline,
standard, or rechargeable batteries. Do not mix old and new batteries. The batteries may explode or leak causing injury.
2. Do not leave discharged batteries in the product for an extended period of time as this could permanently damage the product.
3. Replace all batteries at the same time.
Follow these instructions when using alternate power sources:
1. Read all the instructions before using the appliance.
2. To reduce the risk of injury, close supervision is necessary when an appliance is used near children.
3. Only use attachments recommended or sold by the manufacturer.
4. Use only the charger supplied by the manufacturer to recharge.
5. The charger is intended for indoor/household use only. DO NOT USE CHARGER OUTDOORS.
6. To reduce the risk of electrical shock, do not put in water or other liquid. Do not place or store appliance where it can fall or be pulled into a tub
or sink.
SAVE THESE INSTRUCTIONS
CONTENTS
• 1 x Rechargeable fan
• 1 x 240V Adaptor
• 1 x 12V Adaptor
• 1 x User Manual
• 1 x Warranty Card
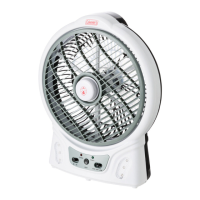
1
2
3
4
5
6
7
8
9
10
11
Handle
Front body
LED light
Switch
Back body
Battery cover
Side cover
Cover
Fixed cover
Protecting cover
AC socket
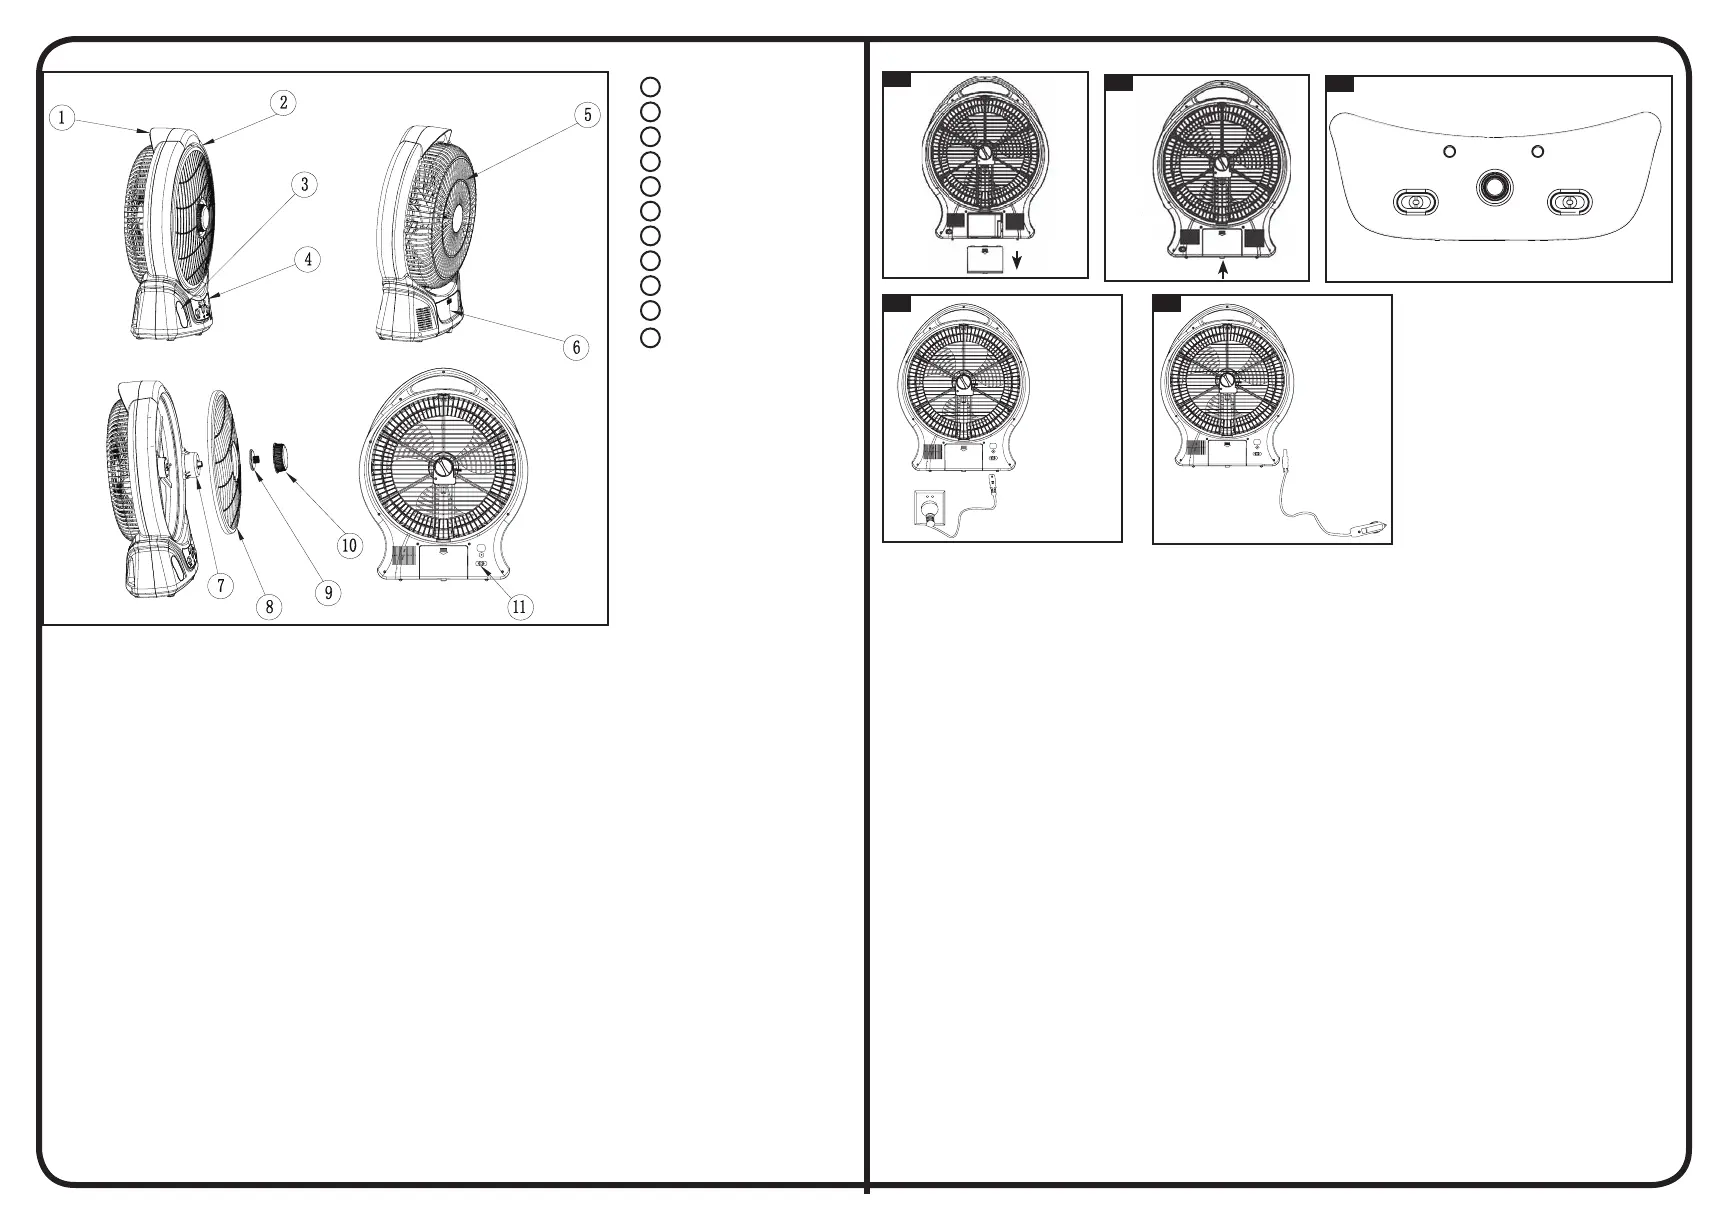
TO REPLACE THE BATTERY
This fan comes with a built in rechargeable battery, please be sure that the charging voltage is compatible with the input voltage of fan indicated on
bottom label (AC 220-240V 50HZ).
1. Slide down the battery cover. (Fig.1) (6)
2. Take out the battery and disconnect the power cords from the fan.
3. Install the new battery by connecting the red cord to the positive polarity indicated “+” and connecting the black cord to the negative polarity
indicated “-”.
4. Slide back the battery cover. (Fig.2) (6)
TO CHARGE THE BATTERY
1. Slide the AC/DC switch (4) to DC position. (Fig.3)
2. Connect the small end of the 240V AC adaptor cord to the AC socket (11) in the back of the fan. Connect the other end of the charger to the
appropriate electrical outlet(Fig. 4 & 5).
3. The red indicator light will illuminate when the adaptor is connected correctly. The green light will illuminate when the unit is in operation (Fig. 3).
TO OPERATE THE RECHARGEABLE FAN
1. This fan has two AC and DC working conditions. Slide the switch to AC position when using AC power supply, slide switch to DC position when
operating from battery or car charger. (Fig.3)
2. This fan has three working modes as High/Off/Low, select the mode you want by sliding the switch. (Fig.3)
3. The LED lights are able to operate together or individually with the fan by pressing the light button on board. (Fig.3)
4. The power indicator will be solid green when working.
ATTENTION:
1. Make sure the volts of power supply is compatible with the input voltage of fan.
2. Built in SLA battery is 6V 4.5AH, charge time is 15 - 24 hours.
3. It’s common for the SLA battery to get warm when charging.
4. Charge the fan for over 8 hours if it has not been used for 3 month.
5. This fan has no water proof function, please do not use in wet conditions.
Fig 3
LIGHT
POWERCHARGE
AC/DC
HIGH OFF LOW
Fig 1
Fig 2
Fig 4 Fig 5
220 -240V AC
Adaptor
12V DC
Receptacle Plug
 Loading...