EasyManua.ls Logo

Coleman CHT10 - User Manual

Coleman CHT10
2 pages
Print Icon
To Next Page IconTo Next Page
Loading...
IMPORTANT SAFETY INSTRUCTIONS
WARNING: When using electric appliances, basic
precautions should always be followed, including
the following:
1. Keep AAA batteries away from small children. If
swallowed promptly see a doctor and have the
doctor phone (202) 625-3333 collect.
2. Do not install the batteries backwards,
follow the + and - symbols as shown in the
instructions. Do not charge or put in a fire. Do
not mix alkaline, standard, or rechargeable
batteries. Do not mix old and new batteries. The
batteries may explode or leak causing injury.
3. Do not leave discharged batteries in the product
for an extended period of time as this could
permanently damage the product.
4. Replace all batteries at the same time.
SAVE THESE INSTRUCTIONS
TO INSTALL OR REPLACE BATTERIES IN
HEADLAMP
Your new headlamp operates on three “AAA cell
batteries. For longest life, use alkaline batteries.
1. Use the end of the strap buckle as a “Key”
(Fig. 1), and insert it into the slot of the battery
cover located on the side of the headlamp
(Fig. 2).
2. Remove battery door by rotating
counterclockwise 1/4 turn (Fig. 3).
Note: Battery door is designed to stay attached to the
strap buckle “Key”.
3. Remove battery cartridge from headlamp body
by turning on side and shaking gently (Fig. 4).
Note: The cartridge is easily removed if batteries
are installed, but may require additional shaking
if no batteries are in the cartridge.
4. Install three batteries in the correct orientation as
shown on the battery cartridge housing (Fig. 5).
5. Properly align battery cartridge and then re-load
back into the headlamp body (Fig. 6).
6. Properly locate battery door, and then rotate
clockwise 1/4 turn to fully secure (Fig. 7).
7. Remove “Key” from battery door by pulling gently
on the strap buckle.
TO OPERATE HEADLAMP
1. Five lighting modes are available: Red,
White, Low, Medium & High.
2. Operate by pressing the power button on
top of the headlamp. Each cycle of the
power button will advance the headlamp to
the next mode. Operating in the Low and
Medium modes will extend the battery life.
3. This headlamp is designed with two
convenient features.
ToadvanceinstantlytotheHighmode,
simply press and hold the power button
for 3 seconds.
• Theheadlampispoweredoffwith
one click after the headlamp has been
operating in one mode for more than
10 seconds.
4. This headlamp is equipped with a battery
indicator which is located inside the
primary reflector. The battery indicator
provides GREEN, AMBER and RED
indications based on the voltage of the
batteries installed. The battery indicator is
designed to operate for 3 seconds when
the headlamp is powered on or if the light
mode is changed.
• GREENlightindicatesnormaloperation
with several hours of operation available.
• AMBERlightindicatesbatterylife
is shortened and battery should be
replaced soon.
• REDlightindicatesbatterylifeisalmost
complete and the batteries should be
replaced immediately. RED indicator will
stay on during operation.
** Battery indicator varies depending on mode.
THINGS YOU SHOULD KNOW
1. Operating time for this light depends
on whether it is run continuously or
intermittently. Intermittent operation
extends the run time of the batteries.
2. LEDs are lifetime light sources and do not
need to be replaced.
Fig. 1
Fig. 2
Fig. 3
Fig. 4
Fig. 5
Fig. 6
Fig. 7
INSTRUCTION CARD
CHT10 3AAA HEADLAMP
Battery Meter
Charge de la pile
Question and Answer IconNeed help?

Do you have a question about the Coleman CHT10 and is the answer not in the manual?

Overview

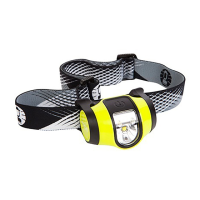
This document describes a Coleman headlamp, model CHT10 3AAA. It is a portable lighting device designed for various activities, including those requiring hands-free illumination.

Function Description

The headlamp operates with five lighting modes: Red, White, Low, Medium, and High. Users can cycle through these modes by pressing the power button. A quick press of the power button advances the headlamp to the next mode. Holding the power button for three seconds activates the High mode directly. The headlamp is equipped with a battery indicator that is located inside the primary reflector. This indicator provides Green, Amber, and Red indications based on the voltage of the batteries installed, helping users monitor battery life. The battery indicator is designed to operate for three seconds when the headlamp is powered on or if the light mode is changed.

Important Technical Specifications

The headlamp uses three "AAA" cell batteries. The battery indicator provides:

  • Green light: Indicates normal operation with several hours of operation available.
  • Amber light: Indicates battery life is shortened and battery should be replaced soon.
  • Red light: Indicates battery life is almost complete and the batteries should be replaced immediately. Red indicator will stay on during operation.

The headlamp is designed to be water resistant, though specific IP ratings are not provided in this document.

Usage Features

General Use:

  • The headlamp is operated by a single power button.
  • A quick press cycles through the modes: Red, White, Low, Medium, High.
  • Holding the power button for three seconds directly activates the High mode.
  • The headlamp will turn off after 10 seconds if it is in an off state and the power button is held for three seconds.
  • The headlamp is designed for use in various conditions, including those where occasional exposure to water is possible.

Battery Installation and Replacement:

  1. Locate the battery compartment on the back of the headlamp.
  2. Unscrew the battery compartment cover by turning it counterclockwise 1/4 turn (Fig. 3).
  3. Remove the battery carriage from the headlamp body by pulling it out from the side or shaking gently (Fig. 4).
  4. Install three AAA batteries in the correct orientation as shown on the battery carriage housing (Fig. 5).
  5. Properly align the battery carriage and then re-load it back into the headlamp body (Fig. 6).
  6. Properly locate the battery door, and then rotate it clockwise 1/4 turn to fully secure it (Fig. 7).
  7. Remove "key" from battery door by pulling gently on the strap buckle.

Important Warnings and Precautions:

  • When using electric appliances, basic precautions should always be followed, including the following:
    • Keep AAA batteries away from small children. If swallowed promptly see a doctor and have the doctor phone (202) 625-3333 collect.
    • Do not install the batteries backwards, follow the + and - symbols as shown in the instructions. Do not charge or put in a fire. Do not mix alkaline, standard, or rechargeable batteries. Do not mix old and new batteries. The batteries may explode or leak causing injury.
    • Do not leave discharged batteries in the product for an extended period of time as this could permanently damage the product.
    • Replace all batteries at the same time.

Maintenance Features

Battery Replacement:

  • The headlamp uses three "AAA" cell batteries.
  • The battery indicator helps determine when batteries need to be replaced (Green: good, Amber: replace soon, Red: replace immediately).
  • Always replace all three batteries at the same time to ensure optimal performance and prevent damage.

Cleaning:

  • The manual does not provide specific cleaning instructions, but general care for electronic devices applies. Avoid submerging the device in water.

Warranty Information: Coleman Brands Pty. Ltd. ("Coleman") warrants that for a period of three (3) years from the date of original retail purchase, this product will be free from defects in material and workmanship. This warranty is valid only for products that are purchased new and unused in Australia and New Zealand, from Coleman or Coleman dealers or retailers.

Exclusions and Limitations:

  • This warranty does not cover: (a) normal wear of the product and/or its parts; (b) parts that are not genuine Coleman® parts, consumables, lost parts and accessories; (c) damage resulting from any of the following: negligent use or misuse of the product, commercial use of the product, use contrary to the operating instructions, disassembly, repair or alteration by anyone other than Coleman or Coleman service centre, the use of a part other than a genuine Coleman® part, or (d) acts of God, such as fire, flood, hurricanes and tornadoes.
  • The warranty is limited to the original retail purchaser and is not transferable.
  • Proof of purchase documentation, such as the original sales receipt or the relevant credit card statement, is required for warranty claims.

Making a Warranty Claim:

  • To make a claim, contact an authorised Coleman retailer or Coleman service centre, or the Coleman customer service centre by visiting www.coleman.com or calling 1800 224 350 or + 61 2 8762 5000.
  • Provide a written description of the problem with the product, together with your contact name, address and telephone number and proof of purchase.
  • Coleman will repair or replace the product, or if the product is no longer available, provide a refund or credit.
  • Coleman is not responsible for costs of transporting the product, including packaging, freight insurance and costs, to an authorised Coleman retailer or Coleman service centre for warranty service.

LEDs and Lifetime:

  • LEDs are lifetime light sources and do not need to be replaced.

Contact Information:

  • Telephone: 1800 224 350 or + 61 2 8762 5000
  • Email: customerservice@colemanaust.com.au
  • Website: www.coleman.com
  • Coleman Brands Pty. Ltd. ABN 74 091 681 195, Suite 201, 12-85 O'Riordan Street, Sydney Corporate Park, Alexandria, NSW 2015 Australia.

Coleman CHT10 Specifications

General IconGeneral
BrandColeman
ModelCHT10
CategoryHeadlamp
LanguageEnglish