7
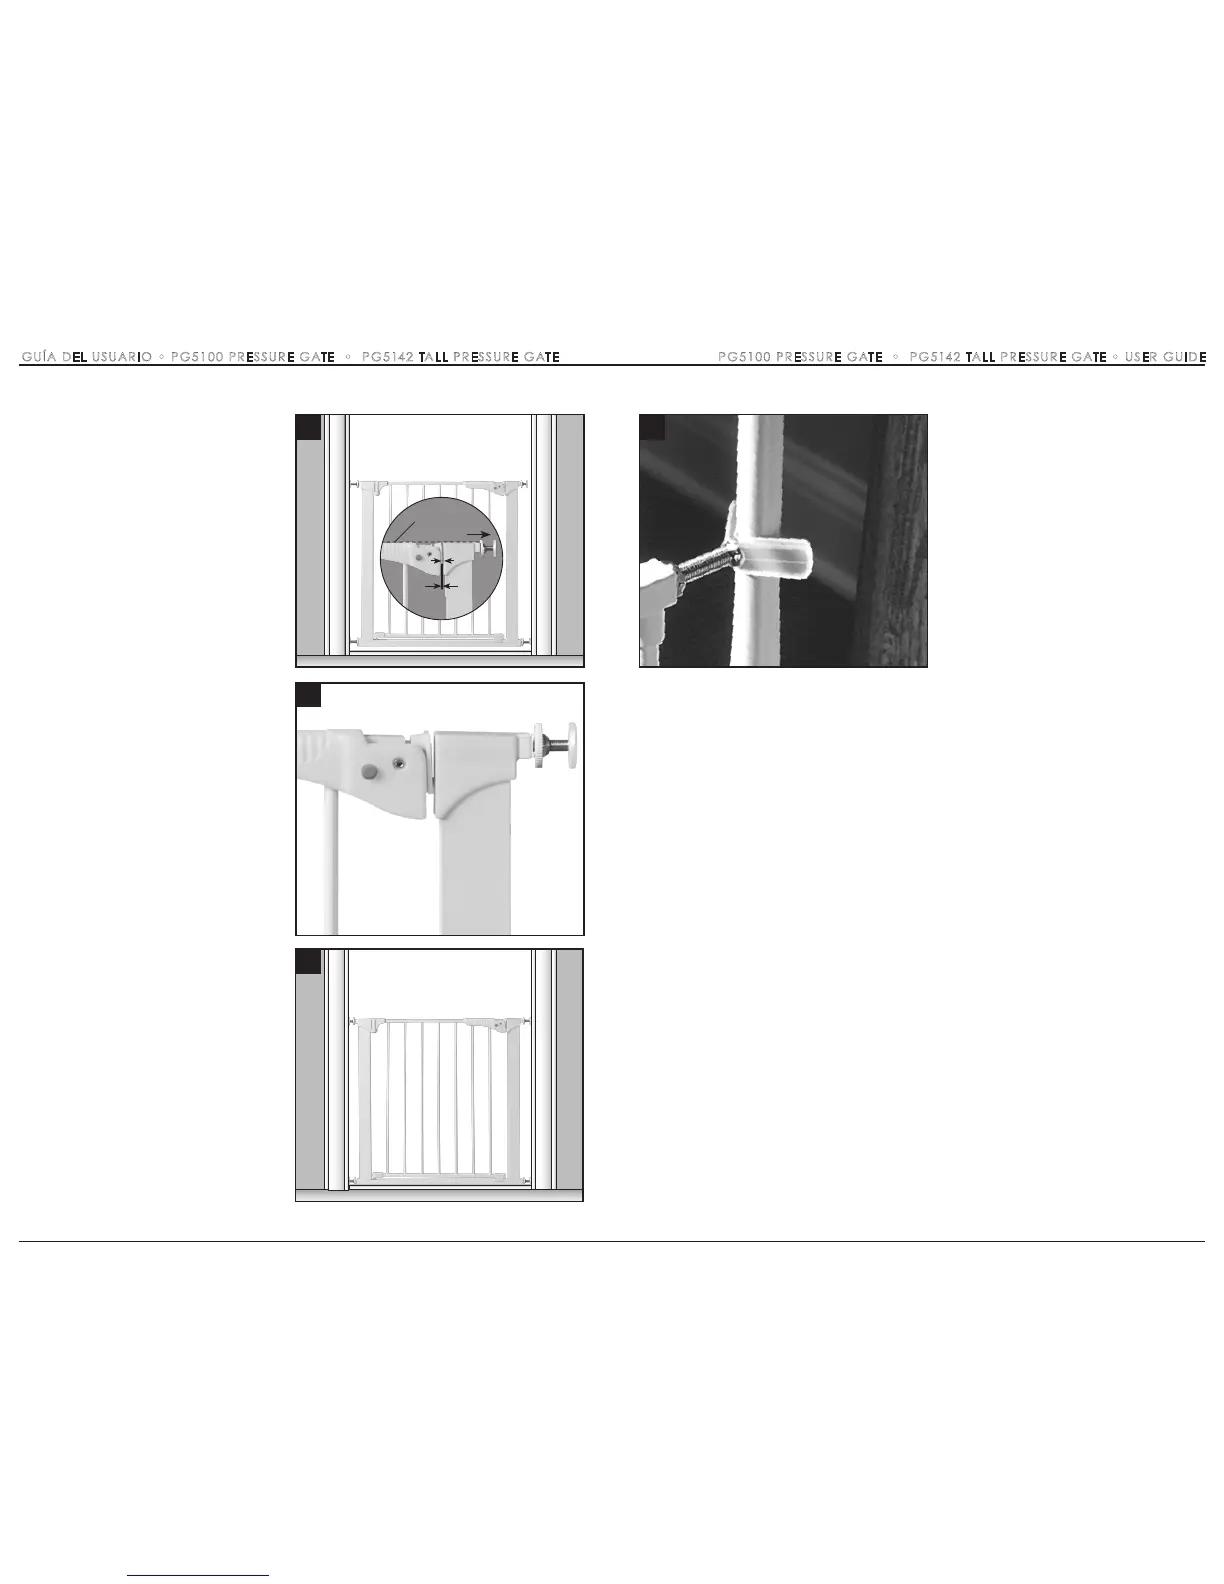
10 Installation Aid - KidCo has available
OPTIONAL Y-Spindles (model GY-1) to
assist in installation when the mounting
surface has a round baluster. These spindles
are used in place of the spindles included
with the basic gate. They may be ordered
through a local Command dealer or direct
from KidCo. Remove handwheel from gate
spindle nut and attach to Y spindle nut
before installing Y spindle into gate end.
10
18
7 Jale el eje superior (a) del lado de la
manija hasta que se sienta tensión y la
distancia entre la placa de presión (f) y la
bisagra de presión (d) sea de 1/32".
8 Cierre la manija y revise todo el herraje.
Apriete la ruedecilla HACIA EL MARCO DE
LA REJA. Si está correctamente instalada,
la reja debe estar firmemente en su lugar.
Una vez abierta, la puerta de acceso debe
operar fácilmente en cualquier dirección.
9 a) Para abrir la puerta: Libere el
mecanismo de bloqueo presionando los
botones (e) mientras levanta la manija. LOS
BOTONES SIEMPRE DEBEN ESTAR
PRESIONADOS AL LEVANTAR LA MANIJA.
Levante la puerta de acceso de manera
que la bisagra quede elevada y la puerta
se abrirá en cualquier dirección.
b) Para cerrar la reja levante la puerta de
acceso: Alinee la placa de presión (f) con la
bisagra de presión (d). Baje la puerta y
presione la manija (g) hacia el pestillo.
8
1
/32”
(a)
(f) (d)
Al ras
7
PG5100 PRESSURE GATE • PG5142 TALL PRESSURE GATE • USER GUIDEGUÍA DEL USUARIO • PG5100 PRESSURE GATE • PG5142 TALL PRESSURE GATE
9
 Loading...