Installation
The Remote Expander should be mounted under the dash in a dry location. The 10 foot cable
attached to the Expander must be able to reach the rear of the Autopilot.
1. Mount the Expander using four fasteners (not provided), suitable for the surface
being used; the fasteners go in the holes in the lips at the case’s bottom edges.
2. Route the cable which is attached to the Expander over to the Autopilot, and plug it
into the Remote connector.
3. Plug up four Remote Controls into the receptacles on the Expander.
2001 Autopilot
If the Remote Expander is plugged into the 2001 Autopilot’s REMOTE 1 receptacle:
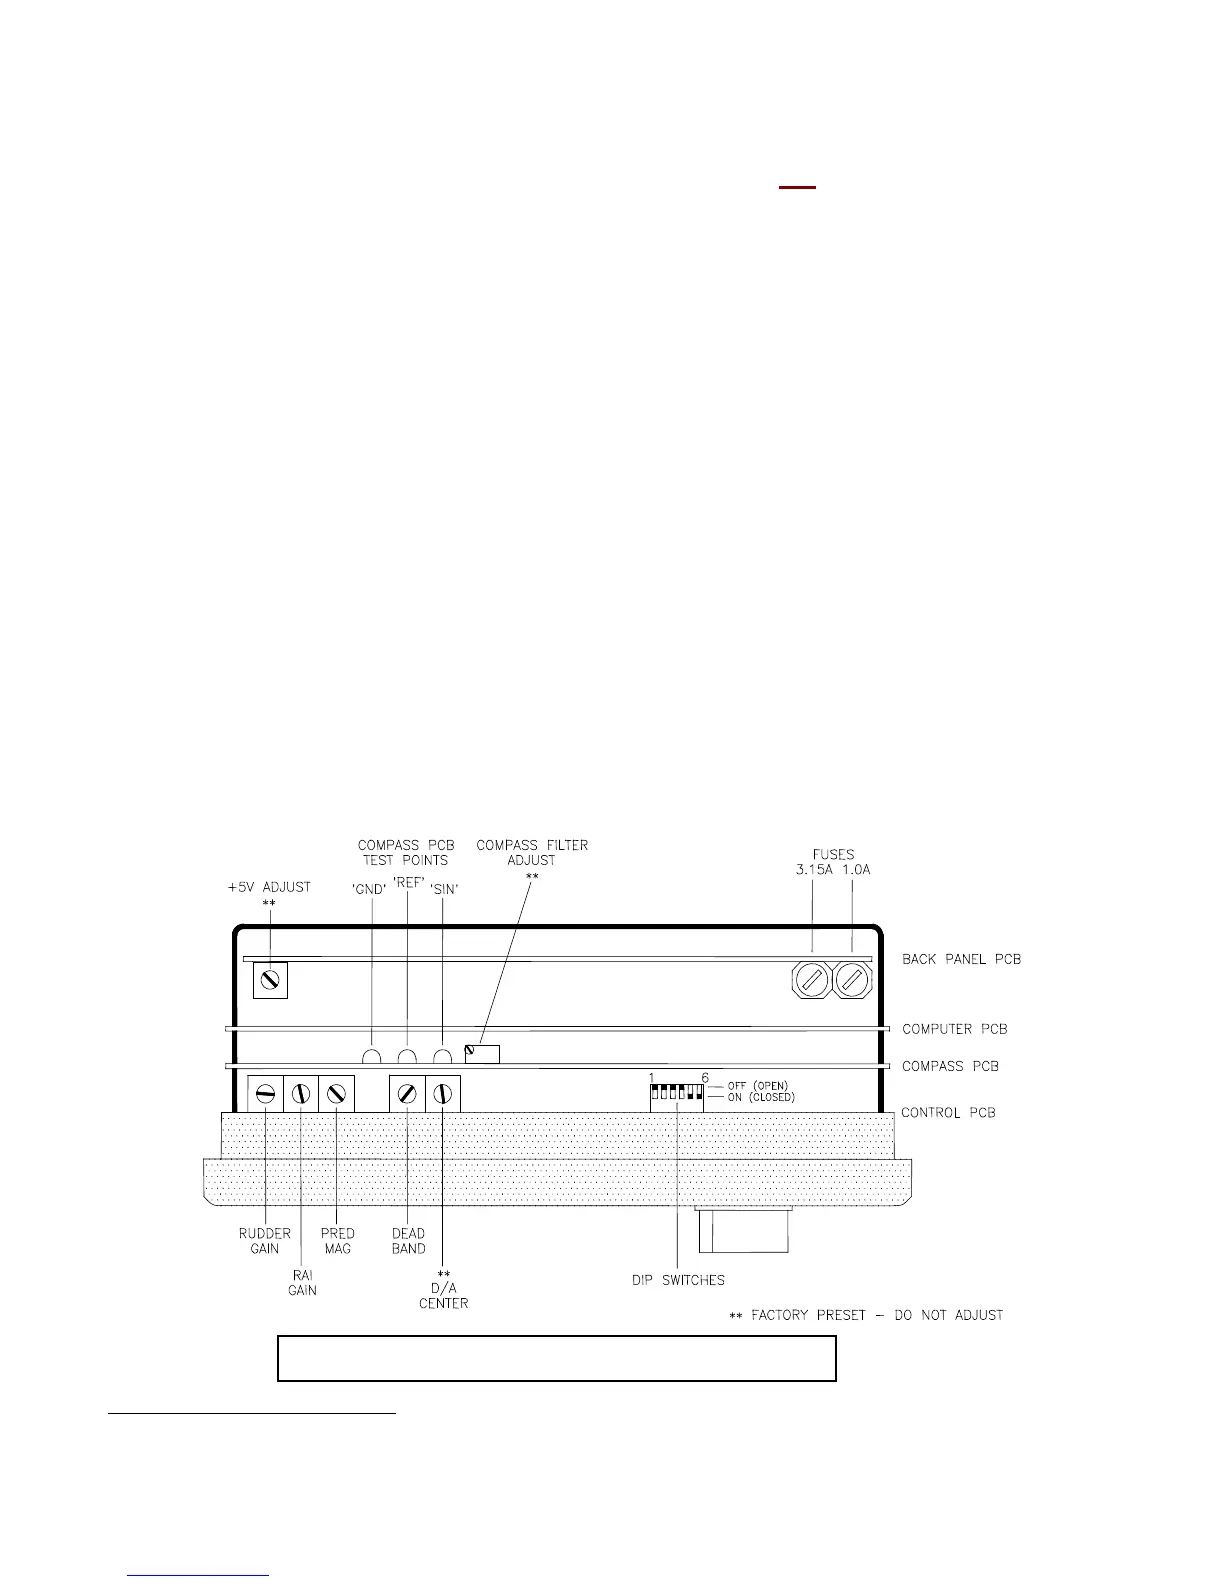
• If all Remotes are the tiller steering type, set DIP Switch 5 to the ON
1
(or CLOSED)
position. Note: you will have to remove the backshell of the 2001 (see the figure
below to locate the DIP switches).
• If all Remotes are the power steering type, set DIP Switch 5 to the OFF (or OPEN)
position.
If the Remote Expander is plugged into the Autopilot’s REMOTE 2 receptacle:
• If all Remotes are the tiller steering type, set DIP Switch 6 to the ON (or CLOSED)
position.
• If all Remotes are the power steering type, set DIP Switch 6 to the OFF (or OPEN)
position.
Top View of a 2001 Autopilot (back shell removed)
1
Both DIP Switches are ON (CLOSED) when the 2001 is shipped from the factory
Document PN 29010042 V1.2 Page 2 of 3
 Loading...