5
3.2 Securing the photovoltaic modules to the frame
Prevent damage to the photovoltaic modules due to incorrect installation.
| Work only in dry conditions.
| Secure the modules against slipping and falling.
| Do not drop the modules.
| Do not hold the module by its socket or connection cables.
| Always carry modules that are to be lifted by two opposite points on the frame.
| Never carry modules by just one part of the frame.
| Do not drop any objects on the module and do not step on it.
| Do not drill the module frame.
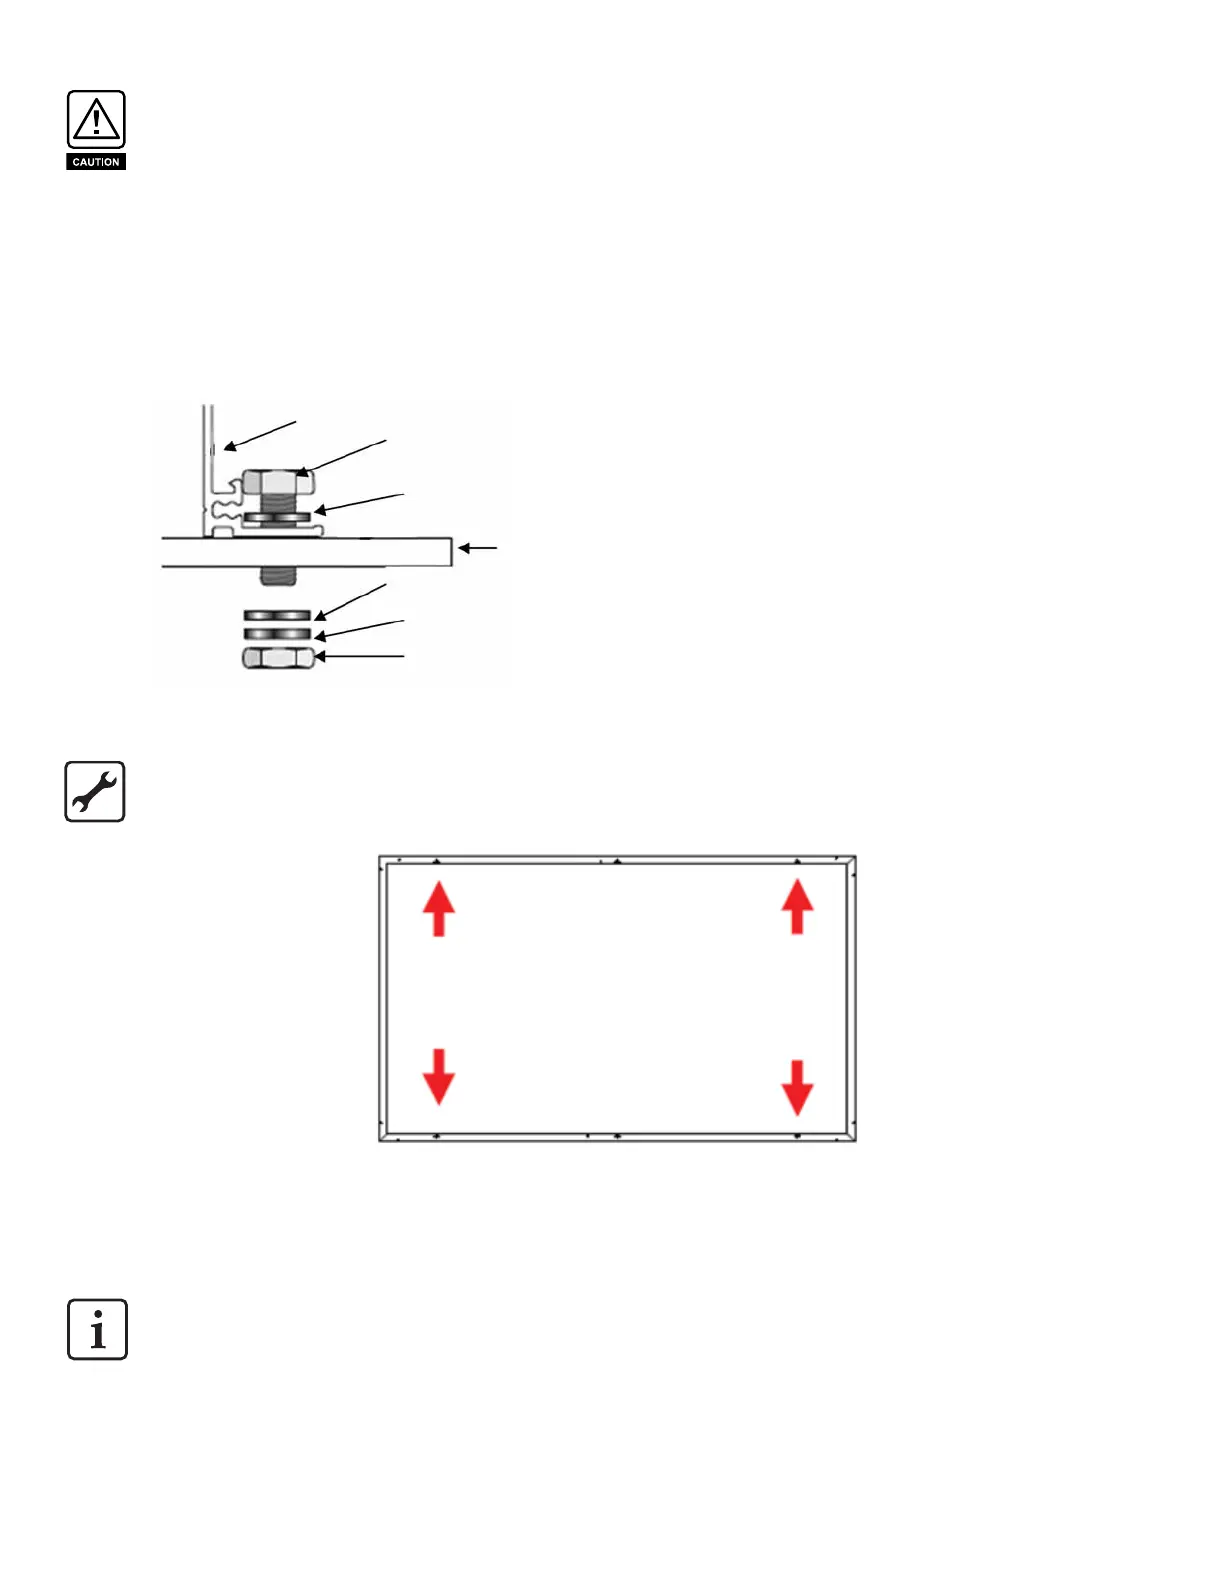
3.2.1 Bolting the photovoltaic module in place
Fig. 3-2: Securing the module with bolts
1. Place the module on the frame.
2. Insert four stainless-steel bolts (M6) through the holes (7x11.5mm) in the frame. For maximum security against
strong winds and snow falls, all six mounting holes should be used to secure the modules.
3. Secure each bolt to the frame with 2 stainless-steel washers, a stainless-steel spring washer or toothed lock washer
and a stainless steel nut (M6).
4. To tighten, a torque wrench is recommended to produce a tightening torque of 15 ~ 20Nm
3.2.2 Clamping the photovoltaic module in place
The module may be clamped only in the permitted clamping areas (see Fig 3-1). The module clamps [1] (see Figure
3-3) must not overlap the glass or shade the module surface [2] and must be a minimum of 40mm or 1-1/2” wide
(contact surface on the frame in a longitudinal direction).
Module Frame
M6 Bolt
M6 Nut
Washer
Washer
Spring Washer
Mounting Structure