Assembly Instructions…
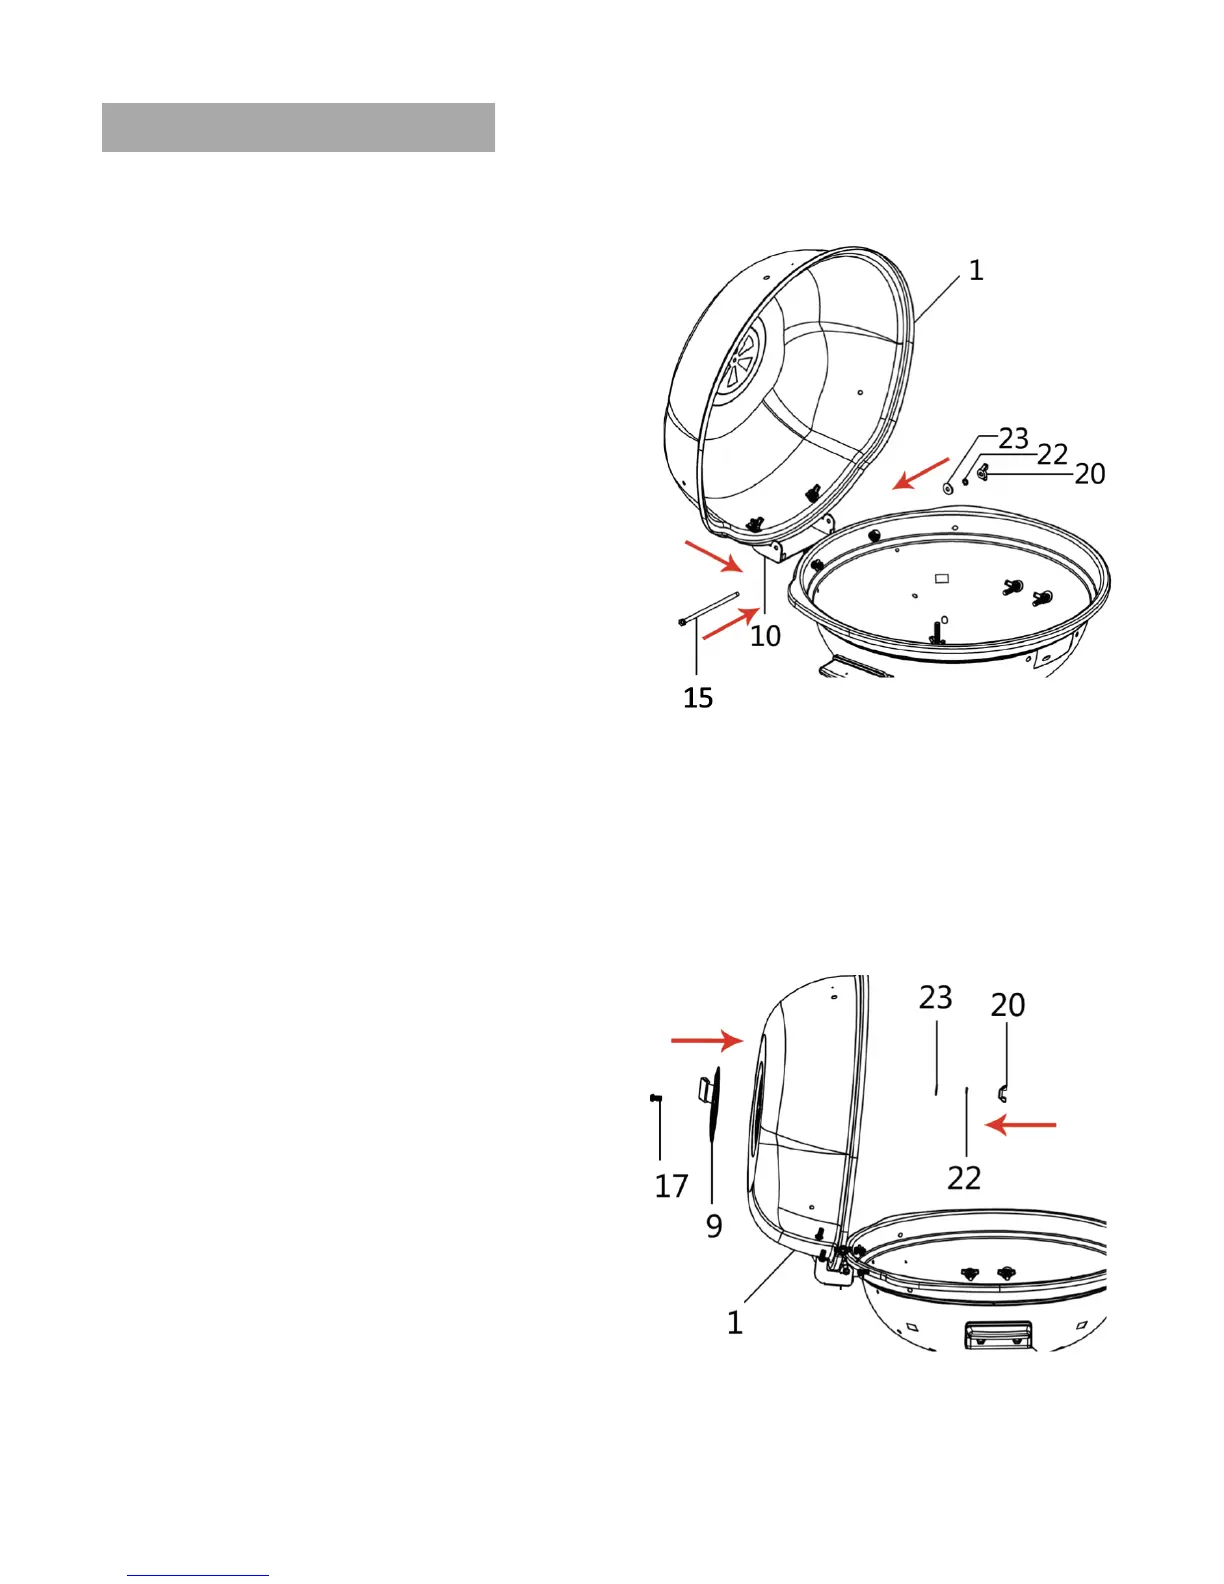
Step 7 – M5*123 Locking Pin (part #15)
Hardware: M5 small wing nut (part #20) – 1 pc
flat washer (part #23) – 1 pc
lock washer (part #22) – 1 pc
Locate the M5*123 Locking Pin, and set aside one (1)
flat washer, one (1) lock washer, and one (1) M5 small
wing nut. Place the Lid on the Bowl as shown here, so
the Lower Hinge Bracket sits inside the Upper Hinge
Bracket, and align the holes. Screw the Locking Pin
through all four (4) holes of the Hinge Brackets. From
the other end, place a flat washer, then lock washer on
the Locking Pin and affix using the small wing nut.
Step 8 – Air Vent (part #9)
Hardware: M5*12 small screw (part #17) – 1 pc
M5 small wing nut (part #20) – 1 pc
flat washer (part #23) – 1 pc
lock washer (part #22) – 1 pc
Locate the Air Vent, and set aside one (1) M5*12
small screw, one (1) flat washer, one (1) lock washer,
and one (1) M5 small wing nut. Place the Air Vent on
the outer middle of the Lid as shown here, and align
the holes. Put the small screw from the outside
through the center of the Lid. From inside the Lid,
place a flat washer then lock washer on the screw
and affix using the small wing nut.