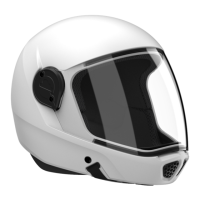
The G4 Helmet is certied according to Standard XP S 72-600 and is designed exclusively for Skydiving
and Wind tunnel use and should not be worn for any other activities. It should not be used on Motorised
and Non-Motorised means of transport. This helmet is intended to reduce the user’s risk of head injury
within the area covered by the helmet This helmet is not a toy. Do not let children wear it while climbing
or doing other activities as there is a risk of hanging/strangulation. For best protection, the helmet must
be properly tted and attached to the user’s head. Read the user’s manual and follow all warnings and
instructions before using the helmet. This helmet is designed to absorb energy of one signicant impact
and should be replaced after such an event. In the event of any impact whether in use or dropped
accidently, the helmet should be replaced. Cookie Composites generally recommends helmet replace-
ment every THREE years. Although this helmet provides some protection it cannot provide complete
protection from all foreseeable impacts. Please use responsibly
Position and Fit
In order for your G4 helmet to perform its functions it must be tted and worn correctly. Follow these
steps to get the correct position and t.
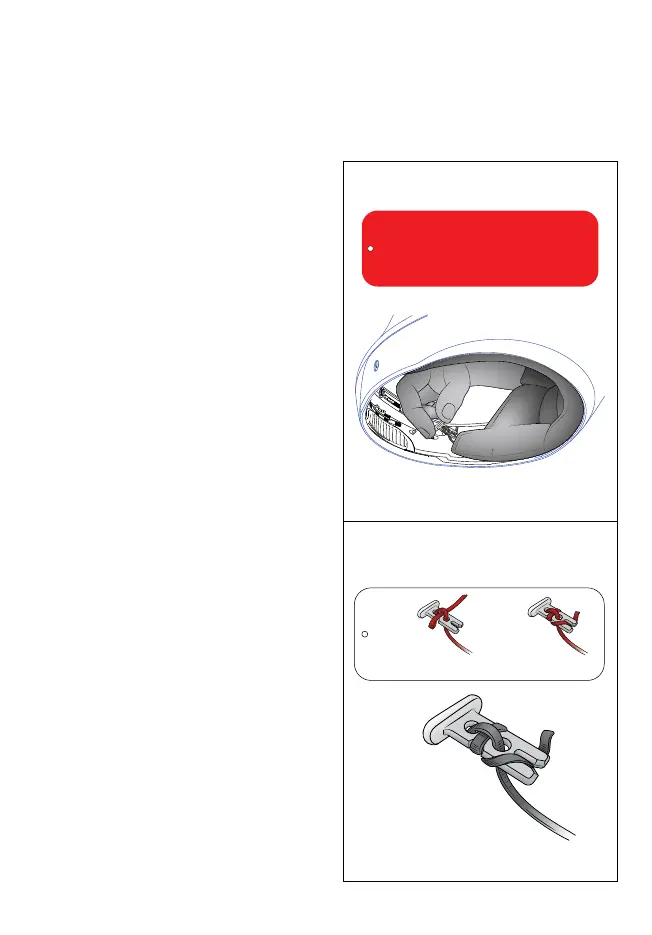
1. Firstly undo the clip beneath the chin and extend the helmet padding at the back of the helmet so
that the liner is fully open Figure 1. Put the helmet on your head and
hold the fabric by the chin area and
rotate the helmet over your face so your chin enters the helmet and the liner sits beneath your chin
Figure2.
2. Grasping the buckle in your right hand, pull the webbing horizontally until the helmet is liner closes
rmly against the back of your head or neck. Now mate the buckle Figure 4. If the buckle is unable to be
fastened or the helmet t is too loose you’ll have to adjust the t using the internal line and anchor
system shown in Figure 5-6.
Figure 5.
Figure 6.
Figure 1.
Figure 2.
Figure 3.
Figure 4.
3. To make this adjustment, locate the RED label axed to the Anchor and pull this away from the cheek pad.
You can either shorten or lengthen the adjustment cord at the anchor depending on your requirements.
Shortening will make the rear skirt tighter on the back of you neck. Lengthening the cord will make the rear
skirt looser . Note that any adjustment should be made at the anchor and not at the strap buckle. After making
your adjustment lock the cord of acording to Figure 6. Tuck the anchor and excess cord into the channel
opening and pull the chinstrap to seat the anchor into position . Once adjusted properly the helmet will t
without the need for further adjustment.
G4 Helmet Ventilation
Figure 7.
Figure 8.
The G4 helmet has a unique ventilation syetem to control the airow within the helmet
HELMET OWNER’S MANUAL
English
HELMET OWNER’S MANUAL
English
To make adjustment
Loosen off the cord.
Once completed.
Lock off cord and reinstall.
ANCHOR
IMPORTANT BEFORE USE
To acheive a correct fit. The rear neck cutain
must be tight against your neck and head when the
chinstrap is fastenend beneath your chin. The cord at the anchor
can be adjusted to ensure the correct fit.
RETURN THE ANCHOR TO HOME POSITION AND CHECK FITTING BEFORE USE
28 29
Wanneer u klaar
bent maakt u het
koord zet u het koord
vast en hermonteert u.
Om de pasvorm
af te stellen los
het bevestingsstuk.
BEVESTIGINGSPUNT
Plaatsing en pasvorm
Voor een optimale werking moet u uw
G4-helm op de correcte manier opzetten en
dragen. Volg de onderstaande stappen op
om de helm correct te plaatsen voor een
goede pasvorm.
1. Maak eerst de clip onder de kin los en
houd de wattering achter in de helm
naar buiten, zodat de voering volledig is
geopend. Figuur Zet de helm op uw hoofd
en houd de helm vast bij de stof in het
kingedeelte. Trek de helm over uw gezicht,
zodat uw kin in de helm zit en de voering
onder uw kin komt. Figuur 2.
2. Houd de riem vast met uw rechterhand,
trek de webbing horizontaal tot de
helmvoering strak tegen uw hoofd of nek
zit. Zet nu de riem vast. Figuur 4. Als u de
riem niet kunt sluiten of als de helm te los
zit, moet u de pasvorm afstellen met het
koord bij het bevestigingspunt, zoals in
figuren 5 en 6 wordt getoond.
3. Om de pasvorm af te stellen, zoekt
u het RODE label met A dat aan het
bevestigingspunt is bevestigd en trekt u
dit label weg van de voering bij de wang.
U kunt het koord korter of langer maken
bij het bevestigingspunt, voor de gewenste
pasvorm. Als u het koord korter maakt,
wordt de wattering bij de nek strakker.
Als u het koord langer maakt, wordt de
wattering bij de nek losser. Let op: de
pasvorm moet bij het bevestigingspunt
worden afgesteld en niet bij de riem.
Na het afstellen van de pasvorm, zet
u het koord vast. Zie figuur 6. Stop het
bevestigingspunt en de rest van het koord
in de opening en trek de kinriem aan om
de het bevestigingspunt vast te zetten.
Wanneer u de helm correct hebt afgesteld,
hoeft u deze niet nogmaals af te stellen.
Figuur 6.
Figuur 5.
GEBRUIKERSHANDLEIDING
Nederlands
BELANGRIJK VÓÓR GEBRUIK
Voor een goede pasvorm moet de nekbescherming
strak tegen uw nek en hoofd zitten wanneer de kinriem onder
uw kin is vastgemaakt. Het koord bij het bevestigingspunt kunt
u gebruiken om de pasvorm af te stellen.
ZET HET BEVESTIGINGSPUNT TERUG IN DE BEGINPOSITIE
EN CONTROLEER DE FITTIN.
 Loading...