Do you have a question about the Cooper RANGER Series and is the answer not in the manual?
Lists required hand tools like screwdrivers, wrenches, and Teflon tape for installation.
Instructions on covering the standpipe, filling with water, and slowly adding sand.
Step-by-step guide for attaching the dial valve, clamp, and pressure gauge.
Details on making final connections for return, suction, and waste lines.
Instructions to connect electricals as per the pump owner's manual.
Checks connections, primes pump, and runs system on backwash to remove impurities.
Sets valve to rinse, then filter position for normal operation.
Notes initial pressure and identifies when to backwash based on pressure rise.
Explains FILTER for normal cleaning and BACKWASH for cleaning the sand bed.
Describes RINSE, WASTE for bypassing filter, and RECIRCULATE functions.
Warns against running the pump with the valve in the CLOSED position.
Guidance on vacuuming directly into the filter or using the waste position.
Recommends using qualified technicians for all service and repairs.
Steps for winterizing, including draining, opening valve, and covering the filter.
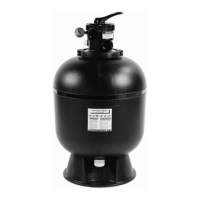
This document is an owner's manual for the Ranger® Series Sand Filter, a device designed for filtering swimming pool water. The manual provides comprehensive instructions for installation, operation, and maintenance, ensuring many years of trouble-free use.
The Ranger® Series Sand Filter operates by using special filter sand to remove dirt and debris particles from pool water. Water is pumped through the piping system and directed by a 6-position dial valve into the filter. As the water passes through the sand bed, impurities are trapped, and clean water is returned to the swimming pool.
Over time, as dirt and debris accumulate in the sand bed, the pressure within the filter rises. This indicates that it's time to "backwash" or clean the filter. During backwashing, the 6-position valve reverses the water flow. Water enters the sand bed from the bottom, flows upwards, dislodging accumulated dirt and debris, and exits through the 6-position valve to a waste line. After backwashing, the filter is set to "rinse" and then back to "filter" to resume normal operation.
The filter features a 6-position dial valve, which is central to its operation. The positions include:
A key operational safety instruction is to always depress the valve handle before rotating it to change positions and never change dial valve positions with the pump running. All suction and discharge valves must be open when starting the system to prevent property damage, personal injury, or death.
Vacuuming can generally be done directly into the filter unless there is a very heavy dirt load, in which case it should be performed with the valve in the "WASTE" position.
Installation of the filter requires only hand tools such as screwdrivers, wrenches, and Teflon tape. The filter sand is loaded through the top of the filter tank, with a clear plastic sand disc covering the standpipe to prevent damage to the laterals. The tank should be half-filled with water before adding sand to further protect the laterals. After adding the recommended amount of sand, the disc is removed, and the sand bed is leveled.
The 6-position dial valve assembly involves placing the valve on top of the filter tank with a large o-ring seated in the groove, gently pushing it onto the standpipe. The valve clamp is then secured around the valve flange, but not completely tightened until all plumbing connections are made. The pressure gauge is carefully screwed into its designated opening, with one or two wraps of Teflon tape, ensuring not to overtighten it. Pump and return connections to the valve ports should also be hand-tightened with a quarter turn from a wrench, again avoiding overtightening. Once all plumbing is in place, the valve clamp is fully tightened.
For optimal pool water clarity, the manual emphasizes that crystal clear water is a result of proper water chemistry and adequate filtration. The sand filter is designed for continuous operation, though it may not always be necessary. It is recommended to run the filter long enough to clean the entire volume of the pool water daily.
For service and repairs, W. Cooper Inc. recommends that only qualified service technicians perform any work on the sand filter or pump. Returns to the manufacturer without authorized permission are not accepted.
Winterizing instructions include turning off the pump once the pool is drained, placing the valve in a position between settings to allow air into the filter, removing drain plugs from the filter and piping, and storing all drain plugs for the winter. The filter should be covered with plastic or a tarpaulin to protect it from the elements.
The manual also includes general pool safety tips, such as installing a safety enclosure, supervising children, having rescue equipment, learning CPR, teaching children to swim, avoiding swimming alone or in poor visibility, storing chemicals safely, and keeping electrical equipment away from children.
| Series | RANGER |
|---|---|
| Category | Water Filtration Systems |
| Temperature Range | 40-100°F |
| Connection Size | 1" NPT |
| Filter Media | Activated Carbon |