15 16
Attaching the lines
red - left
Kite
Sensor 2 Bar
1 2 3
WARNING
Always check all lines and the correct attach-
ment of all lines to the kite prior to ying your kite!
LINE ATTACHMENT TO THE KITE
To avoid mistakes when connecting the
lines to the kite, the Sensor 2 Bar lines are
colour coded and have alternating posi-
tions for the loops and knots. This ensu-
res that there is only one possible way to
attach the lines.
PREFLIGHT CHECKLIST
1. Make sure your launch is open, FREE OF
DOWNWIND BYSTANDERS, hard objects,
nearby power lines, buildings and walls,
within at least 200 ft. (60 m), and preferably
more. Some riders have needed in excess of
500 ft. (170 m), to regain control in violent
dragging or loftings. Avoid kiteboarding
near airports and in low ight path areas,
complaints have led to restricted access in
some areas.
2. Check to see what kite size other kite-
boarders are rigging and get their input on
conditions. Do not rig too large a kite for
conditions and carefully consider advice of
more experienced riders. Failure to act on
prudent advice has cost some riders severe
injury.
3. Check your kite for tears or leaky blad-
ders. If you have leaky bladders or tears in
your kite, repair them before ying.
4. Check ALL kite, harness, control bar li-
nes, webbing, pigtails, bridles, the chicken
loop and leaders for knots, wear or abrasi-
ons. If the line sheathing shows
any breaks, replace them. The pigtails
should be replaced no less frequently than
every 6 months on inatable kites. Inspect
and test all your quick releases.
5. Make sure your ying lines are equal as
they will stretch unevenly with use. If they
have knots that can´t be easily untied, re-
place your ight lines.
6. Walk down your lines and examine them
carefully. Just before launch pick your bar
up and carefully look down the lines for
twists and tangles that could cause the kite
to be dangerously uncontrollable. While
you are holding your bar up look down the
lines, shake your bar to make sure the cen-
ter lines are connected to the leading edge
of the kite. Be particularly careful, slow and
methodical in high winds. Multiple, careful
preighting in higher winds is strongly ad-
vised.
Inate the kite to 7–8 psi and close the fast-
pump-clamps properly.
To depower the kite with the adjuster, al-
ways keep a little tension on the backlines.
Before starting the kite you should always
check all bar safety systems and feel com-
fortable with all features on the bar.
Double-check the weather conditions and if
you´re in doubt, don´t go out!
Have fun and enjoy your safe ride!
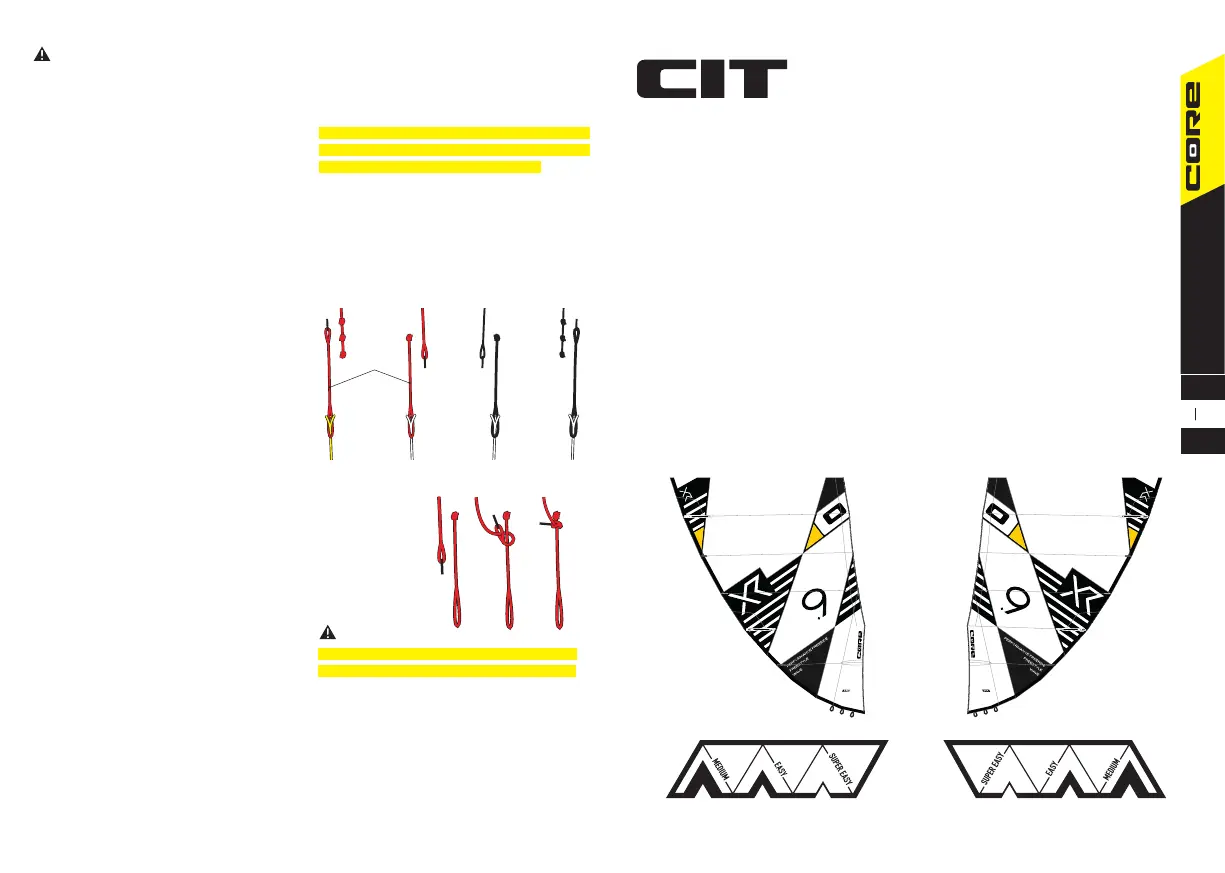
Alignment of the lines
Each CORE kite is delivered with the
optimum all-round trim settings. You
are however able to trim your CORE
kite to suit your personal preferences
and requirements.
CORE INTELLIGENT TRIM SYSTEM
TRIMMING THE TURNING SPEED
You are able to change the turning speed
of the kite at the kite tip. The closer the y-
ing lines are attached to the kite tip, the
faster your kite will turn.
Unhooked wakestylers and beginners select
the front position for medium turning speed.
For freeriders we would recommend the
middle setting for quick turning speed.
The wave riding mode – the back position
– with the quickest turning speed is reser-
ved for experts.
Short manual
XR6
EN DE
FR
 Loading...