Do you have a question about the Corghi Artiglio Master J and is the answer not in the manual?
Fields for recording user and machine details like name, address, and contact information.
Covers safety measures, hazard identification, and operative safety procedures for training.
Details checks for machine maintenance and performance.
Includes procedures for clamping, bead breaking, demounting, and mounting tires.
Information on using accessories and the correct inflating procedure.
Overview of the manual's purpose, scope, and assumptions regarding user knowledge.
Critical safety information, hazard identification, general warnings, label positioning, and electrical/pneumatic connection requirements.
Specifications and technical details of the machine, including size ranges, power, and capacity.
Information and precautions regarding air pressure limits and safety during inflation.
Notes on specific rim and tyre types that may require special procedures.
Defines the proper and intended use of the tyre changer, excluding motorcycle wheels.
Requirements and responsibilities for operator training, qualification, and skill maintenance.
Essential pre-operation checks to ensure machine safety and functionality.
Guidelines for safe operation, identifying issues, and emergency shutdown procedures.
Steps for safely removing the machine from its packaging and checking for transport damage.
Proper methods for lifting and moving the machine from its pallet and during installation.
Detailed steps for installing the machine, filter unit, and optional lifter components.
Illustrates the operator's typical position during various work phases.
Provides the physical dimensions of the tyre changer, with and without the lifter.
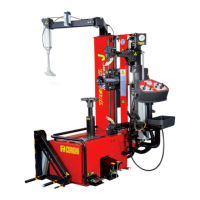
Identifies and lists the main parts and operating elements of the machine, referencing Figure 19A.
Details the various controls of the machine, including the ON/OFF switch and control console.
Description of the main power switch for operating the machine.
Explains the layout and functions of the main control panel with buttons and displays.
Describes the function and operation of the foot pedals for inflation and turntable rotation.
Details the operation of the optional wheel lifter pedals for lifting and lowering.
Explains the pressure gauge for monitoring air pressure and the deflation control button.
Information on available optional accessories and where to find a complete list.
Essential checks to perform before starting machine operation, including pressure and connections.
Procedure for powering up the tyre changer using the main switch.
Guidance on orienting the wheel on the turntable for optimal demounting based on rim dimensions.
Instructions on how to safely load a wheel onto the machine, using lift pedals correctly.
Steps for securely fixing the wheel onto the turntable using the clamping handle and cone.
Specific clamping procedure for the automatic version of the turntable using pedal and centring handle.
How to input and configure wheel diameter data using the keypad and display.
Procedure for completely deflating the tyre using the valve.
Special procedures for demounting and mounting UHP and Run Flat tyres, referencing external documentation.
Instructions and safety regulations for inflating tyres, including explosion risks.
Critical safety rules for tyre inflation to prevent explosions and ensure proper bead seating.
Detailed procedure for inflating the tyre, checking pressure, and positioning beads.
Specific inflation steps for the TI version, potentially using quick bead insertion.
Steps to release the wheel from the turntable using handles or a pedal for automatic versions.
Steps to safely remove the wheel from the lifting mechanism using the lifter pedals.
Explanation of error codes and diagnostic messages displayed by the machine for troubleshooting.
Recommended maintenance schedule and tasks for filter units, carriage guides, and screws.
Details and illustrations of fixing accessories used with standard rims.
Details and illustrations of fixing accessories used with rims having embedded holes.
Details and illustrations of fixing accessories used with reverse rims.
Details and illustrations of fixing accessories used with rims for vans.
Details and illustrations of fixing accessories used with rims lacking a central hole.
Details and illustrations of fixing accessories used with rims featuring a central hole.
| Brand | Corghi |
|---|---|
| Model | Artiglio Master J |
| Category | Industrial Equipment |
| Language | English |