CTBMM100BR, -BK, -BL, -NY, -RG, -RD 2 Rev. 7/21/15
Due to the weight of this cart we recommend that TWO PEOPLE work
together on the assembly. This cart weighs approximately 170 lbs,
please use caution during assembly.
Step 1: Locate the key tied to the bottom tray. Using the key, open
the lid and remove the caster box from the bottom drawer.
Once removed make sure all drawers are completely
closed and the inside lever is in the locked position. Close
the top lid and lock.
Step 2: Lay out a work surface using the protective foam provided.
Once this surface is secure gently turn the cart onto its lid.
(logo will be facing the foam)
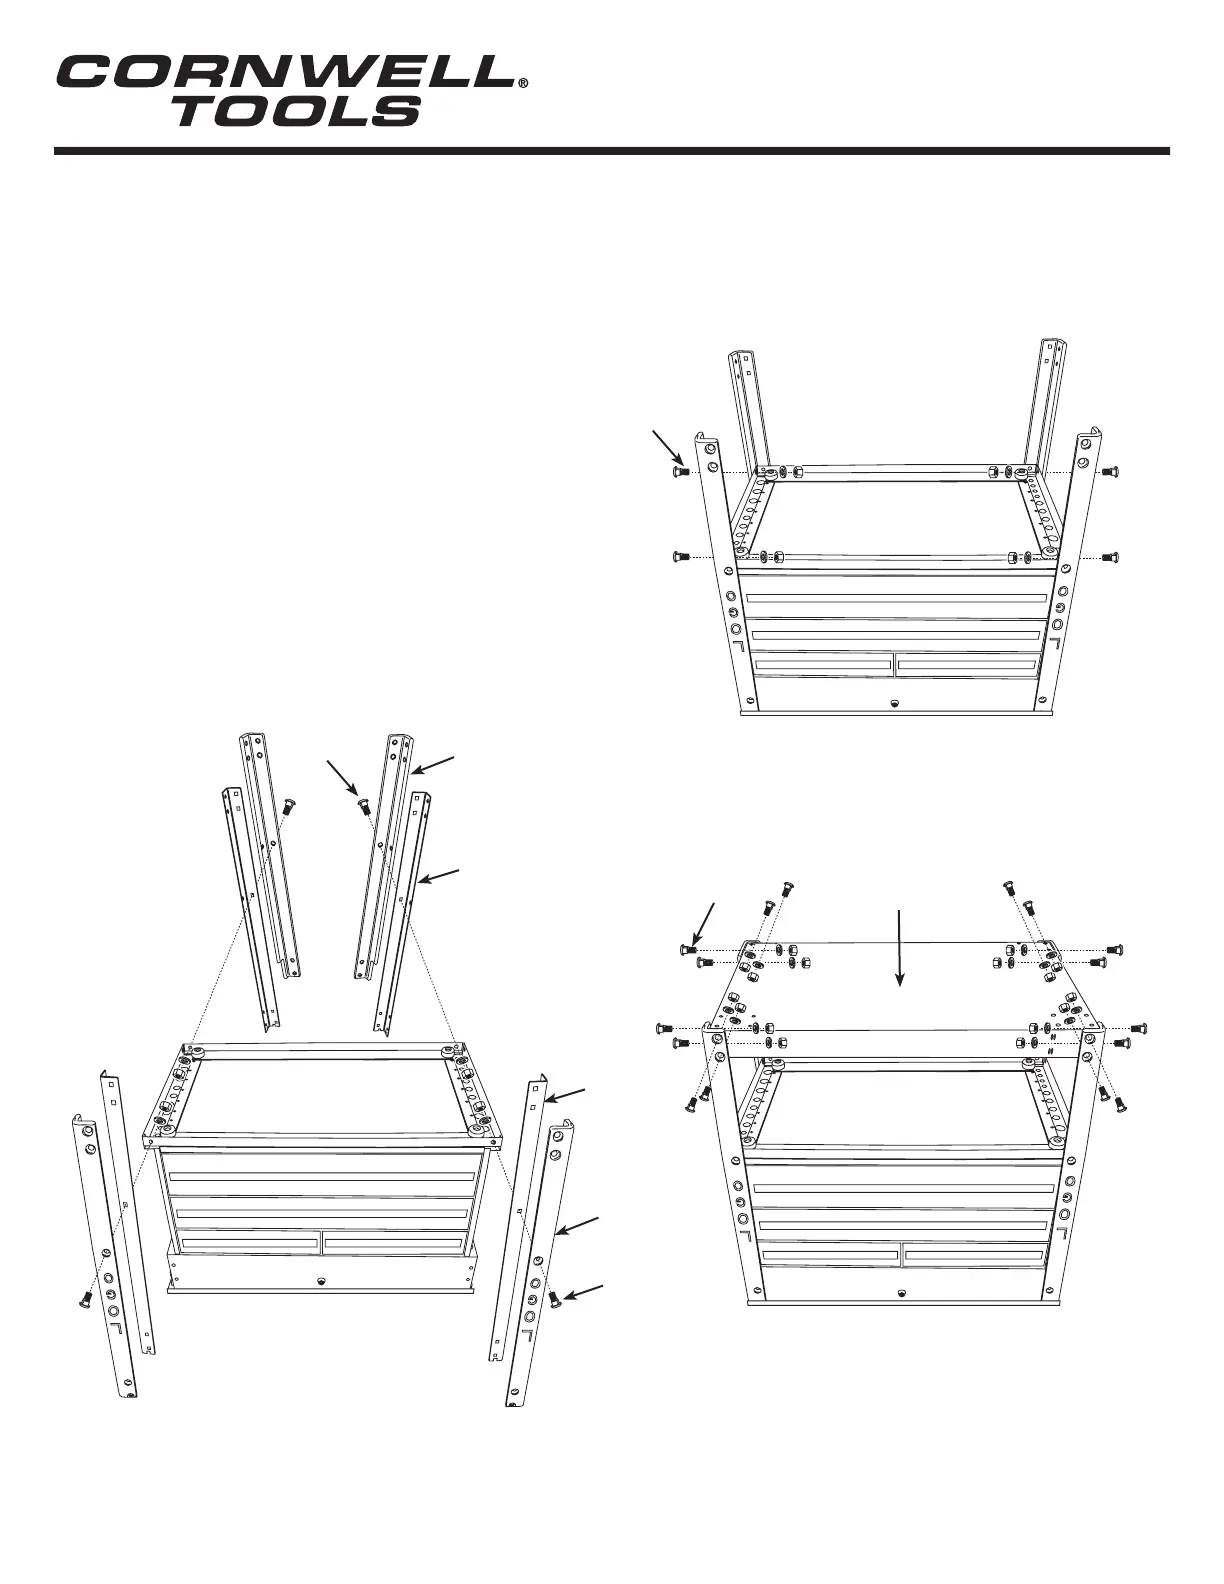
Step 3: (Before assembling the legs, remove the cable tie holding
the bumper in place) Insert the front leg (#7), labeled FL
or FR into top lip of the cart. Then place the Front bumper
(#14 with Cornwell Logo) over the leg aligning the center
bolt holes. With holes aligned insert stove bolt (#1a) and
finger tighten with nyloc nut and washer
Step 4: Install back leg (#7) labeled BL or BR and bumper (#14
without logo) following the same procedure as above.
Note: Make sure the back leg is inside the hinge rivet.
Otherwise the holes will not line up during assembly!!!
ASSEMBly INSTRUCTIONS
Step 8: Insert bottom shelf (#23) between the four legs flat side
facing up towards the ceiling. Insert sixteen stove bolts
(#1a) and completely tighten.
Step 5: Repeat steps 3 & 4 to mount the legs on the opposite side.
Step 6: Completely tighten the 8 bolts just inserted.
Step 7: Insert bottom shelf (#23) between the four legs flat side
facing up towards the ceiling. Insert sixteen stove bolts
(#1a) and completely tighten.
1a
23
1a
1a
14
7
1a
14
7
CTBMM100BR, Bk, Bl, Ny, RG, RD
Pro Series Service Cart
 Loading...