chimney back inside (5), chimney top (4), four chimney top sides (4), two chimney trims (5), four
chimney flute fronts (10), and four chimney flute sides (10).
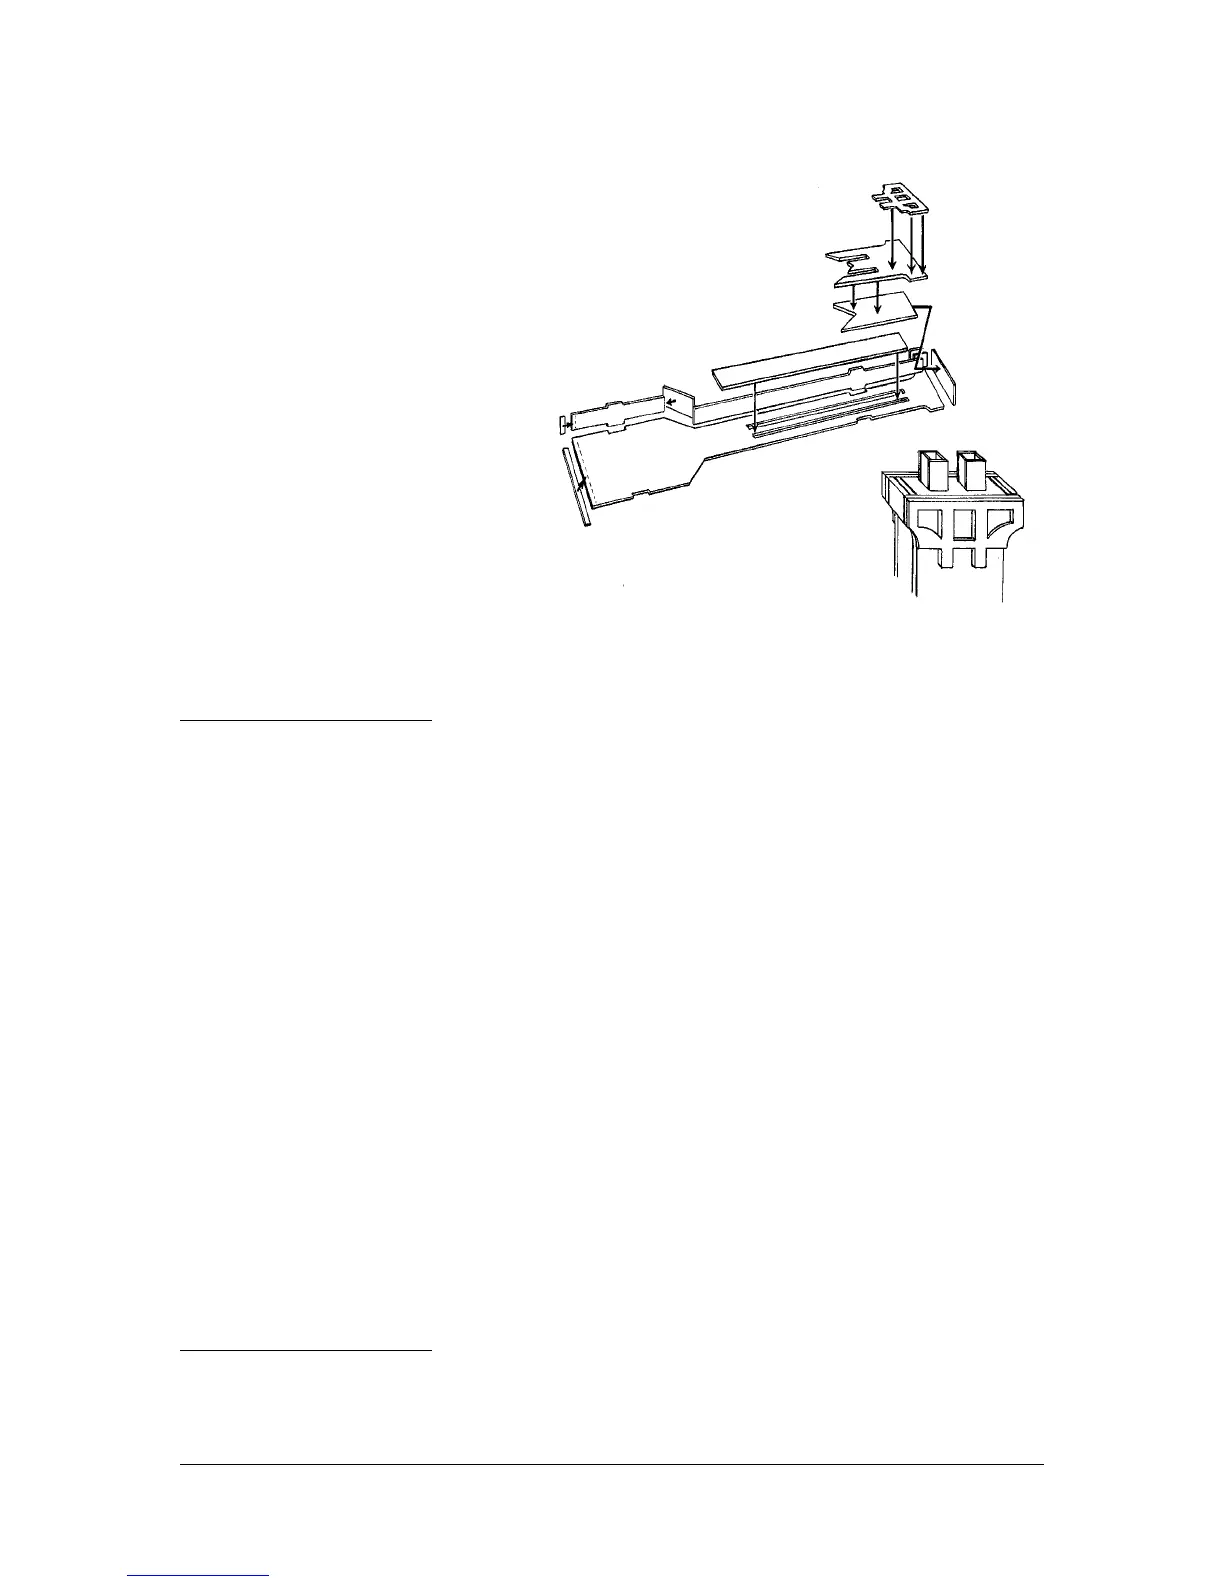
7. Using tabs and slots as guides, glue the
chimney sides to the chimney front. The
small angled side piece is wider than the
other side pieces. Glue them with back
edges flush, the front and bottom edges will
hang over a little. Position the chimney
front inside piece on the inside of the
chimney covering the two long “slots”.
Position and glue the chimney back inside
piece to the chimney back in the same
manner. Glue the chimney top to the
chimney front assembly keeping it flush
with the top edge of front. Sandwich two
chimney sides together by gluing and glue to
each side if chimney. Glue chimney back to
front keeping to edges flush. Position
chimney trims on front and back keeping top
edges flush - glue.
8. Glue two chimney flute sides to two flute fronts, (making a little box). Repeat for second flute.
Position flutes on chimney top and glue in place. Set entire chimney assembly aside, do not glue onto
house yet.
6 The Willow
F) ASSEMBLY OF EXTERIOR WINDOW CASINGS, FRONT STEPS, FRONT DOOR
CASING, AND HOUSE TRIM
1. R&P eleven exterior window casings (11), eleven window casing bottoms (10). Position and glue
E) ASSEMBLY OF INTERIOR WINDOWS, INTERIOR DOOR TRIM, AND STAIRWAY
TRIM
1. R&P twenty two double hung window sashes (3,5,7) and eight arched window casings (8,9). Remove
window from plastic sheet by carefully cutting along the dotted lines. Glue plastic windows to back side
of each window sash. Only four of the arched window casings will get plastic glued to them, these are
the exterior casings. The four arched windows without plastic will be used as interior casings.
2. R&P eleven window sills (10), eleven interior window casings (10). Position and glue one window
sash over the bottom opening of each window on the inside of the house. Position and glue one window
casing around each window sash so that bottom edges are flush. Position and glue one window sill
centered along bottom edge of each window sash. Position and glue four arched interior window
casings - these will have no plastic! The arched windows do not get window sills.
3. R&P four second floor interior door trims (1). Position and glue around second floor doorways.
4. R&P two first floor interior door trims (5) - one of these is “L” shaped. R&P three pieces of interior
front door trim (1). Position and glue the three front door trims on interior of front door. Position and
glue “L” shaped door trim around stair side of interior door and remaining trim on opposite side of
interior door.
5. R&P two second floor stairway railings (6) and three stairway hand rails. Position and glue the two
railings along edge of opening for stairway on second floor. Position and glue a hand railing centered
over each of these railings. Position longest hand rail centered along entire stairway railing, notched
edge to the top of the staircase.
 Loading...