FIRST TIME START UP
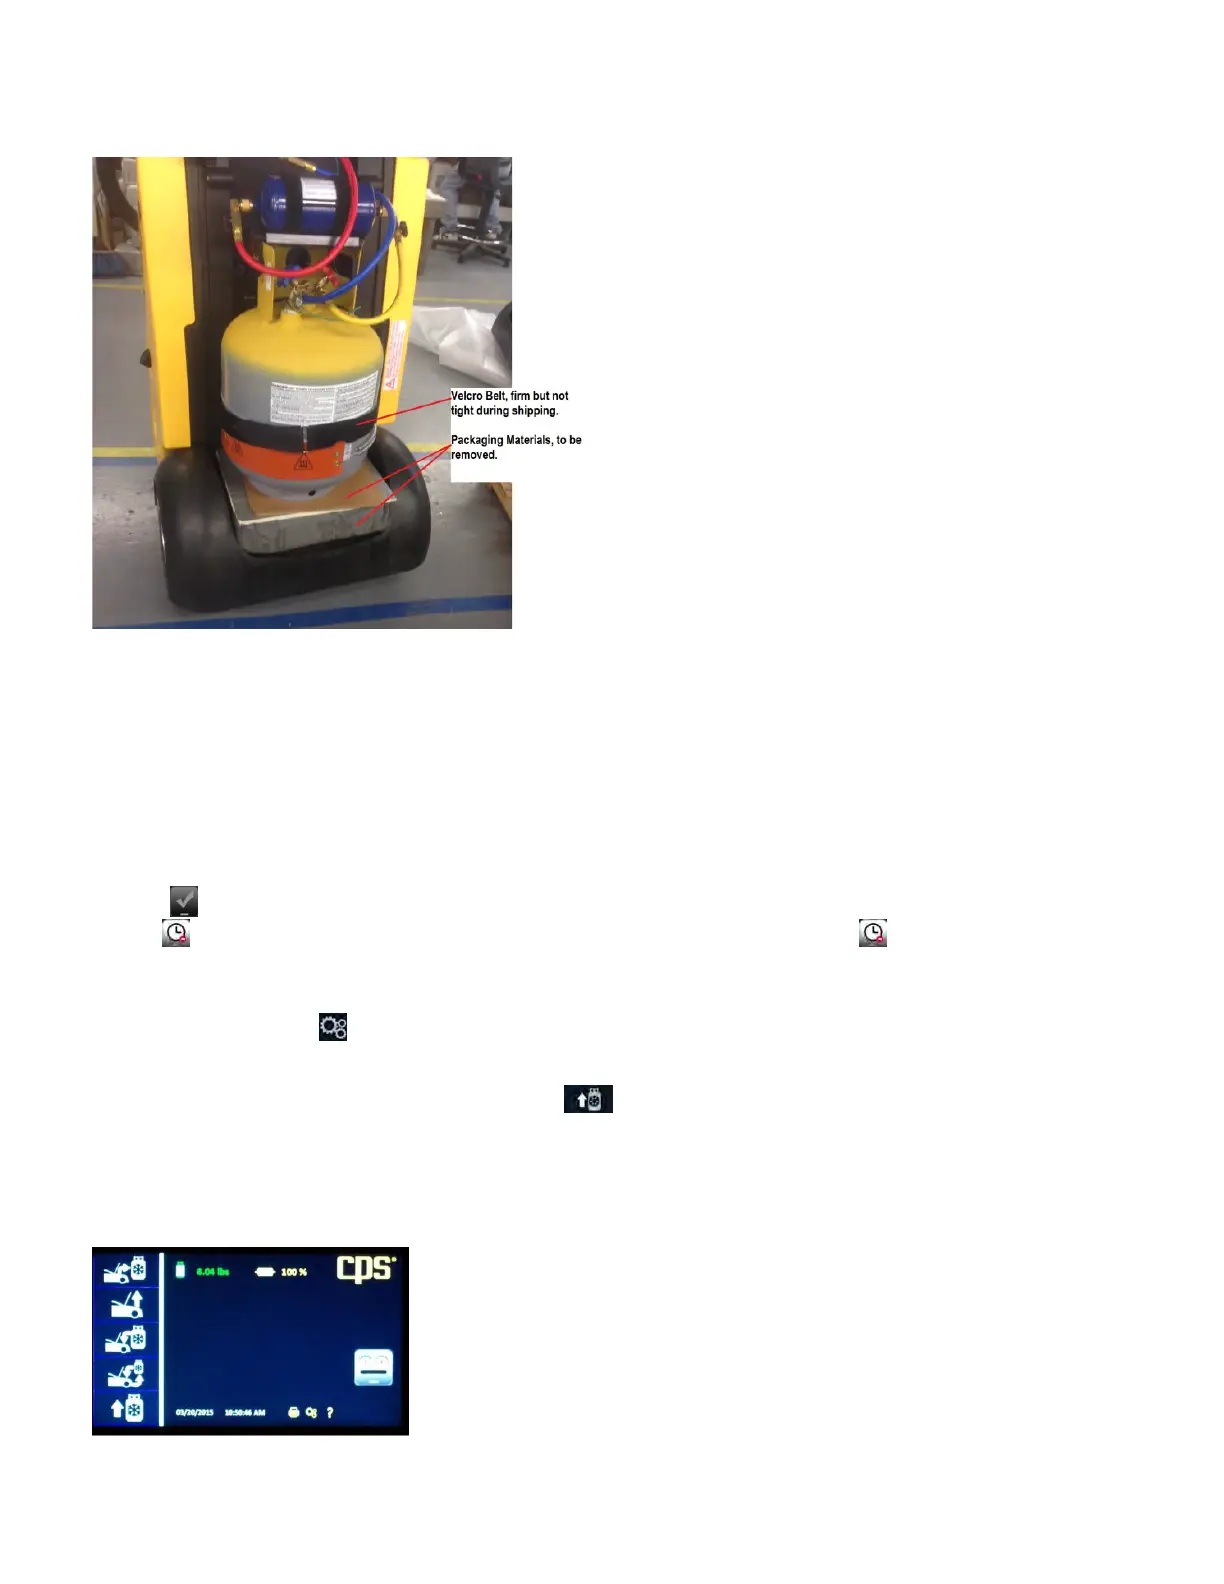
1. Remove the black tank cover on the back of the unit by unscrewing the two thumb screws located on each side of the cover. Remove the
protective packaging from between the storage tank and the scale. See Figure A below.
Figure A: Shipping support to be removed before start up.
2. Plug the unit into the proper power source. Push the blue lighted power switch. All functions will be operated directly from the 7” Touch
Screen.
3. Connect service hoses to the machine.
4. Install oil purge bottle
5. Press the key to enter your shop information into your unit. This information will appear on certain screens and on print outs.
Pressing will cause the unit to proceed with set up without personalizing your unit. Selecting will cause the unit to ask you later
if you want personalize your FX1234.
6. When personalization has been completed, press OK and the unit will proceed through self-calibration. When complete, the Home
screen will appear.
7. Select the Gear icon to enter mode to change the default language, Date/Time and units of measure. The FX1234 will allow you to
modify the weight unit of measure prior to entering the charge amount. This feature anticipates that the vehicle may be asking for a unit
of measure that is not your selected default.
8. Fill the internal storage tank. From the Home screen, select Connect the red high side hose to a virgin, or recycled refrigerant tank
using the supplied tank adapter. Refrigerant will be moved from the external tank to the internal tank in a liquid state. Therefore, a virgin
tank may be turned upside down, or if filling from a recycled tank, the hose may be connected to the “liquid” port. Follow the directions
on the FX display.
Congratulations, your FX Series Refrigerant Management Center is ready to use.
Note: Each time the machine is turned on it MUST be disconnected from a vehicle
6
 Loading...