Do you have a question about the Craftsman 351.226711 and is the answer not in the manual?
Guidelines for operator attire, hair, and personal protective equipment before using power tools.
Ensuring a clean, well-lit, and safe work environment for power tool operation.
Instructions on unplugging, consulting the manual, and keeping tools clean for safe operation.
Advice on using the right tool, avoiding force, using accessories, and safe handling practices.
Ensuring the sander is fully assembled and fasteners are tight before operation.
Instructions on belt direction, disc sanding side, and supporting the workpiece.
Guidelines on avoiding forcing the motor, overheating work, and not grinding magnesium.
Importance of keeping the sander maintained and disconnecting power when not in use.
Details on motor specifications, voltage, and frequency requirements for the sander.
Information on the 3-conductor cord, grounding prong, and proper outlet connection.
Recommendations for selecting wire size and using 3-wire extension cords.
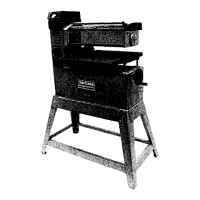
Procedure for checking the sander for shipping damage and verifying all parts are present.
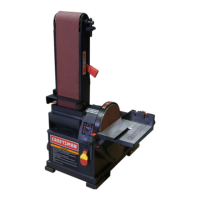
List of tools required for assembling and adjusting the belt and disc sander.
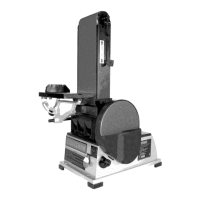
Instructions on attaching the table support bracket to the endshield.
Steps for aligning the disc table and securing it with bolts and knobs.
Procedure for attaching the belt guard to the belt housing using supports and knobs.
Instructions for fastening the belt table and bracket to the frame.
How to tension the abrasive belt using the spring-loaded cam shaft.
Steps for removing and installing a new abrasive belt, noting direction.
Procedure for testing and adjusting the abrasive belt tracking for proper alignment.
How to adjust the angle of the belt table for beveling work.
Guidance on using the abrasive belt for sanding wood, deburring metal, and polishing.
Steps for adjusting the belt platen for sanding straight lines.
Using the flexible belt to follow the contour of curved parts.
Using the sander for sharpening tasks with the aid of an auxiliary wood piece.
Instructions for tilting the belt housing to horizontal and using the workstop.
Steps for removing and replacing the abrasive disc on the aluminum disc.
How to adjust the disc table angle for beveled work.
Using the abrasive disc for finishing flat and convex surfaces.
Guidance on using the miter gauge for securing work and maintaining angles during disc sanding.
Instructions on keeping the machine and workshop clean, especially before working with metal.
Information that the sander's bearings are permanently lubricated and require no further attention.
Advice on keeping the sander in repair, replacing worn parts, and contacting service technicians.