Do you have a question about the Crosstour CR850 and is the answer not in the manual?
Displays images and interface elements for the car recorder.
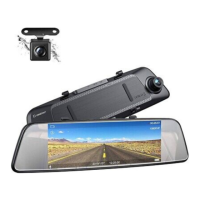
Provides a clear rear-view mirror reflection.
Resets all settings to their default values.
The viewfinder for capturing video.
Provides sound reminders and alerts.
Used to securely attach the dash cam to the car's Rear-view Mirror.
Records audio along with the video.
Turns the camera on/off or controls the screensaver.
Mini USB Port for data/power, AV IN for rear camera.
For installing and uninstalling the Micro SD card.
Slide the memory card into the slot with the label facing the camera screen until it clicks.
Place fingernail against the edge of the memory card and lightly press further to remove.
Attach the camera to the car's rear-view mirror using rubber straps and adjust the lens.
Connect the USB car charger to the cigarette lighter and the Micro USB to the dash cam.
Connect the rear camera terminal to the AV IN port and its red cable to the car's reversing lamp.
Displays the rear camera image in the upper left corner of the screen.
Allows switching video display modes by touching the Video Switch button.
Connect the USB car charger to the car's socket and the Micro USB to the dash cam for charging.
The camera powers on/off automatically with the car's engine.
Press and hold the Power Button to manually turn the camera on or off.
Tap the Audio icon to enable or disable audio recording.
Tap Camera icon to enter video mode and Shutter icon to start/stop recording.
Tap Rear View icon to quickly review the image from the rear camera.
Tap Playback icon to quickly enter video and photo playback mode.
Tap Setting icon to quickly enter system setting.
Access video settings to configure recording parameters.
Use the Shutter icon to begin or end video recording.
Tap the Photo Mode icon to switch from video to photo capture.
Tap the Home icon to navigate back to the main menu.
Use the Lock icon to protect the current video recording from deletion.
Set video resolution between 1080P and 720P.
Enable or disable simultaneous recording with the rear camera.
Configure cyclical recording intervals (Off/3Min/5Min/10Min).
Activate or deactivate automatic recording triggered by impacts.
Adjust exposure level by selecting a priority area or using default scene analysis.
Turn HDR (High Dynamic Range) Off/On.
Enable or disable adding date stamp to videos or photos.
Set G-Sensor sensitivity to Off/Low/Medium/High to lock video on collision.
Turn Audio Record Off/On to disable or enable audio recording.
Configure desired photo settings.
Use the Shutter icon to capture a photo.
Tap the Video Mode icon to switch from photo to video capture.
Tap the Home icon to return to the main menu.
Set photo resolution from VGA up to 10M.
Configure time-lapse photo capture intervals (Snap/Delay2s/Delay5s/Delay10s).
Enable burst capture for taking up to 3 photos consecutively.
Select image quality: Fine, Normal, or Economy.
Adjust image sharpness: Strong, Normal, or Soft.
Adjust color temperature for optimal lighting conditions.
Select color mode: Normal, Black and White, or Sepia.
Adjust ISO for light sensitivity and image noise trade-off.
Adjust exposure level by selecting a priority area or using default scene analysis.
Enable or disable adding date stamp to photos.
Set quick review duration: Off, 2 sec, or 5 sec.
Tap the Select icon to choose folders or files for operations.
Select target media type (Video/Photo/Locked Files) for operations.
Navigate through thumbnails to enter video/photo playback mode.
Lock or unlock individual files or all files to prevent overwriting or deletion.
Delete selected files or all files after unlocking them.
Configure screen saver timeout: Off/30 Sec./60 Sec./120 Sec.
Set automatic power off timer: Off/3 Min/5 Min/10 Min.
Set power frequency to 50HZ or 60HZ.
Choose the interface language: Chinese, English, or Japanese.
Reformat the micro SD card to maintain good condition and erase content.
Set or check the current date and time.
Reset all camera settings to their original default values.
Check the camera's brand, model, firmware version, and update time.
Connect to PC for data transfer and file copy/delete operations.
Use the camera function on the personal computer.
Connect to computer to use it as a power bank for charging.
Ensure card is Class 10, format on computer and camera.
Check if memory is full, save files, and format the SD card.
Adjust camera position to avoid windshield reflections.
Adjust car charger position to ensure stable connection.
Check charge indicator light, re-insert charger, and reset camera.
Check memory card status and reformat or replace if necessary.
Confirm audio record function is enabled in system settings.
Charge the camera via USB car charger, not data cable.
Normal for heat, but stop if smoke or odor occurs.
Signal may disappear temporarily due to lighting or blinking periods.
Machine may not turn off if video mode is running even with engine off.
Ensure genuine memory card, format if 'Memory error' occurs.
Press the reset button on the main unit to restart the system.
| Brand | Crosstour |
|---|---|
| Model | CR850 |
| Category | Voice Recorder |
| Language | English |