Routine Maintenance
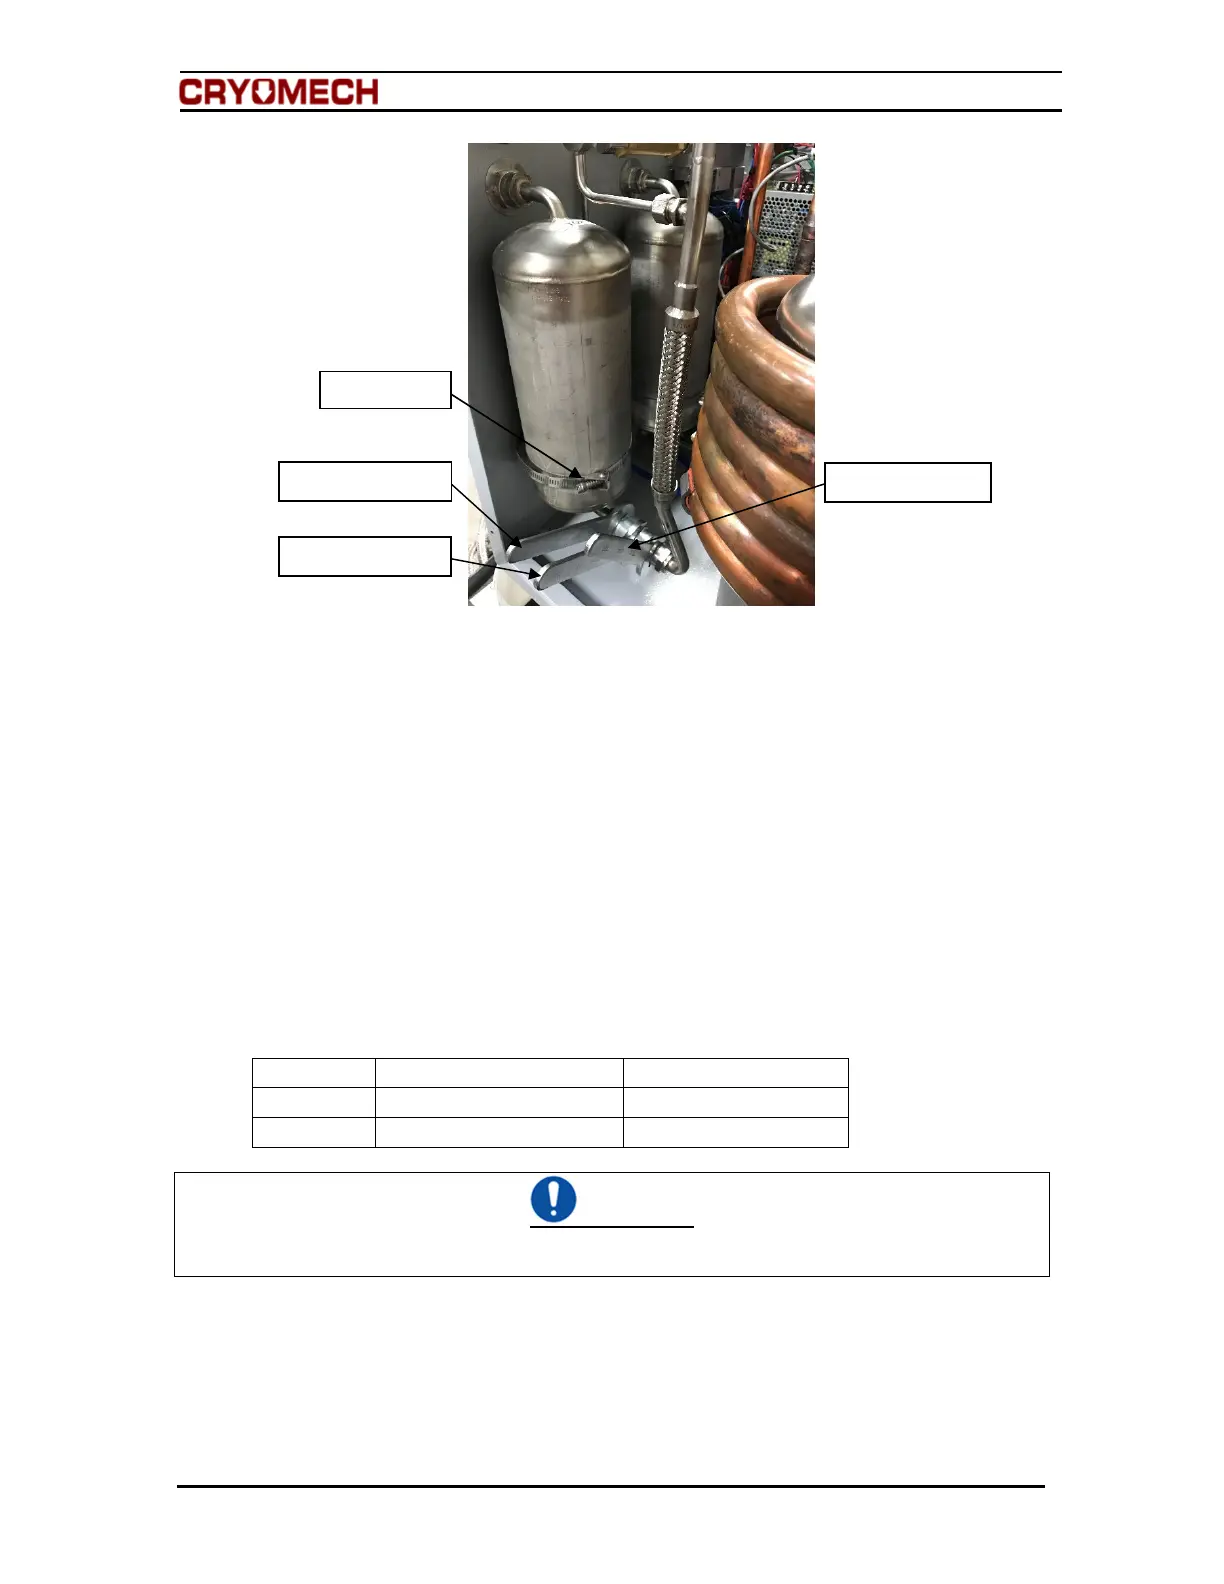
Figure 8-1: Disconnecting the Aeroquip adsorber
5. Remove the nut holding the high pressure Aeroquip coupling to the front panel.
6. Loosen and disconnect the hose clamp that attaches the adsorber to the front
panel.
7. Remove the adsorber from the helium compressor package.
8. Check the Aeroquip couplings for oil residue.
a. If oil is present, contact Cryomech, Inc. for further assistance.
9. Remove the lock washer from the top Aeroquip on CP2800 and CP1100 helium
compressor packages.
10. To install the new adsorber, reverse steps 1 through 9.
8.5 Vent excess helium from the helium compressor package
Required tools:
Quantity Description Comment
1 3/4 in open end wrench For Aeroquip coupling
1 Service Aeroquip coupling For service access port
CAUTION
Venting more than 5 psig (0.34 bar) of helium per minute will lead to improper oil migration within
the system. If this condition occurs, factory service will be required.
This procedure should only be used to vent small quantities of helium from an overcharged
system.
1. Make sure the service valve is closed. See Figure 8-2.
2. Attach the service Aeroquip coupling to the service access port.
Hold this wrench
Hose clamp
Hold this wrench
Turn this wrench
 Loading...