Installation
6-8
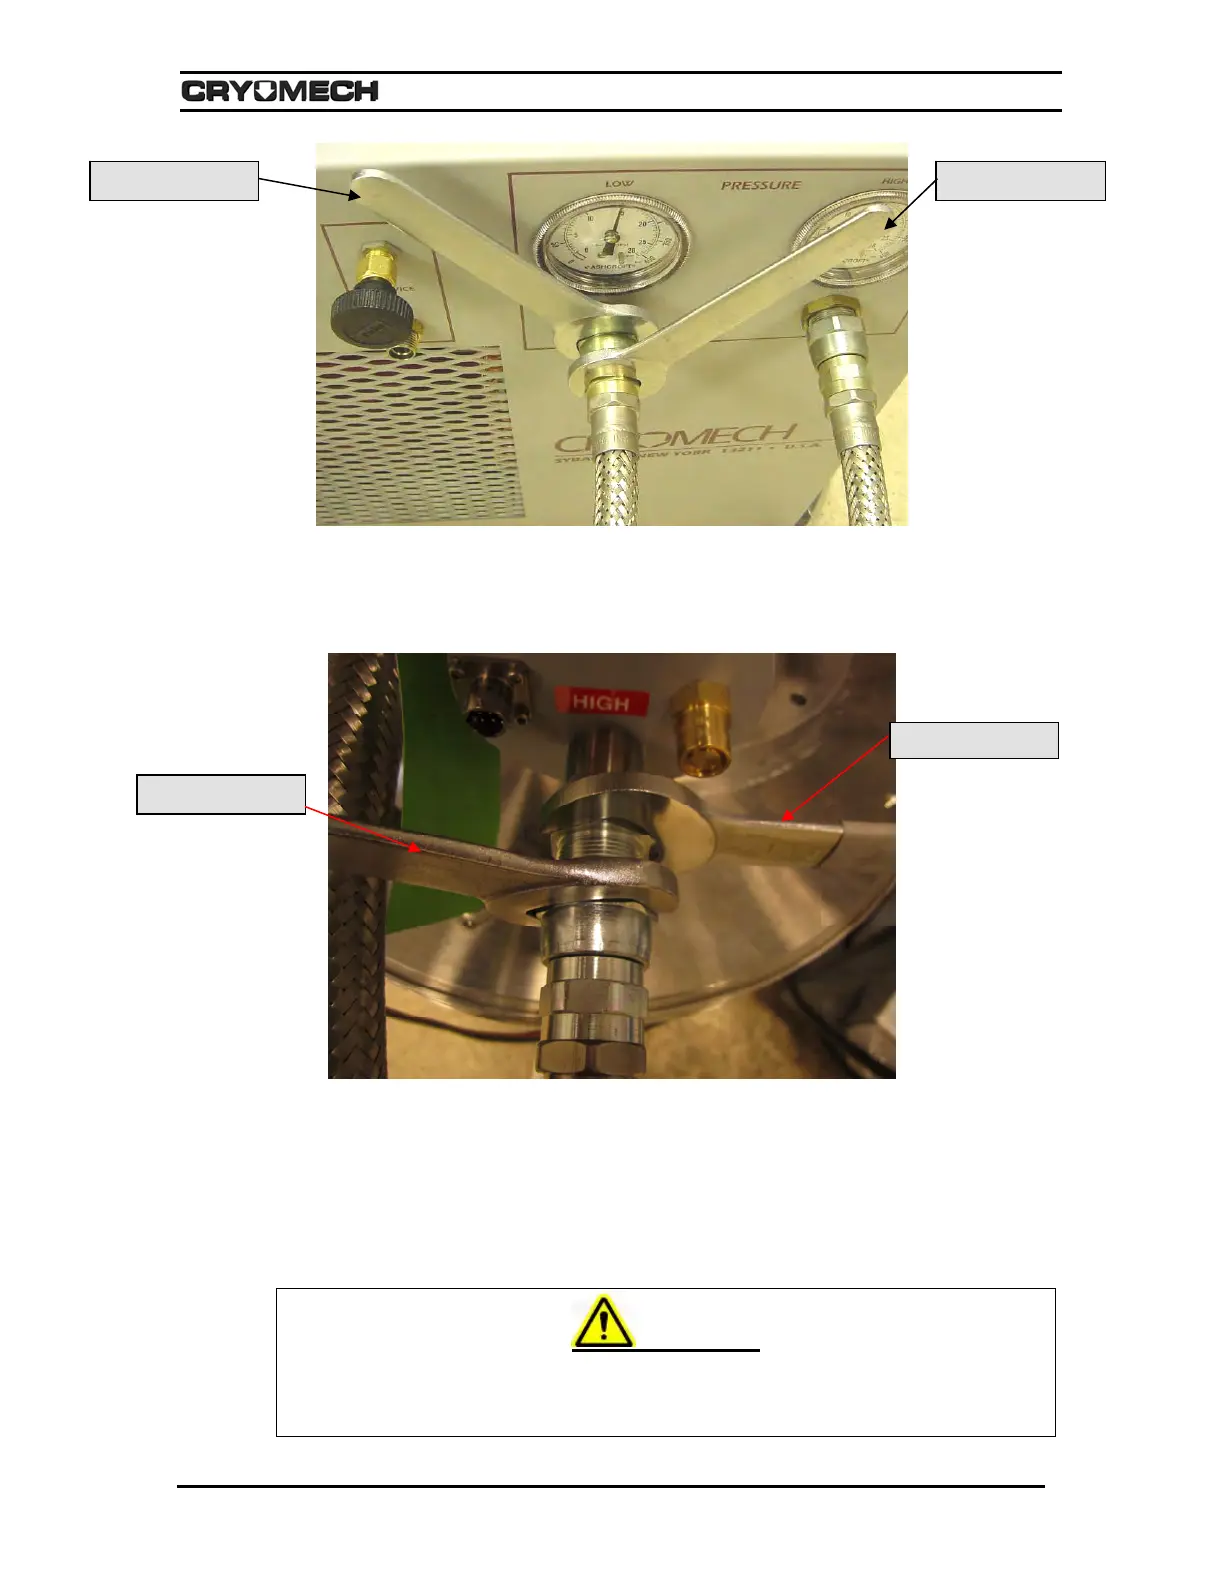
Figure 6-6: Connecting the flex lines to a compressor package
5) Connect the other end of the helium flex line to the low-pressure port on the cold
head. The low-pressure port is marked “Low.” Tighten the connector until a positive
stop is felt.
Figure 6-7: Connecting the high-pressure flex line to the high-pressure port on a cold head
6) With the same wrenches, connect the other helium flex line to the high-pressure port
on the compressor package front panel. The high-pressure port is marked “HIGH”.
Tighten the connector until a positive stop is felt.
7) Connect the other end of the helium flex line to the high-pressure port on the cold
head. The high-pressure port is marked “HIGH”. Tighten the connector until a positive
stop is felt.
WARNING
Never remove the Aeroquip couplings from the helium flex lines without first
relieving the helium charge in the line to acceptable levels. The pressure in the hose
can blow off the coupling with sufficient force to cause injury.
Hold this wrench Turn this wrench
Turn this wrench
Hold this wrench