Routine Maintenance
8-2
1) Shut down the system by pressing the OFF button, then switching the helium
compressor package circuit breakers off, and disconnecting the input power from the
compressor package.
WARNING
The input power must be disconnected from the helium compressor package before
removing any helium compressor package panels.
2) Disconnect both helium flex lines from the compressor.
3) Remove the side panel from the right hand side of the compressor package.
a. Remove the 6 quarter-turn screws that hold the cover on and retain them.
b. Pull the panel away from the compressor package.
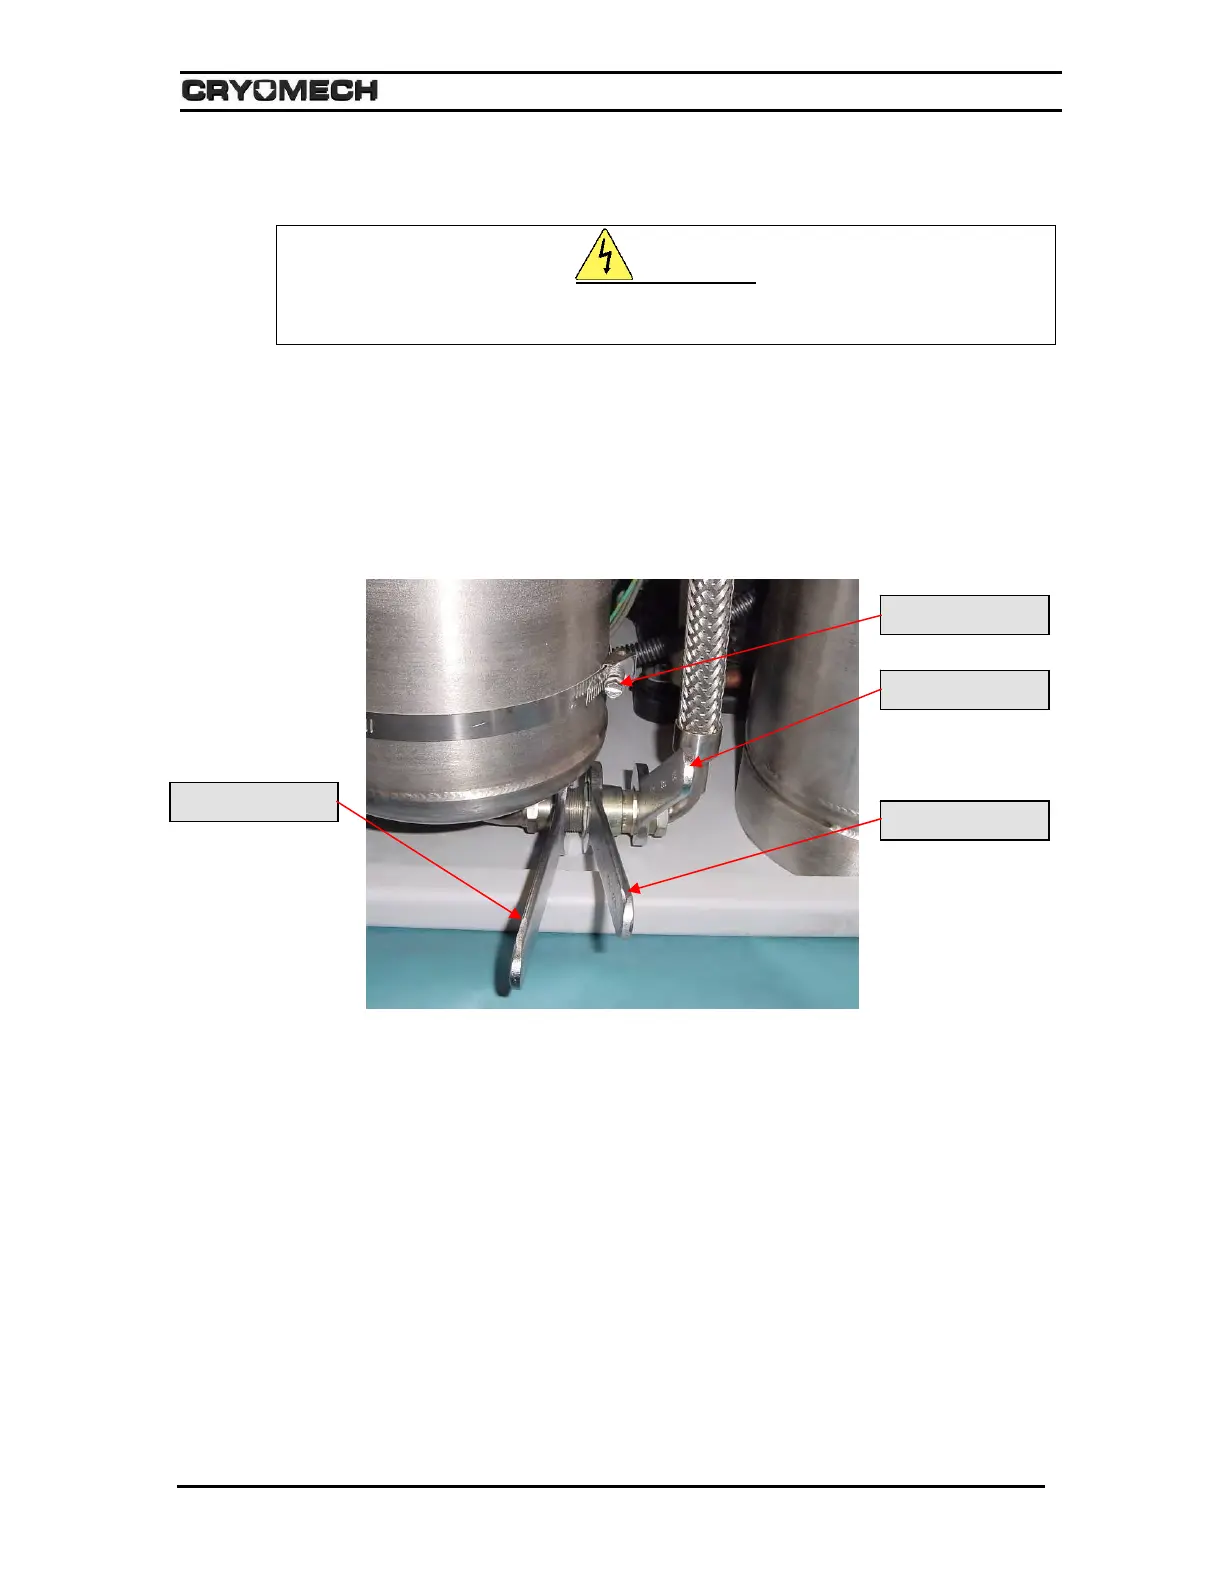
4) Using three wrenches disconnect the Aeroquip coupling between the adsorber and
the oil separator as shown in Figure 8-1.
Figure 8-1: Disconnecting the Aeroquip adsorber
5) Remove the nut holding the high-pressure Aeroquip coupling to the front panel.
6) Loosen and disconnect the hose clamp that attaches the adsorber to the front panel.
7) Remove the adsorber from the compressor package.
8) Check the Aeroquip couplings for oil residue. If oil is present, contact Cryomech for
further assistance.
9) Remove the lock washer from the top Aeroquip and install it on the new adsorber.
10) To install the new adsorber, reverse steps 4 through 7.
11) Reconnect both helium flex lines to the compressor.
12) Reattach the cover or side panel to the compressor package.
Hold this wrench
Turn this wrench
Hold this wrench
Hose clamp