INSTALLATION INSTRUCTIONS II27
8#*/45"--"5*0/*/4536$5*0/4ø 080819B
Powering up the Unit (cont.)
All Units:
12 Make sure that the circuit breaker supplying power to
the circuit is on.
13 Turn on the water supply valve.
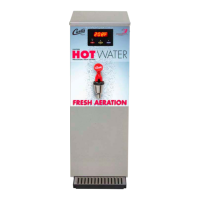
14 Turn the toggle switch on the back of the unit to the ON
QPTJUJPO5IFXBUFSUBOLXJMMCFHJOUPmMM
15 Check the water supply line for leaks. While the tank is
mMMJOHBOEXIFOFWFSUIFXBUFSmMUFSJTSFQMBDFEZPV
NBZIFBSUIFTPVOETPGBJSCFJOHQVSHFEGSPNUIFmMUFS
tubing and water tank.
16 Once the tank is full, the heating elements will turn
on (the LEDs on the screen will chase upward).
Depending on the incoming water temperature and
UIFFMFDUSJDBMTQFDJmDBUJPOTUIFXBUFSUBOLUZQJDBMMZ
requires 60 to 70 minutes to reach the factory set
operating temperature. The bottom left LED will come
on when the temperature is within 10°F (6°C) of the
temperature setting on the control panel.
17 Dispense 12 oz. (350 ml) of hot water through the
faucet to help purge any remaining air in the lines.
Style
varies
IMPORTANT: When operating the unit at higher
elevations, reduce the default operating
temperature (204°F/96°C) by 2°F/1°C for each
1000 ft. (300 m) of elevation above 2000 ft.
(600 m). See PROGRAMMING GUIDE.
 Loading...