Do you have a question about the D-Industrial Technology Q200 and is the answer not in the manual?
Contact information for sales and support in the US and North America.
Lists the issue, change note, date, and description for each revision.
Information about the radioactive source within the hand unit detector.
Procedure for inspecting and replacing the sinter.
How to configure the Q200 for specific requirements like language and gas type.
Step-by-step guide to removing the case lid of the instrument.
Requirements for the Argon gas supply purity and impurity limits.
Procedure to check the internal gas supply and ensure sufficient pressure.
How to check the battery status and recharge it.
Recommendations for fixed installations using external gas and power.
Description of the front panel components: keys, display, and indicators.
Explains the different functions of the key-switch based on its position.
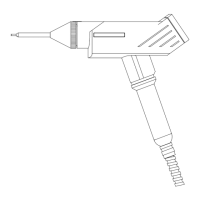
Describes the function of each key on the hand unit.
Explains the function of the Warning LED and Peak Hold LED.
Explains the ten-segment LED bar graph display.
Procedure for switching the instrument on.
What happens when the instrument is switched on, including self-check routines.
Details parameters within the Calibrate menu, including calibration level.
Explains the calibration level parameter and its relation to standard leaks.
Parameter for setting the detector cleaning time.
Sets the alarm level for leak detection and audio warnings.
Parameter for setting the trace gas concentration for accurate leak rate correction.
Algorithm to track out background frequency drift due to contamination.
Sets how leak rate information is presented on the digital display.
Resets all program mode parameters to their default settings.
Indicates whether the gas supply is internal or external.
Displays the current battery voltage of the instrument.
Displays the current detector temperature.
Displays the detector signal frequency.
Displays the time remaining until a re-calibration is requested.
Shows the software version installed in the instrument.
Allows setting the day, month, and year for the instrument's clock.
Allows setting the hours and minutes for the instrument's clock.
How to put the instrument into standby mode and its purpose.
Procedure for entering sample mode and the initial stabilisation display.
General rules and importance of instrument calibration for accurate performance.
Tips to prevent improper readings and ensure accurate leak detection.
How to adjust the audio output volume level.
Managing background contamination and using the auto-zero facility.
How to store up to 100 readings and print them for quality control.
Connecting the Q200 to a printer via the RS232 port.
Connecting the Q200 to an X-Y chart recorder for analogue output.
Guidelines on calibration frequency and checking calibration factors.
Recommendations for battery maintenance, charging, and voltage checks.
How to check and replace the sinter for contamination.
Procedure for cleaning the detector when high leak rates or background occur.
Lists non-recoverable faults, their display messages, and actions to take.
Lists recoverable errors, their messages, and how to clear them.
Lists warnings, their messages, and how to clear them.
How to remove and replace the hand unit probe.
Procedure for changing the instrument's sinter.
| Brand | D-Industrial Technology |
|---|---|
| Model | Q200 |
| Category | Security Sensors |
| Language | English |