62
- Organize and place hoses in the hole.
※ Caution: Be careful not to jam the hoses between the
wall and the washing machine.
11. Organize hoses
- Install the washing machine stick to the wall
surface.
10. Install the washing machine.
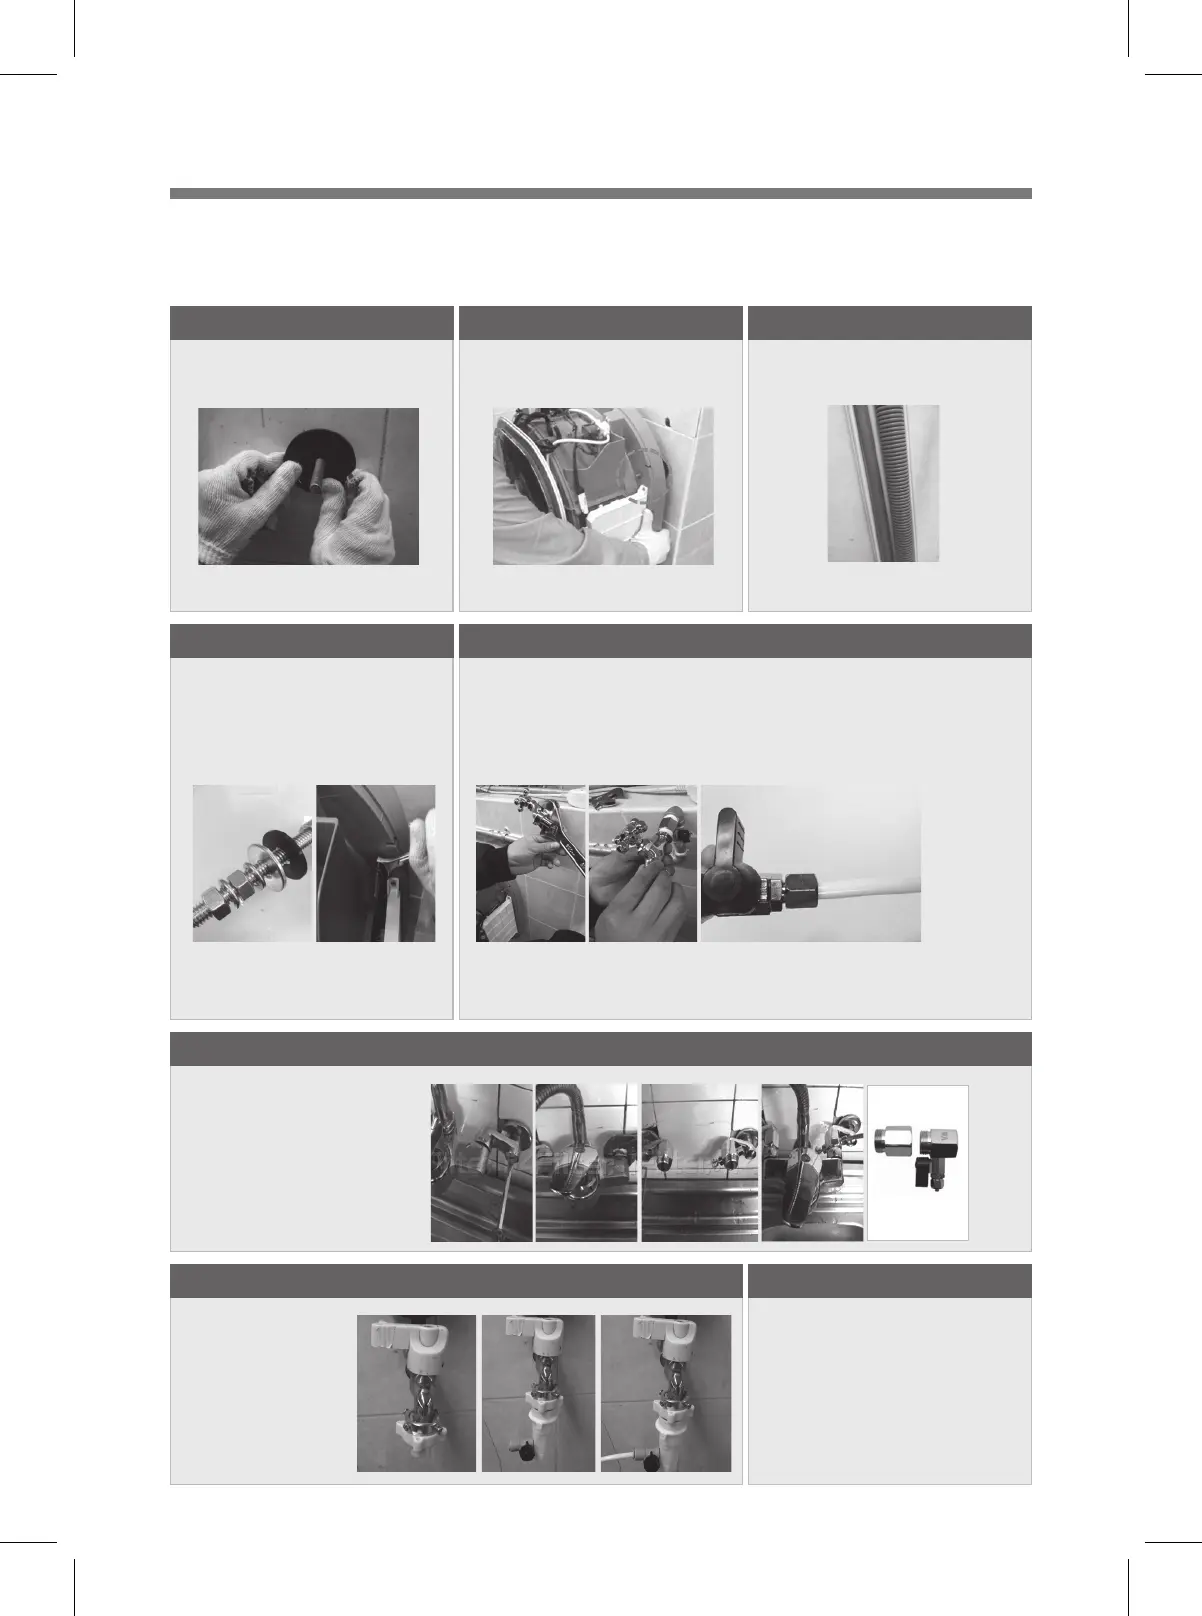
- Attach pads on the fixed anchors.
- Push the pad to the wall.
9. Insert the cushion pad
ⓛ Close the water supply valve
② Disassemble the water supply valve
③ Install the branching adapter (install
adapters accordingly on cold and hot
water taps)
④ Branch off the inlet hose.
13-2 Install the inlet hose - a kitchen sink or a shower
- Run a test operation to check if there is any
malfunction / leakage.
14. Test operation
- Fix the items as follows: Rubber pad (1ea) -> Plain
washer (1ea) -> Spring washer (1ea) -> Nut (1ea)
-> Spring washer (1ea) ->nut (1ea)
- Fasten the nut with a spanner.
※ Excessive fastening of the nut may cause damage to
the washing machine or the wall tile.
※ Fixing nut must be fastened to the end.
12. Fix the washing machine.
① Close the water supply valve ② Disassemble the water supply valve
③ Install the branching adapter ④ Branch off the inlet hose.
※ Wrap the connection of the branching adapter and water supply valve with Teflon tape.
※ Check leakage after installation.
13-1. Install the inlet hose - Regular faucet
① Install the water tap connector on
the faucet (skip if it is a buried
faucet)
② Install the branching adapter.
③ Connect the inlet hose.
※ Check leakage after installation.
13-2 Install the inlet hose - a kitchen sink or a shower
Hot
water
For hot
water
For cold
water
Cold
water
MINI 2.0_COMBO,WASH_영문_SM.indd 62 2017. 8. 25. 오전 11:16