3
CF65/75/85 series Removal and installation
CLUTCH
5-3
5.2 REMOVAL AND INSTALLATION, AS TRONIC CLUTCH UNIT
Removing the clutch unit
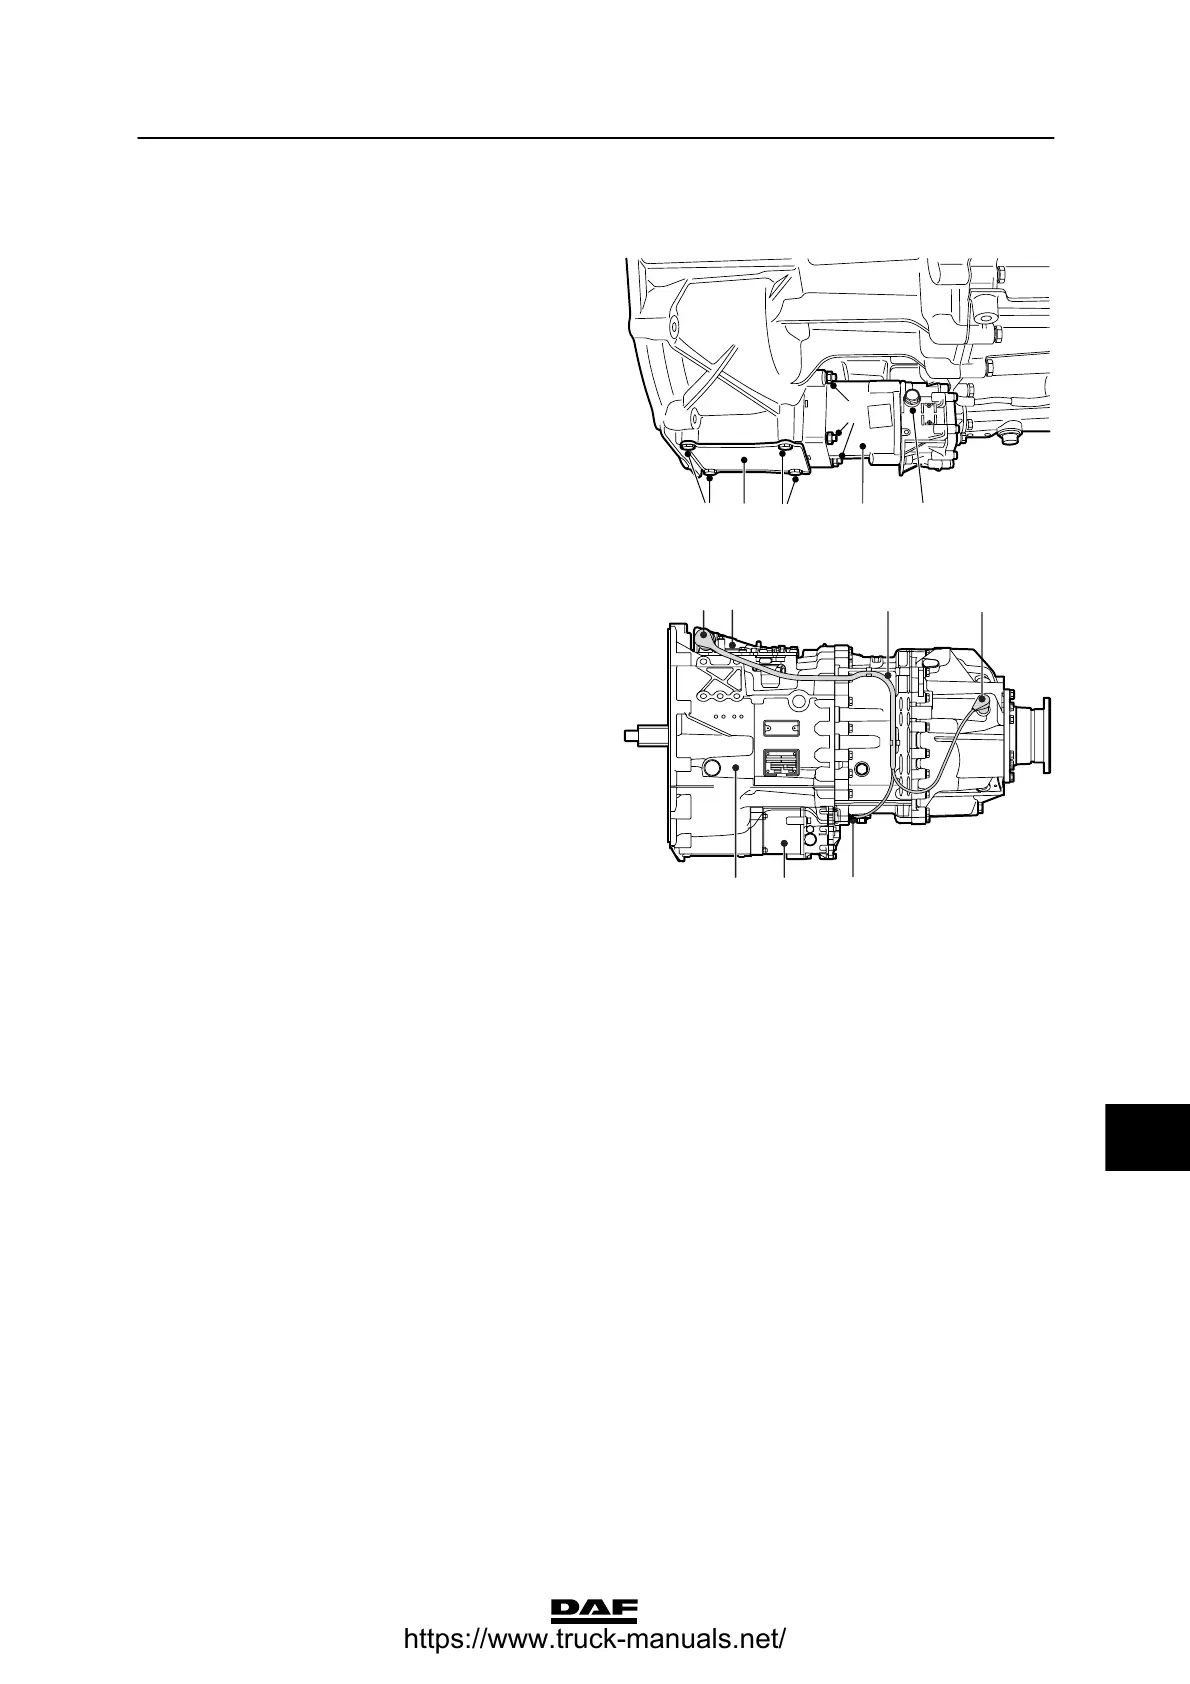
1. Remove the bolts (1) from the clutch
inspection cover (2) and remove the clutch
inspection cover.
2. Remove the connector (4) on the left-hand
side of the gearbox modulator and the
speed sensor connector (3).
3. Bleed circuit 4 and remove the air pipe from
the clutch unit.
4. Remove the attachment nuts (3) from the
clutch unit (5) and remove the complete
clutch unit, including the wiring harness.
5. Remove the thrust pin from the clutch lever.
Installing the clutch unit
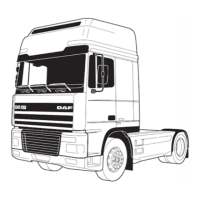
1. Fit the thrust pin in the clutch lever.
2. Bleed the clutch unit.
3. Fit the clutch unit, tighten the attachment
bolts. See “Technical data”.
4. Fit the air pipe, tighten the attachment bolts.
See “Technical data”.
5. Fit the wiring harness (2), with connector 4
to the modulator (5) and connector 3 to the
speed sensor.
6. Fit the clutch inspection cover.
V300669
1
2
3
1
5
4
ZF FRIEDRICHSHAFEN AG
8 1
9
3
5
4
V300718
2
10
ᓻ 200337
https://www.truck-manuals.net/