11 Maintenance and service
Installer reference guide
75
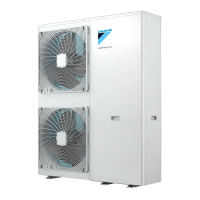
EPGA11~16DAV3 + EAVH/X16S18+23DA6V+9W
Daikin Altherma – Low temperature split
4P556070-1 – 2019.02
Chemical disinfection
If the applicable legislation requires a chemical disinfection in
specific situations, involving the domestic hot water tank, please be
aware that the domestic hot water tank is a stainless steel cylinder.
We recommend to use a non-chloride based disinfectant approved
for use with water intended for human consumption.
NOTICE
When using means for descaling or chemical disinfection,
it must be ensured that the water quality remains compliant
with EU directive 98/83EC.
11.4.1 To drain the domestic hot water tank
DANGER: RISK OF BURNING
The water in the tank can be very hot.
Prerequisite: Stop the unit operation (via the user interface,
operation switch, …).
Prerequisite: Turn OFF the respective circuit breaker.
Prerequisite: Close the cold water supply.
Prerequisite: Open all the hot water tapping points to allow air to
enter the system.
1 Remove the top panel, the user interface panel and the front
panel.
2 Lower the switch box.
3 Remove the stop from the access point to the tank.
4 Use a drain hose and a pump to drain the tank via the access
point.
a Access point to the tank
11.5 About cleaning the water filter in
case of trouble
INFORMATION
For yearly maintenance, you do not have to remove the
water filter from the unit to clean it. But in case of trouble
with the water filter, you might have to remove it so that
you can thoroughly clean it. Then you need to do as
follows:
▪ "11.5.1To remove the water filter"on page75
▪ "11.5.2 To clean the water filter in case of trouble" on
page75
▪ "11.5.3To install the water filter"on page76
11.5.1 To remove the water filter
Prerequisite: Stop the unit operation (via the user interface,
operation switch, …).
Prerequisite: Turn OFF the respective circuit breaker.
1 The water filter is located behind the switch box. To get access
to it, see:
▪ "7.2.3To open the indoor unit"on page27
▪ "7.2.5 To lower the switch box on the indoor unit" on
page28
2 Close the stop valves of the water circuit.
3 Close the valve (if equipped) of the water circuit towards the
expansion vessel.
4 Remove the cap on the bottom of the magnetic filter/dirt
separator.
5 Connect a drain hose to the bottom of the water filter.
6 Open the valve on the bottom of the water filter to drain water
from the water circuit. Collect the drained water in a bottle, sink,
… using the installed drain hose.
7 Remove the 2 clips that fix the water filter.
a Clip
b Magnetic filter/dirt separator
8 Remove the water filter.
9 Remove the drain hose from the water filter.
CAUTION
Although the water circuit is drained, some water may be
spilled when removing the magnetic filter/dirt separator
from the filter housing. ALWAYS clean spilled water.
11.5.2 To clean the water filter in case of trouble
1 Remove the water filter from the unit. See "11.5.1 To remove
the water filter"on page75.
CAUTION
To protect the piping connected to the magnetic filter/dirt
separator from damage it is recommended to perform this
procedure with the magnetic filter/dirt separator removed
from the unit.
2 Unscrew the bottom of the water filter housing. Use an
appropriate tool if needed.
CAUTION
Opening the magnetic filter/dirt separator is ONLY required
in case of severe issues. Preferably this action is never to
be done during the complete lifetime of the magnetic filter/
dirt separator.
a Bottom part to be unscrewed
b Water filter housing

 Loading...