Do you have a question about the Daikin FCVY453CV1 and is the answer not in the manual?
Ensure correct voltage, use proper fuses, and avoid instability or placing items on units.
Minimize noise/vibration for neighbors and adjust airflow for personal comfort and health.
Do not block air inlets/outlets, place chairs, or insert objects into the unit.
Ensure room ventilation and avoid heat sources near the temperature sensor for optimal heating.
Prevent snow from blocking outdoor unit air inlets/outlets in heavy snowfall regions.
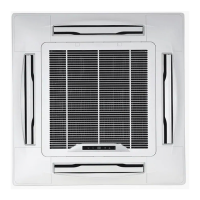
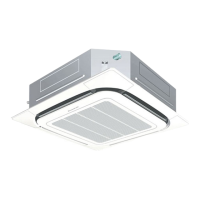
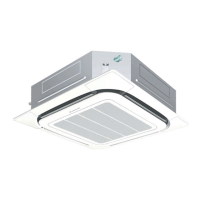
Identifies key parts of the indoor unit like air inlets, outlets, flap, and remote controller receiver.
Identifies key parts of the outdoor unit like air inlets, outlet, and selector switch.
Explains the function of indicator lamps, signal receiver, and auxiliary switch on the unit.
Describes the various displays on the remote, including timer status and signal transmission.
Explains how to select operation modes like AUTO, PROGRAM DRY, COOL, and HEAT.
Details the available airflow settings, including AUTO, LOW, and HIGH.
Explains the ON/OFF, temperature, timer, and airflow adjusting buttons on the remote.
Guides on sliding the back cover, inserting batteries according to polarity, and replacing the cover.
Provides important notes on battery types, mixing, charging, and disposal.
Aim the transmitter at the unit, note the operational distance and confirmation sound.
Guides on fixing the remote holder and avoiding locations near heaters or direct sunlight.
Warns against dropping, shocking, wetting the remote, and notes on battery life and signal interference.
Select the desired operation mode: AUTO, COOL, or HEAT.
Use UP/Down buttons to adjust the room temperature to a comfortable level.
Choose the preferred airflow setting for the operation.
Press ON/OFF to start; press again to stop, observing the operation indicator lamp.
Explains PROGRAM DRY mode for moisture removal with minimal temperature change.
Set TIMER OFF to stop operation at a specified time, up to 9 hours.
Set TIMER ON to start operation at a specified time, up to 12 hours.
Describes how to cancel the set timer functions using the CANCEL button.
Explains how the microcomputer controls temperature for sleep and how settings change after Timer OFF.
Adjust the flap position to direct airflow upwards (COOL/DRY) or downwards (HEAT).
Change the position of adjustor blades to direct airflow horizontally.
Detailed steps for manually adjusting the air outlet direction, advising consultation with a dealer.
How to start/stop the unit using the auxiliary switch during remote controller issues.
Procedures for power restoration, lightning damage, and general troubleshooting for malfunctions.
Explains common sounds and situations that are not actual troubles, like odors or mists.
Reasons for system stops (voltage fluctuations) and condensation on the outdoor unit.
Explains the meaning of the flashing indicator lamp and actions to take for normal/abnormal conditions.
Specifies optimal temperature and humidity ranges for COOL, PROGRAM DRY, and HEAT modes.
Describes the heat pump system, heating capacity limitations, and heat-up time.
Explains defrosting during heating and the hot start procedure for warming up.
Explains the preheating function for the compressor in low temperatures and power-on timing.
Details how operation modes are determined by the master unit in a multi-unit system.
Illustrates how different rooms operate in COOL/HEAT modes, including standby indications.
Safety warnings for cleaning units, including avoiding direct water and harsh chemicals.
Instructions for cleaning the indoor unit and remote controller with soft cloths.
Steps for removing, cleaning, and replacing air filters to maintain efficiency.
Guides for preparing the unit before long periods of non-use and after returning to use.
Checks for fuses, power failure, and remote battery issues when the unit is completely off.
Checks for clogged filters, incorrect settings, blocked inlets/outlets, or open doors/windows.
Actions to take when the operation indicator lamp flashes, indicating potential issues.
Situations requiring immediate power off and dealer contact, like foreign substance entry or frequent safety device activation.
Advice on choosing installation locations considering drain water, special environments, and flammable gas.
Emphasizes separate power circuits, avoiding overloading, and the need for earth leakage breakers.
Guidance on selecting locations to minimize noise nuisance and potential interference with electronics.
| Brand | Daikin |
|---|---|
| Model | FCVY453CV1 |
| Category | Air Conditioner |
| Language | English |