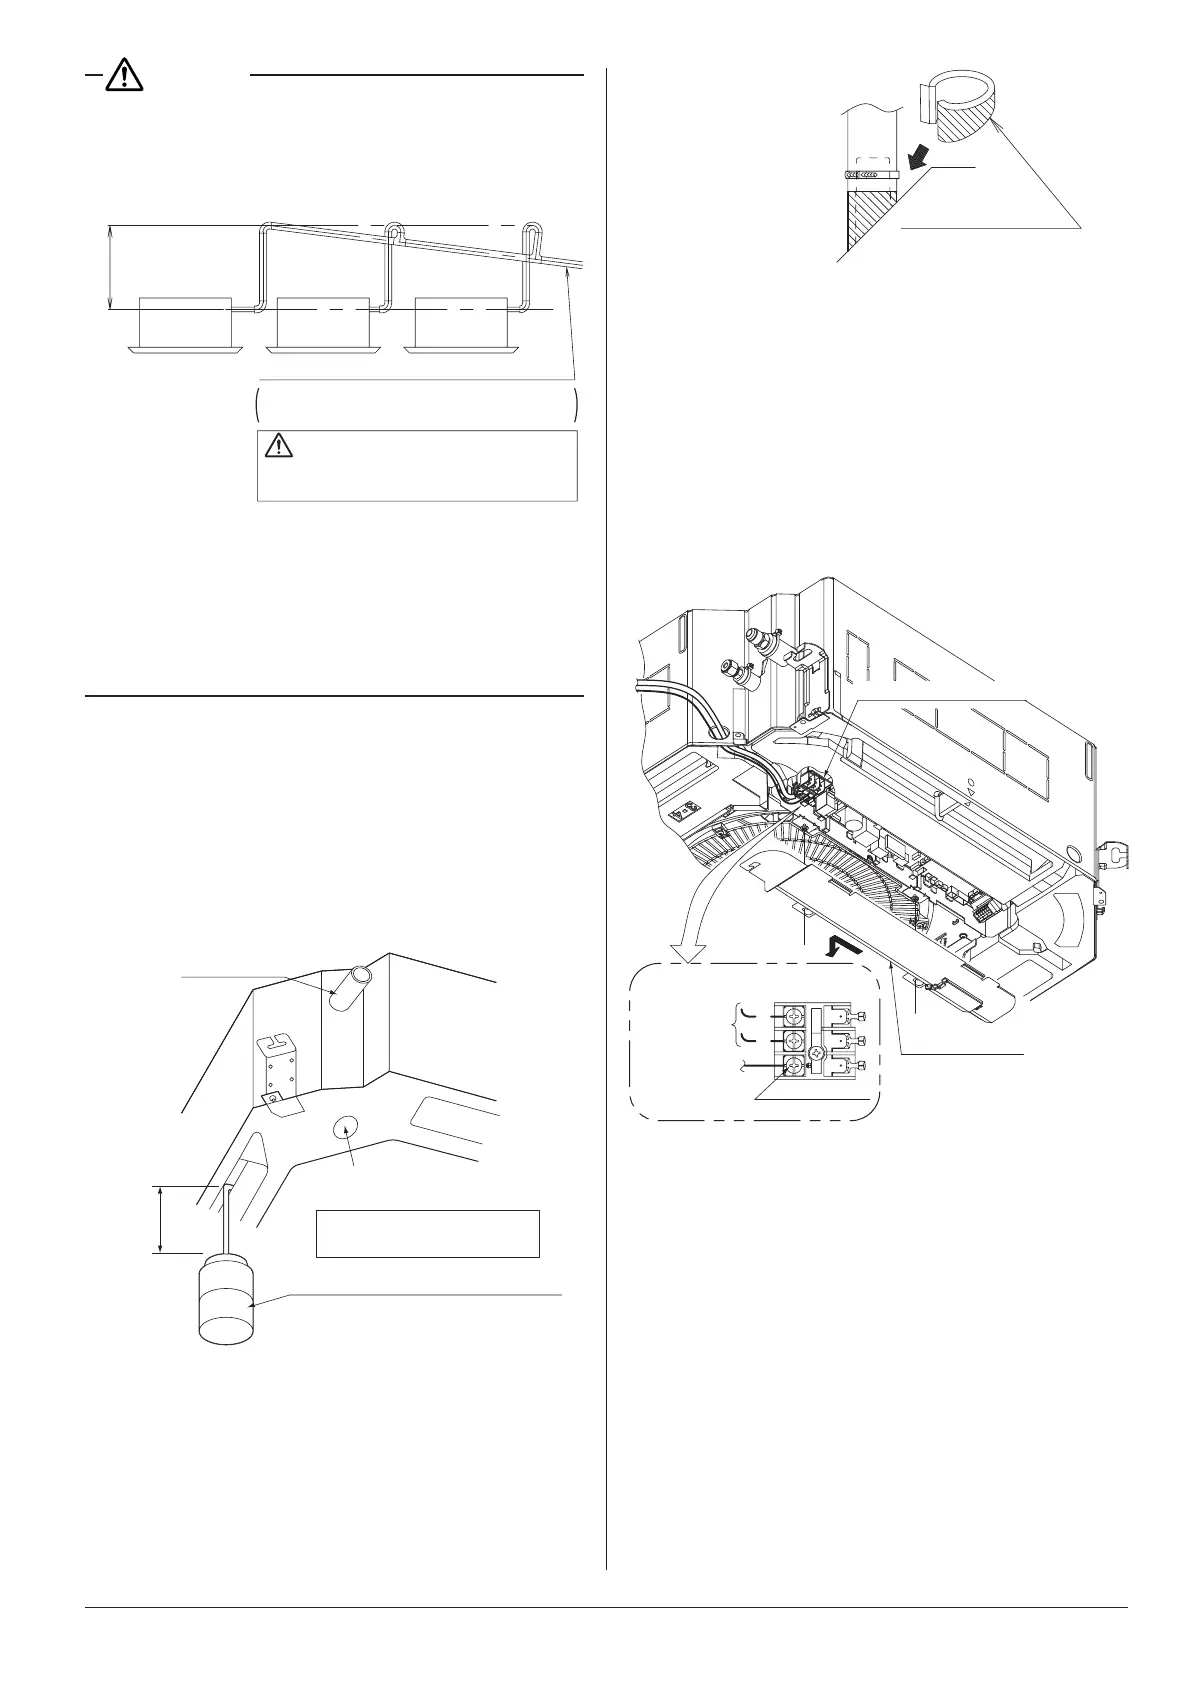
CAUTION
• To avoid the attached drain hose (1) getting excessive
force, do not bend nor twist it.
It may cause water leakage.
•
In case of centralized drain piping, carry out piping work
according to the procedure shown in the fol lowing Fig. 18.
Make a downward inclination of 1/100
or more to avoid stagnancy of air.
If water stagnates in the drain
piping, it may cause clogging of
drain piping.
Centralized drain piping
Fig. 18
• As for the size of centralized drain piping, select the size
that meet the capacity of indoor units to be con nected.
(Refer to the technical document)
• At replacement with new indoor unit, use the attached
new drain hose (1) and the metal clamp (2).
If an old drain hose or a metal clamp is used, it may
cause water leakage.
(2) Afterpipingisnished,checkifthedrainows
smoothly.
[Whentheelectricwiringworkisnished]
• Gradually pour 1 liter of water from the air outlet on the
left side of the drain socket into the drain pan giving cau-
tion to avoid splashing water on the electric components
suchasdrainpumpandconrmdrainagebyoperating
the indoor unit under cooling mode according to “10.
FIELD SETTING AND TEST OPERATION”. (Refer to
Fig. 19)
100
Plastic container for pouring water
(Tube length of 100 mm or more
is necessary.)
Drain outlet for service
(with rubber plug)
Drain piping
Use it when draining water
in the drain pan
[Method of adding water]
Fig. 19
• After checking the drainage of water, refer to Fig. 20 and
attach the sealing material (14) to perform the thermal
insulation of the drain socket.
Sealing material (14)
(accessory)
Fig. 20
[Whentheelectricwiringworkisnotnished]
• The electric wiring works (including earthing) must be
carriedoutbyaqualiedelectrician.
• Ifaqualiedpersonisnotpresent,aftertheelectricwir-
ingworkisnished,checkthedrainageaccordingtothe
methodspeciedin[When the electric wiring work is
nished].
1. Open the control box lid and connect the single phase
220 - 240 V power supply to the terminal (L, N) on the
terminal block (X2M).
Connect the earth wiring to the earth terminal. (Refer
to Fig. 21)
L
N
LN
Single phase
power supply
(50 Hz 220-240 V,
60 Hz 220, 230 V)
Control box lid
Earth terminal
Earth wiring
Terminal block (X2M)
Fig. 21
2. Make sure the control box lid is closed before turning
on the power supply.
• Throughout the whole process, carry out the work
giving caution to the wiring around the control box
so that the connectors may not come off.
3. Gradually pour 1 liter of water from the air outlet on
the left side of the drain socket into the drain pan
giving caution to avoid splashing water on the electric
components such as drain pump. (Refer to Fig. 19)
4. When the power supply is turned on, the drain pump
will operate. Drainage can be checked at the trans-
parent part of the drain socket.
(The drain pump will automatically stop after 10
minutes.)
After checking the drainage of water, refer to Fig. 20
and attach the sealing material (14) to perform the
thermal insulation of the drain socket.
3P335596-2D English 10
 Loading...