PATIO KIT
INSTALLATION
The patio kit has been designed to fit most standard patio doors. Please note that when the patio kit is installed,
the patio door will require a locking bar or other security mechanisms; the patio door cannot be locked
when the patio kit is installed.
Patio door: Minimum & Maximum
Patio
door
Patio Slider Kit:
Min: 67.5cm (2.22ft)
Max: 210cm (6.88ft)
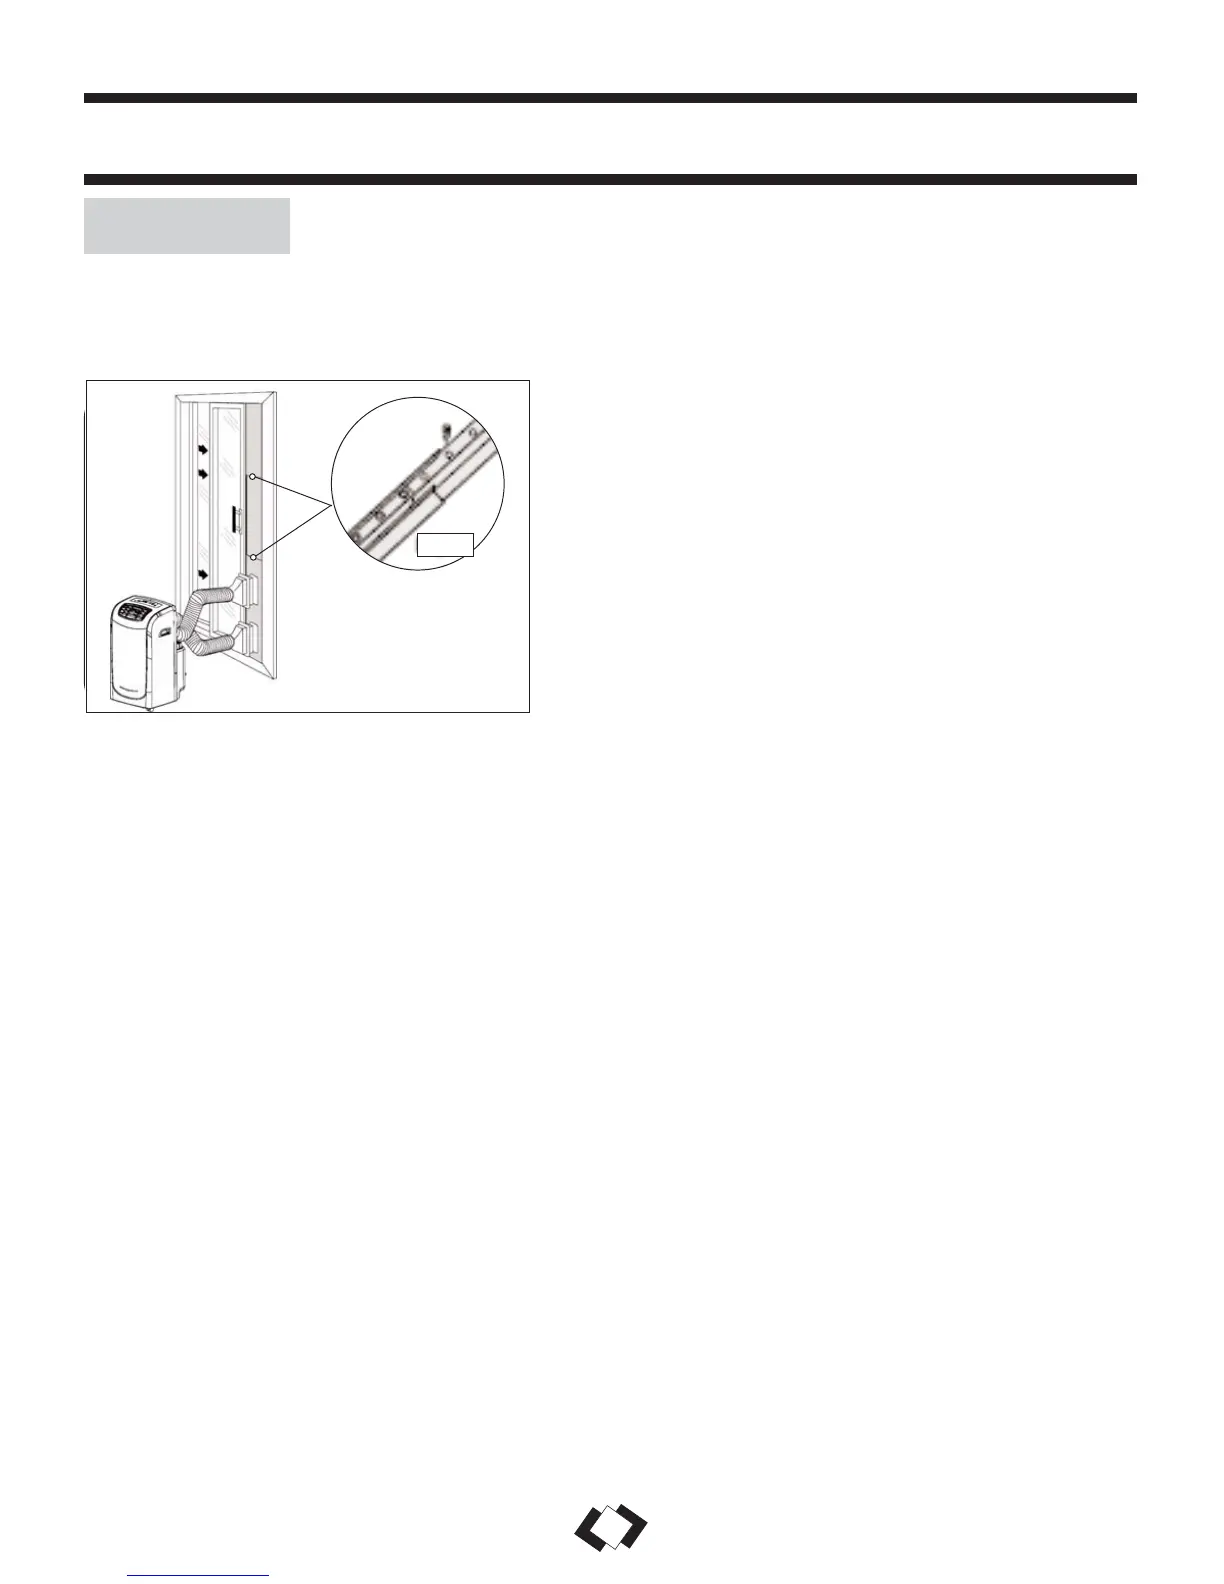
NOTE: The patio slider is a slider accompanying the window
kit, that has a series of factory cut holes along its sides: use
these holes to screw the patio slider kit securely into position,
as depicted in Fig. 3.
Fig. 3
Patio Door Installation
Refer to Fig. 3 while following the below instructions:
1) Select a suitable location, making sure you have access to an electrical outlet.
2) Install the intake / exhaust hoses to the rear of the unit (Accessories #1)as shown in Fig. A, page 4.
3) Install the window slider kit (Accessories #5).
4) Attach the two intake / exhaust hose adapters (Accessories #3) to the end of each hose.
5) Attach the intake / exhaust adapters to the holes in the patio door kit, making sure the patio door kit is
securely in place.
NOTE: Ensure that the exhaust hose adapter is above the intake hose adapter (to prevent the unit from taking
in hot exhaust air).
6) Plug power cord into a 115 V / 60 Hz grounded electrical outlet.
INSTALLATION INSTRUCTIONS (cont’d)
6
 Loading...