Device configuration
Status Three status LEDs are provided
indicating the following states:
The first LED indicates the status of the
GPIOs.
For GPIs the logical status and for GPOs
the status of the relay.
▪ For outputs, the logical status is "1" ( )
when the relay is closed.
▪ For edge triggered inputs, the internal
Object/AmpPreset states are the same
as the GPI status and vice versa.
▪ For outputs in "NO" mode (normally
open), the statuses of the Object and
GPO are the same. In "NC" mode
(normally closed), the status of the GPO
is inverted.
▪ For level triggered inputs, the GPI status
is defined by the external voltage
applied. However, the triggered
Object/AmpPreset can be changed for
whatever reason, i.e. an AmpPreset was
modified or an AmpPreset, which is
defined for a dedicated GPI is loaded.
The second LED indicates the status of the
related Object (binary object) or
AmpPreset.
Objects/AmpPresets and GPIs are
evaluated separately.
▪ For Objects, the logical status is "1" (
)
when the Object is logical "1" (binary
object).
▪ For AmpPresets, the logical status is "1"
(
) when the AmpPreset is loaded and
not modified.
The third LED illuminates as soon as an
error has occurred ( ).
Provided the corresponding GPI/GPO is
selected, a corresponding message will be
issued on the bottom left of the GPIO
screen.
6.3 Web Remote interface
Recommended and tested browsers:
Windows: ▪ Firefox V22.0 or higher
▪ Microsoft Internet Explorer V11 or higher
▪ Microsoft Edge V12 or higher
▪ Google Chrome V21 or higher
▪ Opera V15 or higher
macOS: ▪ Safari V6.0 or higher
▪ Firefox V22.0 or higher
▪ Google Chrome V21 or higher
▪ Opera V15 or higher
iOS: ▪ iOS 6 or higher
Android: ▪ Mobile Firefox V27.0 or higher
▪ Android Browser V4.4 or higher
Alternatively, the integrated Web Remote interface also provides
direct access to the user interface using a standard web browser.
The Web Remote interface is mainly intended for configuring a
single device.
Note: A detailed description of the Web Remote interface is
given in Þ Chapter 7 "Web Remote interface" on page 28.
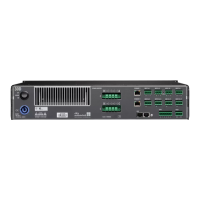
Physical setup and direct connection
Simply connect the LAN connector port of your computer to the
upper RJ45 (ETHERNET 1/PRI) connector socket [4] of the
device.
By factory default, the IP address is set to: 192.168.1.40.
To access the device, manually assign an IP address to the
computer in your network in the same subnet as the device.
1. Navigate to the network settings of your computer associated
with your network adapter.
2. Open the corresponding network properties dialog.
3. Enter a static IP address (e.g. 192.168.1.11) in the same
subnet (255.255.255.0) as the device.
4. Confirm the changes and close the network properties dialog.
5. To display the Web Remote interface page of the device,
enter its IP address (192.168.1.40) in the address bar of
your web browser.
d&b 40D Reference manual 1.3 en 27
 Loading...