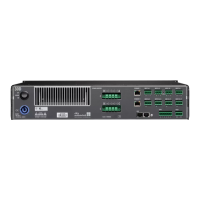
Web Remote interface
Edit dialog
To change the value of an input field such as Level, Delay time,
CPL, EQ settings or Speaker setup, proceed as follows:
1. Enter the desired value or select the respective item.
↳
For parameters such as «Speaker setup» or «Filter type» a
drop-down list is provided to allow easy and quick access
to the list items.
You can simply scroll through the list or type the
corresponding character directly into the input field.
2. Confirm your entry by clicking «OK».
↳
The entered value or selected list item will be applied and
the «Edit» dialog will be closed.
Note: However, please note that you have to finally confirm
your settings by clicking the respective «OK» button or input
field again (Edit cursor changes from yellow to white Þ Position
cursor).
Additional editing
Value +/
Value –
To change the value of an input field such as CPL,
Level, Delay time, EQ settings or Speaker setup
using the «Value +»
«Value –» buttons, proceed as follows:
1. Select the appropriate field and change the value using the
«Value +»/«Value –» buttons.
↳
Every mouse click will increment the «Value +»/«Value –»
by 0.5.
For example, to increase the level by 3 dB, simply click the
«Value +» button six times or simply hold the mouse button
until the amount of steps has been reached.
On the left, a blue counter box will appear showing the
number of steps.
2. When the desired value (steps) has been reached, stop
clicking or release the mouse button respectively.
↳
The counter box moves to the input field previously
selected.
3. As an alternative, values can also be adjusted using the wheel
mouse.
↳
Simply select the appropriate field and adjust the value
using the wheel. This is very useful when entering major
changes.
The counter field will also appear and behaves in the same
manner as described above.
4. To confirm the set value, click the relevant field again or click
the respective «OK» button.
5. To change/enter a device or Channel name as well as IP
settings, click the relevant screen item.
↳
An input mask will be displayed which allows you to enter
the desired data by clicking the respective characters
and/or numbers.
6. Confirm your entry by clicking the corresponding «OK» button.
d&b D40 Reference manual 1.5 en 57
 Loading...