Pocket
SCSI/Link
Quick
Start
This
card
outlines the basic installation
steps
for DaynaPORT
Pocket
SCSI/Link external adapters. Installation typically
should
take
less
than
five minutes.
1.
Make sure the Macintosh
is
turned
off. Set
the
SCSI/ID switch
on
the
Pocket SCSI/Link.
Connect
Pocket SCSI/Link to
your
Macintosh
SCSI
bus
and
your
network
cable system.
Connect
the
ADB
power
cord
or
AC
adapter
and
plug
it
in
to
turn
on
Pocket SCSI/Link.
Turn
on
the
Macintosh.
2.
Insert the DaynaPORT Installer disk in
your
Macintosh
floppy disk drive. Double-click
the
Installer icon
and
click
the
INSTALL
button. TIle Installer will
copy
the DaynaPORT
driver
and
AppleTalk into
your
System.
When
it's
done,
restart
your
Macintosh.
3.
Open
the Network control
panel
and
select the EtherTalk
Alternative icon
and
a default zone. (Refer to
the
section
Choosing
the
Software
Connection
in
Chapter 2 for
instructions.)
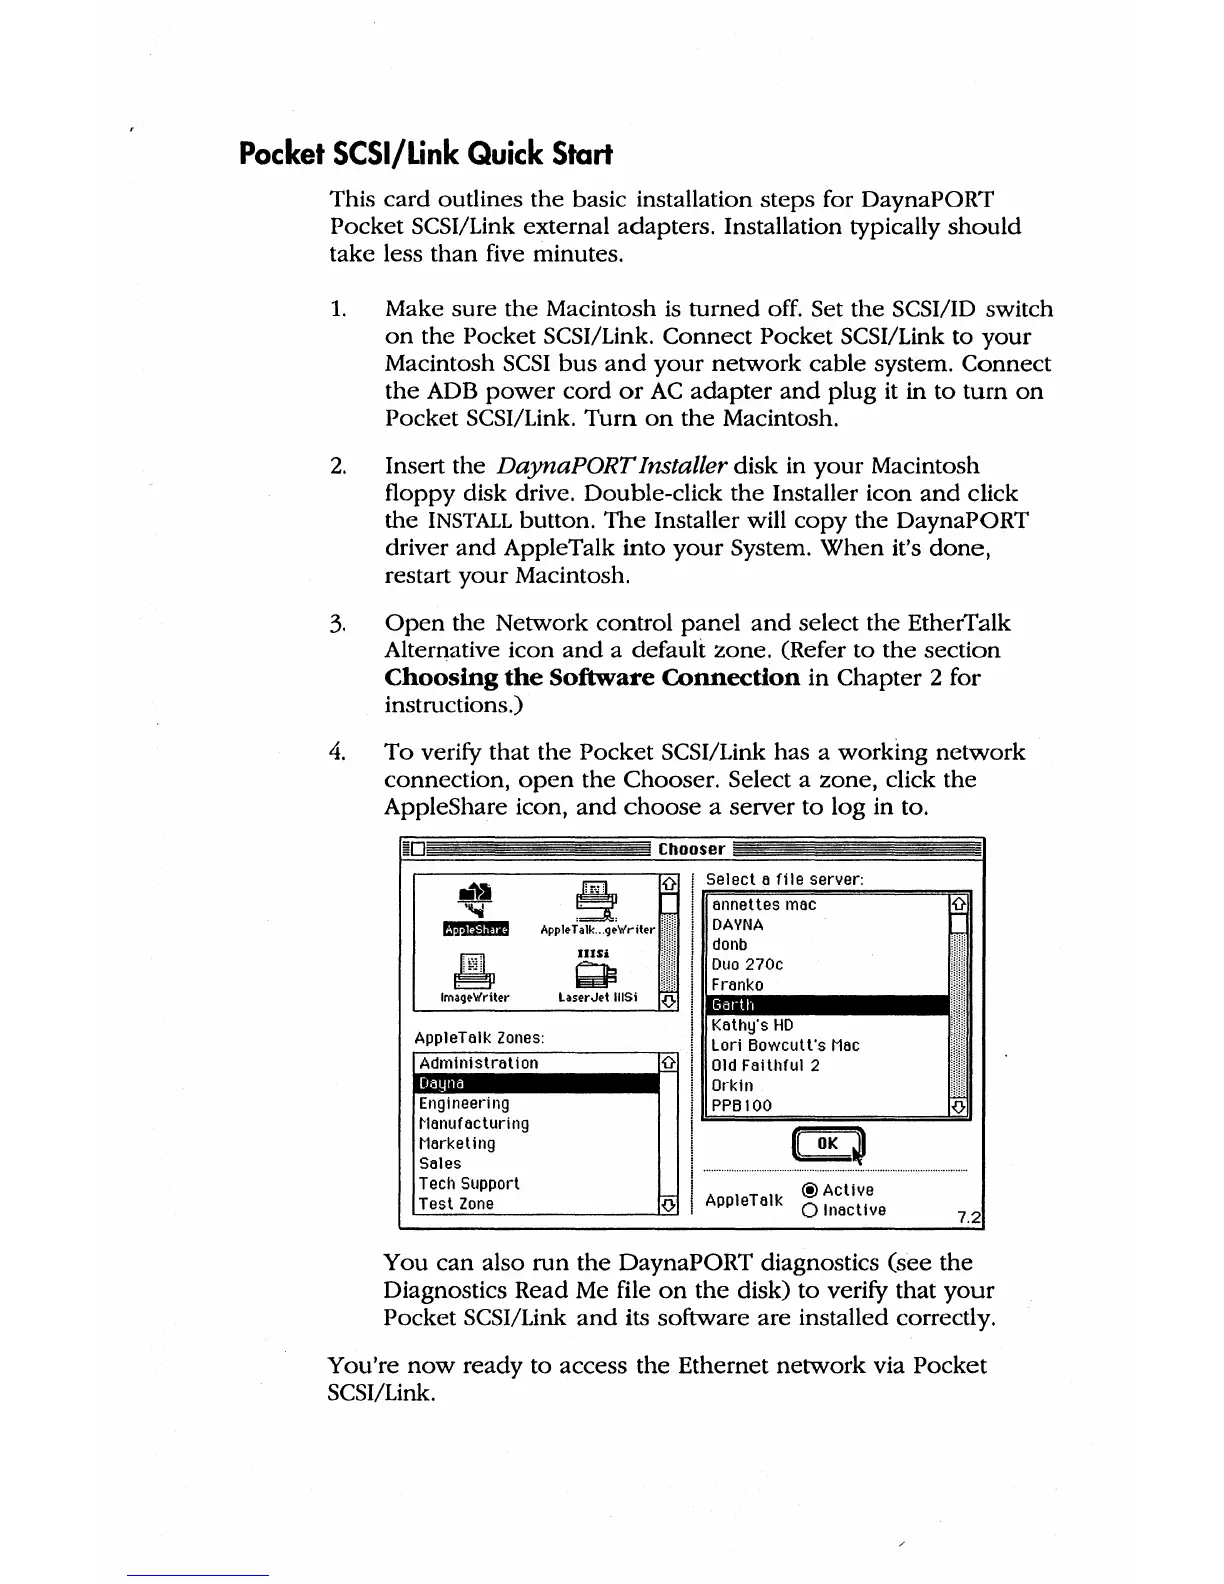
4.
To
verify that
the
Pocket
SCSI/Link has a
working
network
connection,
open
the
Chooser. Select a zone, click the
AppleShare icon,
and
choose
a server
to
log
in to.
Chooser
APP1'T~:wri(";
;
Si~~~~!:::~ea;erver:
1.~~~D~:I~i~°ll!cl!!I
••••••
11
~
IIISi
~
Image-Writer
LaserJet UlSi
{}
AppleTalk
Zones:
Kathy's
HD
Lori
Bowcult·s
Mac
Administration
{}
Old
Faithful 2
Orkin
111111
Engineering
PPBIOO
~Ianufacturing
CD
Marketing
i
Sales
Tech
Support
I
@Actlve
Test
Zone
{)-
AppleTalk
o Inactive
7.2
You
can
also
run
the
DaynaPORT diagnostics (see
the
Diagnostics Read Me file
on
the
disk)
to
verify that
your
Pocket SCSI/Link
and
its software
are
installed correctly.
You're
now
ready to access
the
Ethernet
network
via
Pocket
SCSI/Link.
 Loading...