www.dbtechnologies.com info@dbtechnologies-aeb.com
ES1203 Rev 1.0 cod. 420120253Q
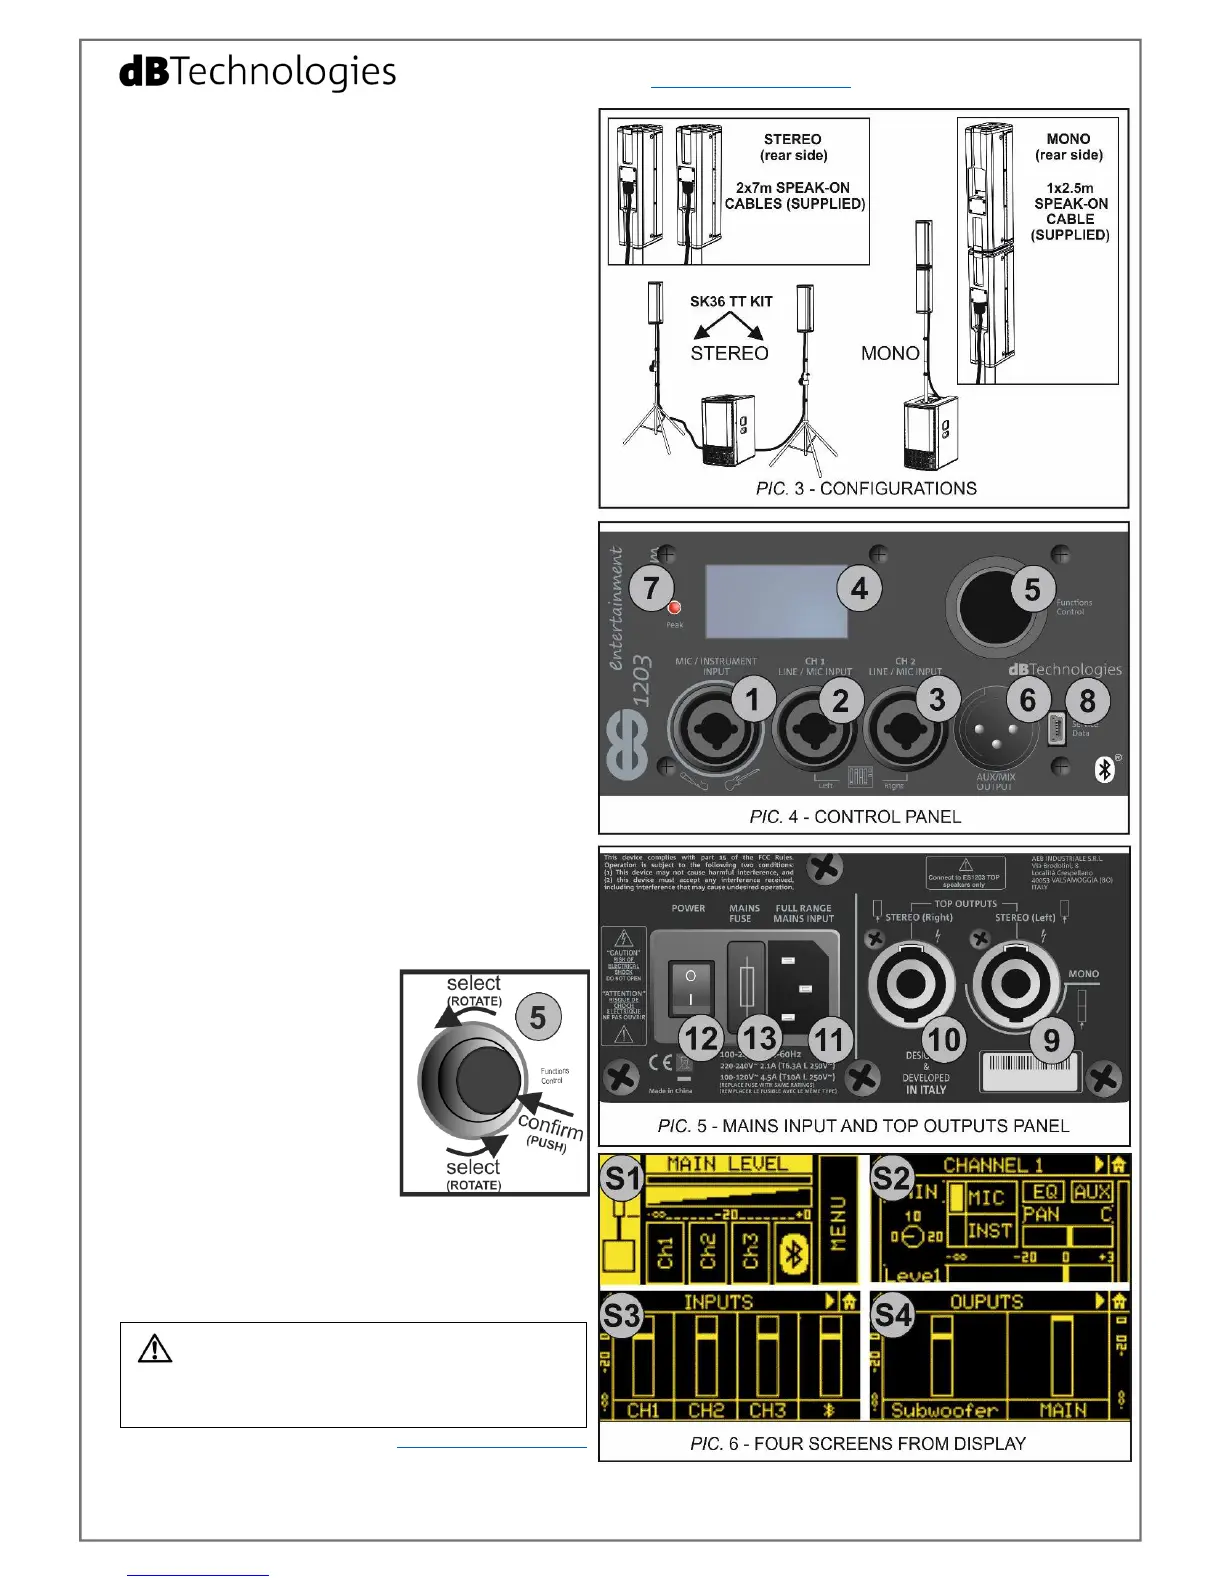
3) I/O and Control panel
In the rear side of ES1203SUB the user can find the
control panel of the system (pictures 4, 5):
1 - MIC/INSTRUMENT INPUT (XLR or TRS connector)
2 – CH1 LINE/MIC INPUT (XLR or TRS connector)
3 – CH2 LINE/MIC INPUT (XLR or TRS connector)
4 – OLED DISPLAY
5 – FUNCTIONS CONTROL
(push rotary encoder
rotate: select, push: confirm)
6 – AUX/MIX OUTPUT (XLR connector)
7 – Peak LED
8 – SERVICE DATA (USB B-TYPE for firmware update)
9 - MONO/STEREO LEFT TOP OUTPUT
10 – STEREO RIGHT TOP OUTPUT
11 – VDE MAINS INPUT (FULL RANGE)
12 – ON/OFF POWER SWITCH
13 – MAINS FUSE
4) ES1203TOPs cabling
MONO:
- Link the mono double-top (see paragraph no. 2) to
the MONO/STEREO LEFT TOP OUTPUT [9] using the
supplied 2.5 m (8.2 feet) speak-on cable. Only one
cable is needed, as shown in picture 3. Mount cable
clips to the pole to organize the cabling.
STEREO:
- Link the two ES1203TOPs to the MONO/STEREO LEFT
[9] and to the TOP OUTPUT STEREO (right) [10]
respectively, using the two supplied 7 m (23 feet)
speak-on cables, as shown in picture 3. Mount cable
clips to the poles to organize the cabling.
5) Setup, turn on and I/O settings
- Connect the desired inputs (with proper cables and
connectors), using [1], [2], [3] inputs, and, if necessary,
enable Bluetooth
®
transmission in your device (for
example .mp3 player).
- If needed, link the output [6] to the input of a second
system, with a proper cable (XLR connectors).
- Insert the VDE connector of the supplied mains cable
in MAINS INPUT [11], connect the plug to the power,
and turn on the POWER switch [12].
- When the system is turned
on, the OLED display [4] shows
the Main Level screen ([S1] in
picture 6). Adjust the main
level and enter every single
channel menu ([S2] in picture
6) for all the related settings,
rotating and pushing the
FUNCTIONS CONTROL [5]. If
necessary, enter Bluetooth
®
page to enable this function.
- Enter the main MENU for a complete set-up, or jump
to Mixer screens ([S3] and [S4]) by holding down the
FUNCTIONS CONTROL [5] for at least 3 seconds
(shortcut). In these pages you can control all the levels
of the system using a simple mixing console.
Check the complete user manual on www.dbtechnologies.com
for further information about the system and available
accessories.

 Loading...