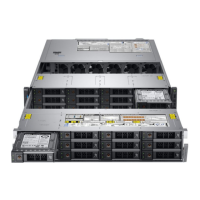
Table 8. Features available on the back view
Item Panels, ports and slots Icon Description
1 Full-height PCIe expansion
car
d slot (3)
N/A The PCIe expansion card slot (riser 1) connects up to three full-height
PCIe expansion cards to the system. For more information, see the
Expansion card installation guidelines
section.
2 Half-height PCIe expansion
card slot
N/A The PCIe expansion card slot (riser 2) connects one half-height PCIe
expansion cards to the system. For more information, see the
Expansion
car
d installation guidelines section.
3 Rear handle N/A
The rear handle can be removed to enable any external cabling of PCIe
cards that are installed in the PCIe expansion card slot 6.
4 Full-height PCIe expansion
card slot (2)
N/A The PCIe expansion card slot (riser 2) connects up to two full-height
PCIe expansion cards to the system. For more information, see the
Expansion card installation guidelines
section.
5 Full-height PCIe expansion
card slot (2)
N/A The PCIe expansion card slot (riser 3) connects up to two full-height
PCIe expansion cards to the system. For more information, see the
Expansion card installation guidelines
section.
6 Power supply unit (2) N/A For more information, see the
Technical specica
tions section.
7 NIC port
The NIC ports that are integrated on the network daughter card (NDC)
pr
ovide network connectivity. For more information about the supported
congurations, see the
Technical specica
tions section.
8 USB port (2)
The USB ports are 9-pin and 3.0-compliant. These ports enable you to
connec
t USB devices to the system.
9 VGA port
Enables you to connect a display deviceto the system. For more
in
formation, see the
Technical specica
tions section.
10 Serial port
Enables you to connect a serial device to the system. For more
in
formation, see the
Technical specica
tions section.
11 iDRAC9 dedicated port
Enables you to remotely access iDRAC. For more information, see the
iDRA
C User’s Guide at Dell.com/idracmanuals.
12 System identication button
Press the system ID button:
• To locate a particular system within a rack.
• To turn the system ID on or o
.
To reset iDRAC, press and hold the button for more than 15 seconds.
NOTE
: To reset iDRAC using system ID, ensure that the system
ID button is enabled in the iDRAC setup.
NOTE
: If the system stops responding during POST, press and
hold the system ID button (for more than ve seconds) to enter
the BIOS progress mode.
13 Drive slots (3.5 inch or 2.5
inch driv
es)
N/A Enable you to install drives that are supported on your system. For more
information about drives, see the
Technical specica
tions section.
PowerEdge R7425 system overview 17

 Loading...


