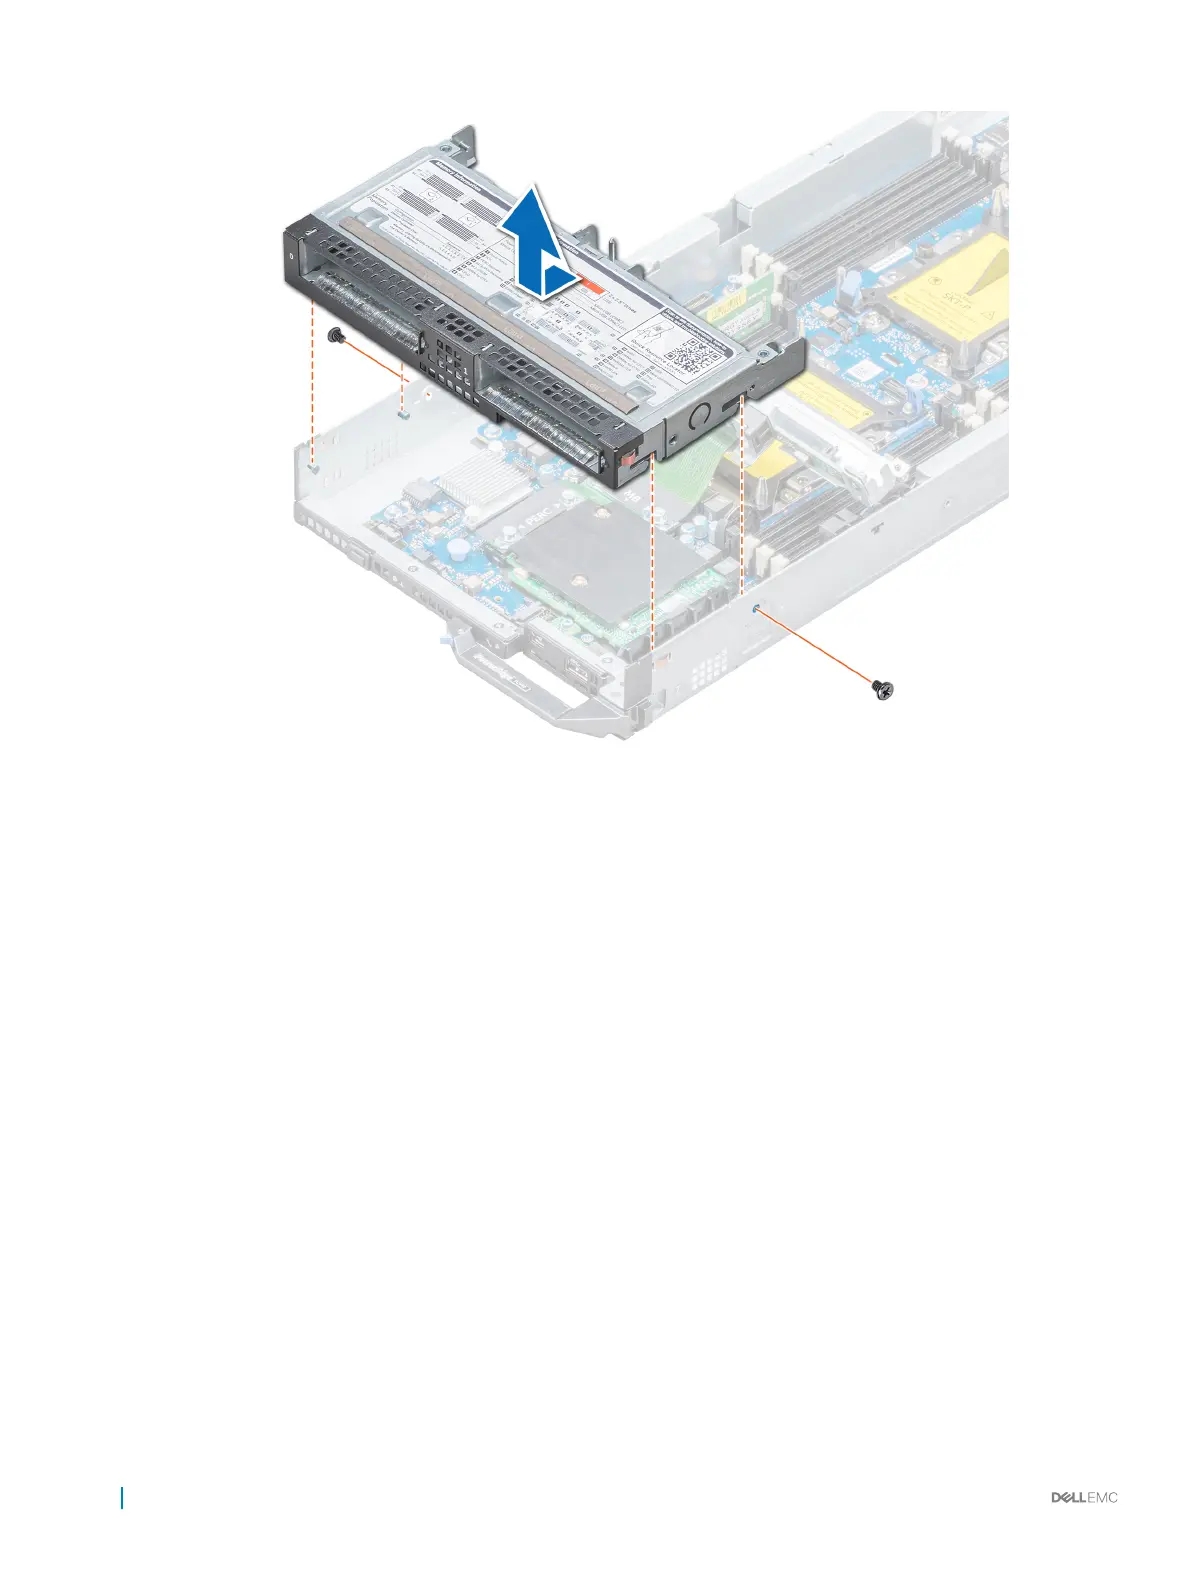
Figure 19. Removing the drive cage
Next step
Install the drive cage.
Related link
Removing the drive backplane
Removing a drive carrier
Installing the drive cage
Installing the drive cage
Prerequisite
Follow the safety guidelines listed in Safety instructions.
Steps
1 Align the slots on the sides of the drive cage with the standos on the system.
2 Lower the drive cage into the system until the slots on the drive cage engage with the standos on the system.
3 Slide the drive cage into the system to the lock position.
4 Using the Phillips #1 screwdriver, replace the screws to secure the drive cage to the system.
62
Installing and removing system components

 Loading...


