82 Installing System Components
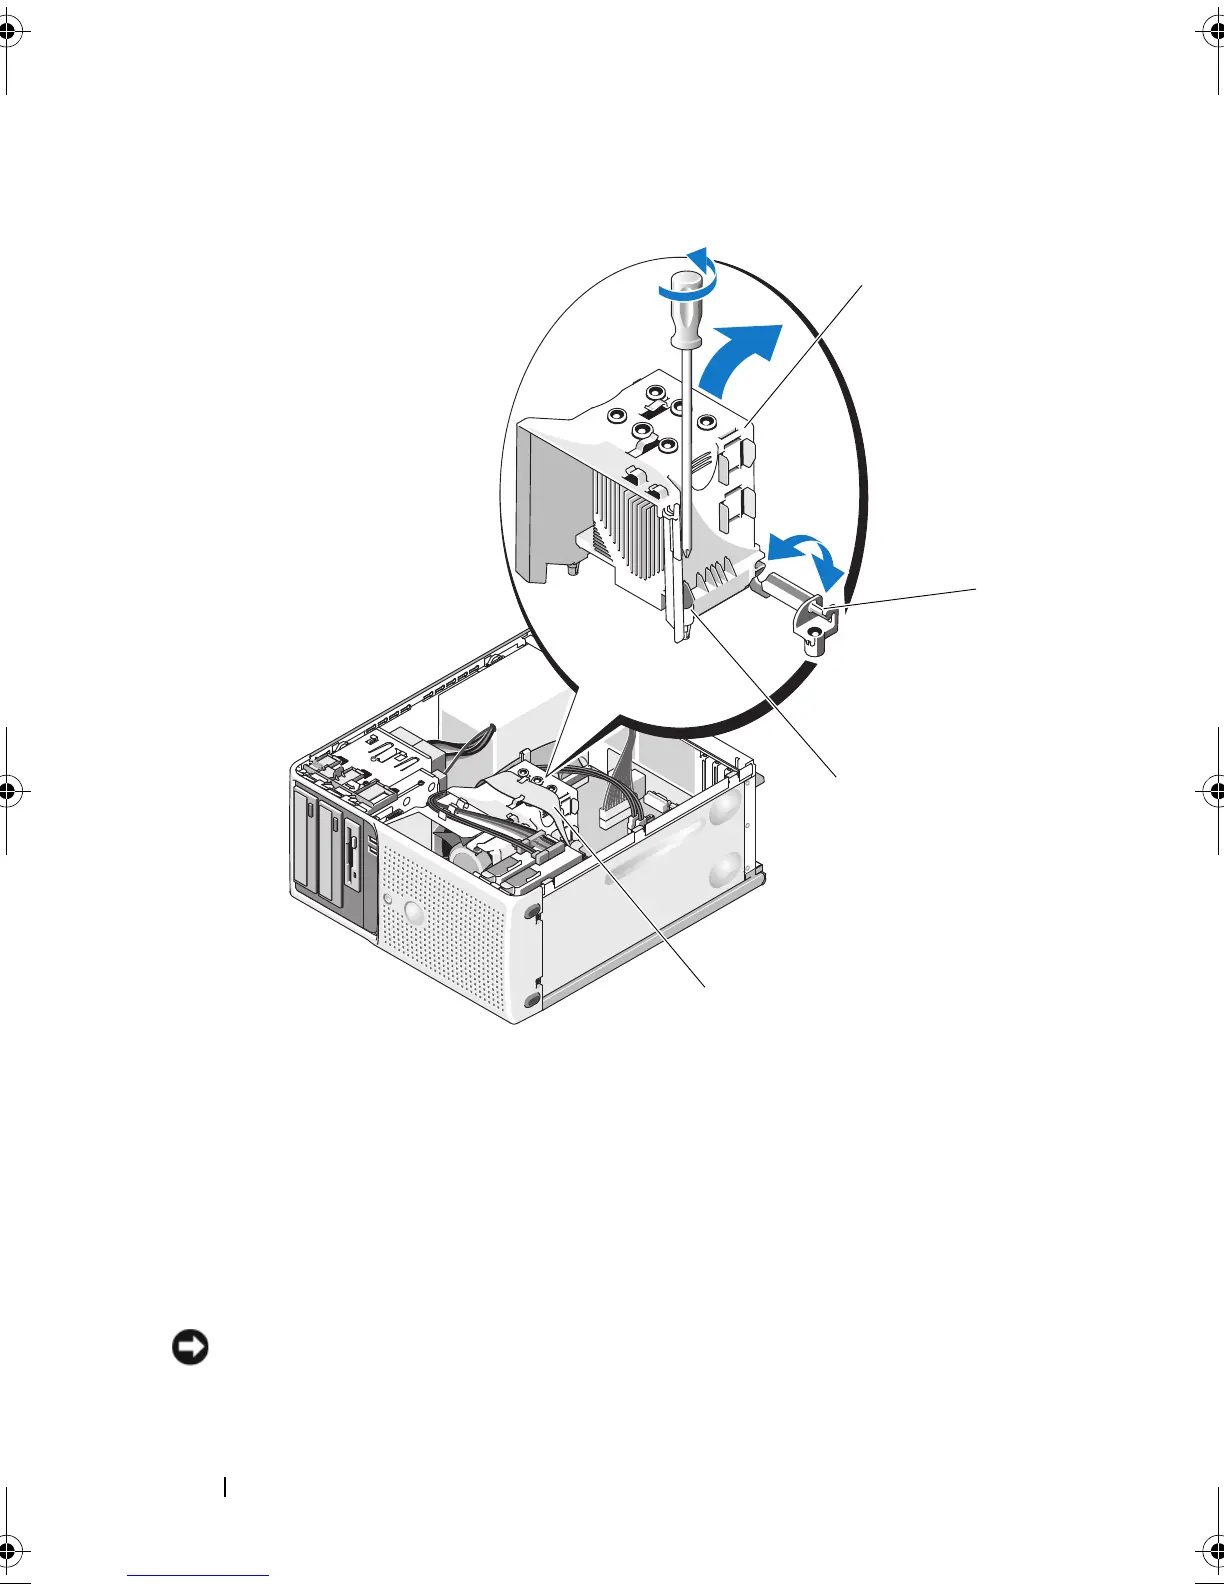
Figure 3-21. Installing and Removing the Heat Sink
6
Release the socket-release lever before opening the processor shield. See
Figure 3-22.
7
Rotate the processor shield upward and out of the way.
8
Lift the processor out of the socket and leave the release lever up so that
the socket is ready for the new processor.
NOTICE: Be careful not to bend any of the pins on the ZIF socket when removing
the processor. Bending the pins can permanently damage the system board.
1 heat sink and shroud assembly 2 pivot bracket
3 captive screws (2) 4 diskette cable
book.book Page 82 Wednesday, June 24, 2009 8:21 AM

 Loading...