Allow some time (around 30 seconds) for the heat sink to loosen from the processor.
2. Loosen the screw that is diagonally opposite the screw you first removed.
3. Repeat the procedure for the remaining two screws.
4. Lift the heat sink away from the system.
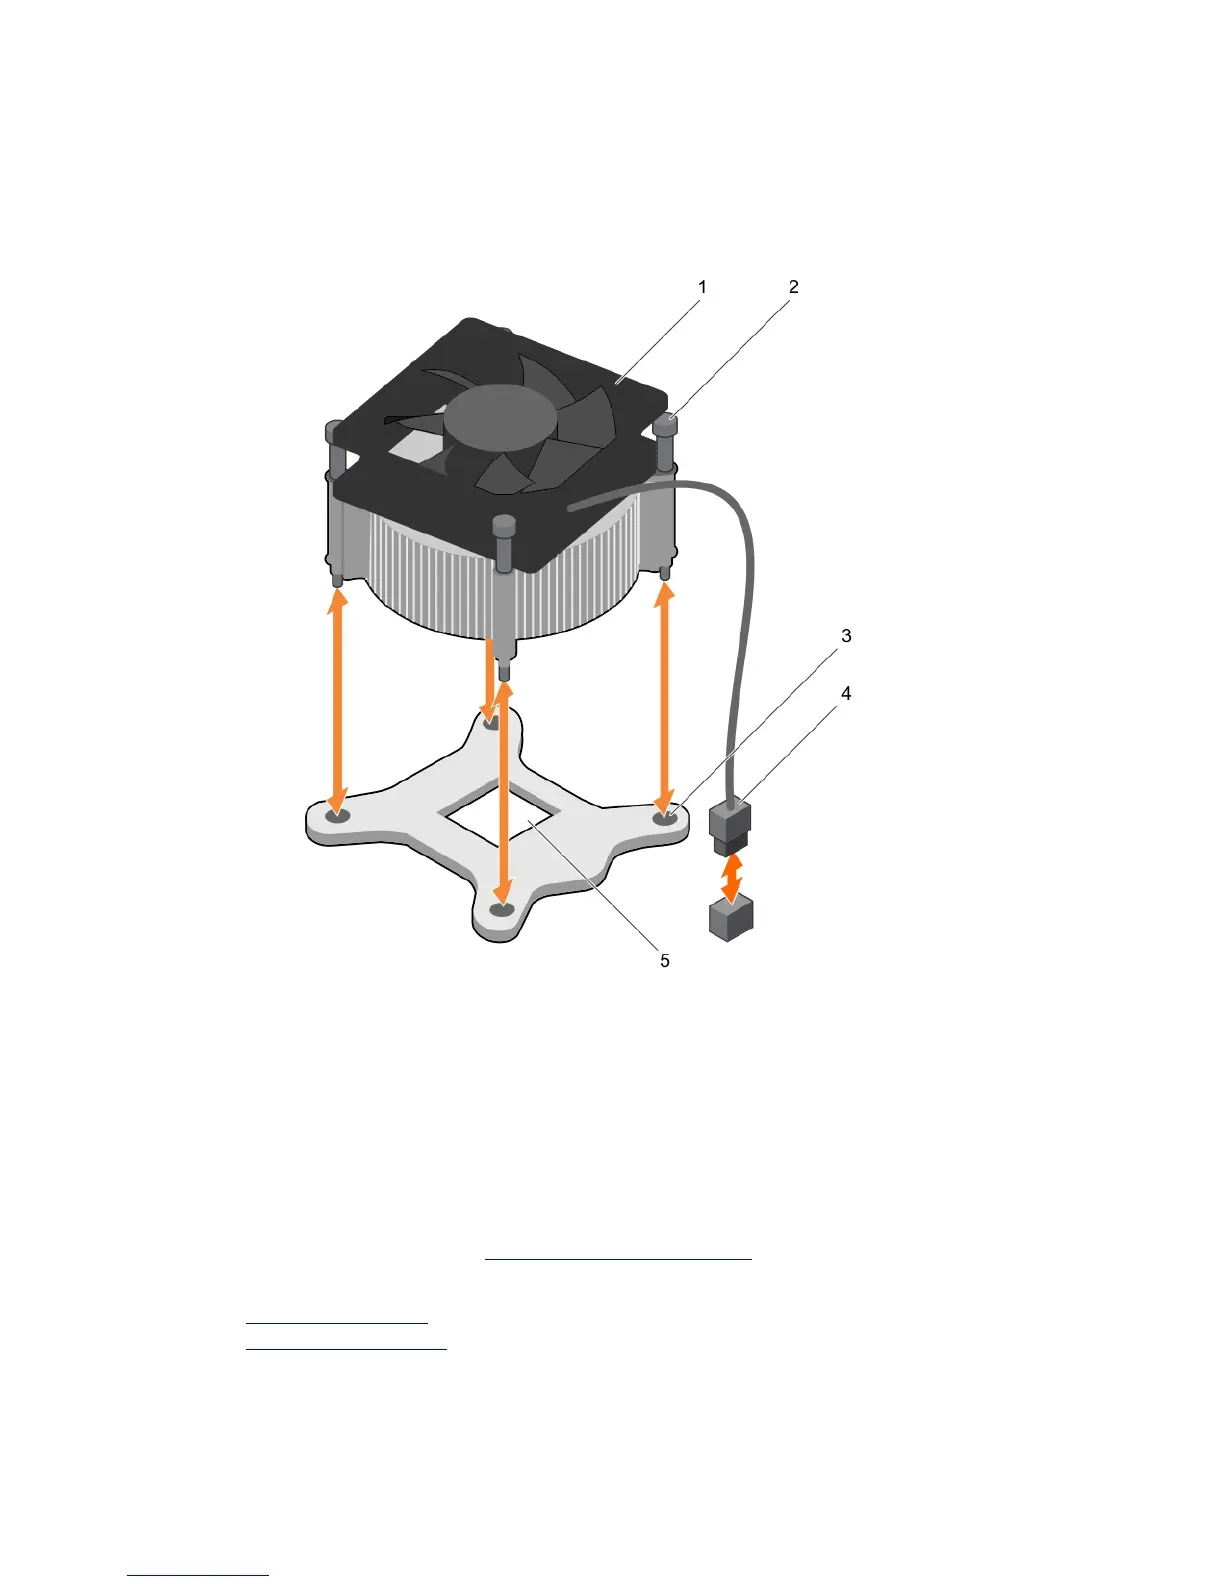
Figure 27. Removing and installing a heat sink
1. heat sink 2. captive screw (4)
3. slot (4) 4. heat sink cooling fan power cable
connector
5. processor socket
Next steps
1. If you are removing only a faulty heat sink, install the replacement heat sink, if not, remove the
processor.
2. Follow the procedure listed in After working inside your system.
Related Tasks
Installing the heat sink
Removing the processor
78

 Loading...