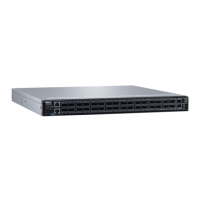
Port connectivity
Dell recommends you distribute port groups across all four port pipes.
The Z9100-ON switch has four port pipes, also known as packet processing pipelines. For the best buer resource usage, distribute the
functional port groups, such as downlinks, uplinks, interchassis links, LAGs, and ECMP, across all four port pipes—0, 1, 2, and 3. If that is
not possible, distribute the port groups across port pipes 0 and 2 or port pipes 1 and 3. For example, create a two-port LAG using port 21
from port pipe 0 and port 5 from port pipe 2, as shown.
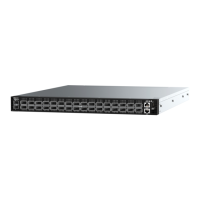
Table 6. Port and port pipe distribution
Ports Port pipe
21–24 and 29–32 0—red
1–4, 9–12, and 33 1—orange
5–8, 13–16, and 34 2—green
17–20 and 25–28 3—blue
The connectivity between the front panel ports and the port pipes is shown.
Figure 15. Port pipes
Power up the system
Supply power to the Z9100–ON after it is mounted in a rack or cabinet.
Dell recommends re-inspecting your system before powering it up. Verify the following:
• The equipment is properly secured to the rack and properly grounded, recommended.
• The equipment rack is properly mounted and grounded, recommended.
• The ambient temperature around the unit, which may be higher than the room temperature, is within the limits specied for the Z9100–
ON. For more information, see Specications.
• There is sucient airow around the unit.
• The input circuits are correctly sized for the loads and that you use sucient overcurrent protection devices.
• All protective covers are in place.
NOTE
: A US AC or DC power cable is included for powering up an AC or DC power supply. You must order all other power cables
separately.
NOTE: ESD damage can occur if components are mishandled. Always wear an ESD-preventive wrist or heel ground strap when
handling the Z9100–ON system and its components.
26 Z9100–ON installation
 Loading...