ELECTRICAL CONNECTION
- Before inserting the plug in an electrical outlet, check carefully to be certain that the voltage in your
home’s electrical system matches the voltage indicated on the appliance and that the socket and
main feed are of a size sufficient to power this appliance.
- This appliance complies with EEC Directive 89/336 regarding electromagnetic compatibility.
ASSEMBLING THE FEET
- Fit the feet ti the appliance as follows:
- Fasten the feet in position using the screws supplied (see fig. 1).
OPERATION AND USE
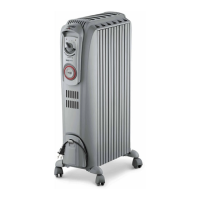
Turning the appliance on
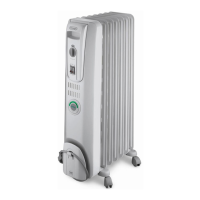
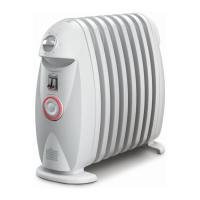
Models with only a thermostat
This appliance can be turned on by rotating its thermostat knob clockwise (C) until it stops at the last
possible setting. To turn this appliance off, rotate the knob to its lowest position and remove its plug
from the electrical outlet.
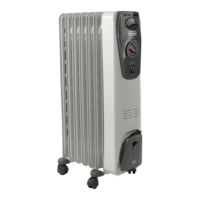
Models with a thermostat and two switches
Turn the thermostat knob clockwise (C) until it reaches its last possible setting, then press one switch (mini-
mum power) or both switches (D) (maximum power) so the red area becomes visible (fig.2).
Adjusting the thermostat
When the room has reached the desired temperature, turn the thermostat knob slowly in an anti-
clockwise direction until you get to the setting — and not beyond it — where you hear a click. The
thermostat will then adjust that set temperature automatically and keep it constant.
If your appliance is the type with 2 switches, you could utilize only one of them during mild seasons
and on days not particularly cold. You will thus use little electrical power and obtain even greater
savings in energy consumption.
Anti-freeze function (only for models with a thermostat)
Turn the switch (or switches) to make the red area show, then turn the thermostat knob to the
" " setting. When so regulated, this appliance will keep a room at a temperature of 5° C. while
consuming a minimum of energy.
WALL-MOUNTING
IMPORTANT: before drilling the wall, make sure the area is free of electrical wires or pipes. To fix
your convector heater to the wall, use the brackets “A” provided and appropriate two screws and
two anchors (provided).
Proceed as follows:
• Fix the brackets “A”, making sure the distances are as shown in fig. 2.
• Hang the heater on the two brackets fixed to the wall. Insert the bracket “B” (provided with
appliance) in the back of the convector base as shown in fig. 4.
Mark the bracket fixing points on the wall. (When mounted, block the base of the heater in a fixed
position to prevent it being removed).
• Remove the heater, drill the wall and insert the anchors.
• Fix the heater again, inserting the bracket “B” into the base of the heater and fixing it to the hole
in the wall using the screw (screws and anchor provided).
Now your heater is mounted on the wall.
The appliance must not be positioned directly underneath a fixed power point.
Position the appliance in such a way that the plug is easily accessible even after installation.
3